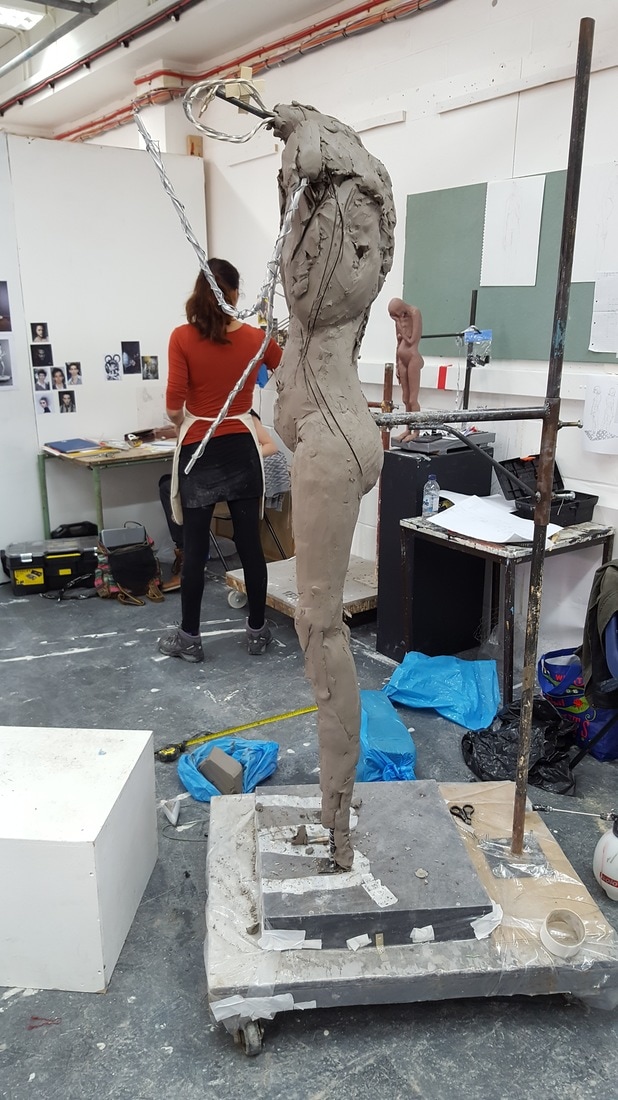
Once the armature was completed and secured into place on the base, I could then start to apply clay to the model. At first I began by applying very large handfuls of clay to the torso, and to ensure that it was secured to the chicken wire I began to hit it with a mallet. This is important because if the clay is not secure and well embedded in the chicken wire armature there would be a chance that when more clay was added later in the project the clay might slip. At first I made sure to keep below the measurements, this is so that I wasn't applying too much on at once. I started to develop a general shape of the ribcage and the hip bone by using the measurements from my maquette as a guide. once the basic shape was achieved I then continued to discern where measurement points in the anatomy of the figure (e.g. tragus, iliac, bellybutton, greater trochanter). by pinpointing where these were on my figure I could then begin to build up towards the bone mass. This however would still be thinner than the final piece because I would eventually develop muscles and skin on top.
|
|
once I had enough clay on I began to work out the general positioning of the figure on the armature. By smoothing out the basic shape I had now created I could step back and decide on how the spine and the belly worked in relation to one another. This was also the time where I began to plot the centre point of the spine and by drawing straight onto the clay I began to determine height and proportions of the figure and where everything was relative to each body part. I began to build up the spine to create the curve in the lower back that was an important aspect of the design.
|
|
|
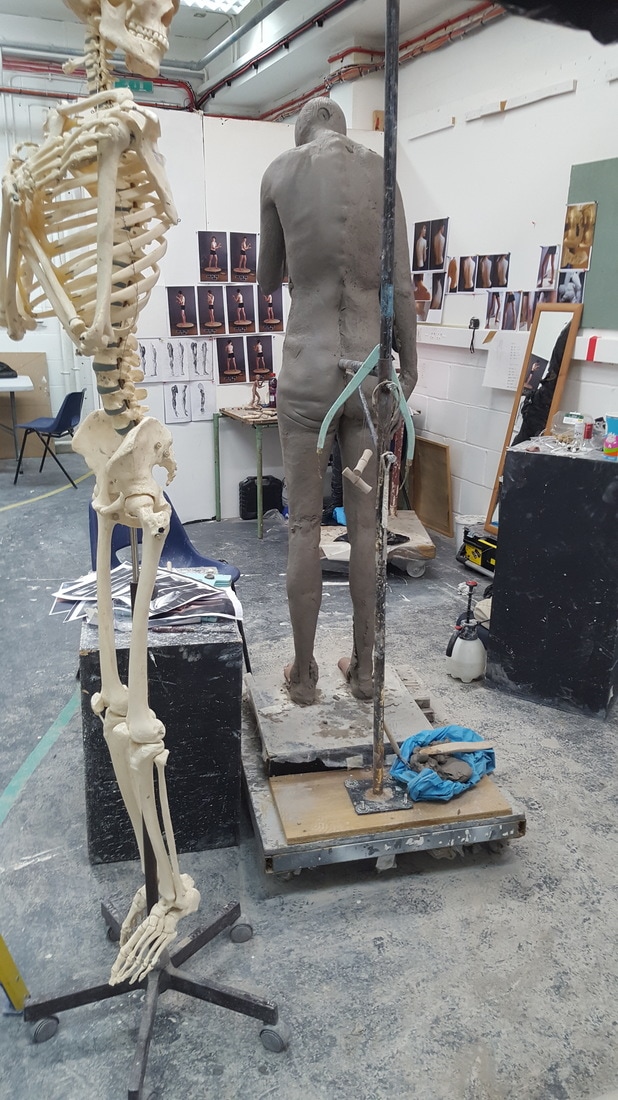
Here I continued to build the curve of the spine by adding clay to the highpoints. Since I am building up the clay using measurements of the bone structure, it will give me the correct dimensions then to add muscle on top. I use the bones that protrude from the muscle as my measuring points. Once I am happy with the side profile of the back, I can then build up the belly and chest. At this stage It is important to keep in mind the width, height and depth of the figure, almost to think of it as a cube at first. once the highpoints are located, the fleshier areas can then be added to make up the voids. I begin to locate the leg points such as the hip, knee and ankle, being careful again at this stage to keep them thinner than what they will end up being. I use a life size replica of the human skeleton as reference to make Shure that the ribcage shape and the hips are where they need to be and that the body is symmetrical. I also plot in where the head will be, by measuring from the chin to the suprasternal notch. the head will be a key reference point to plot height.
|
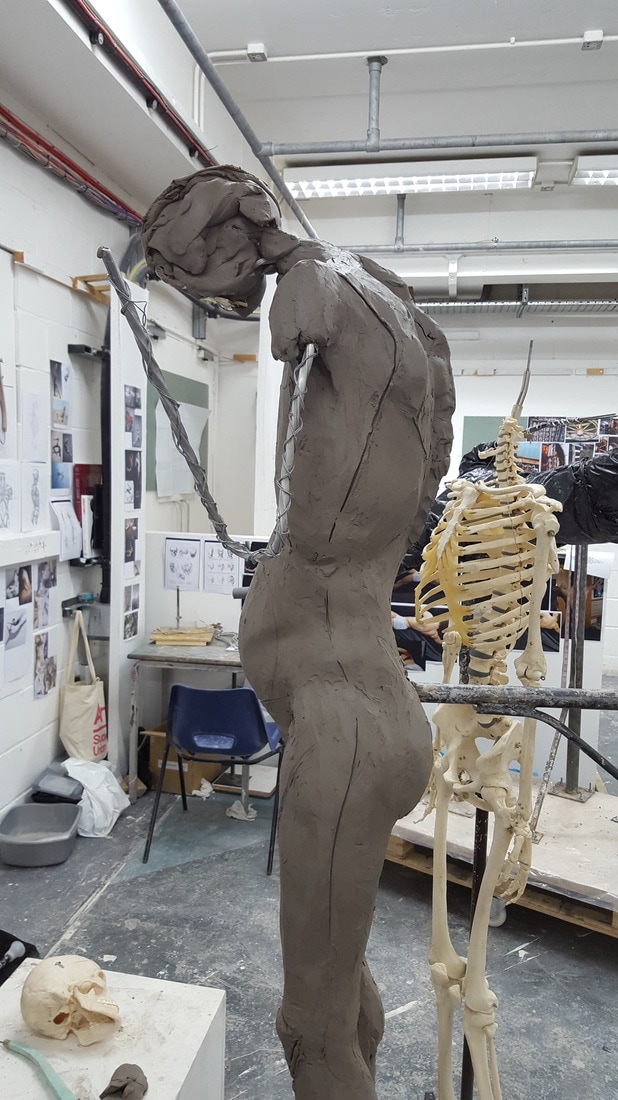
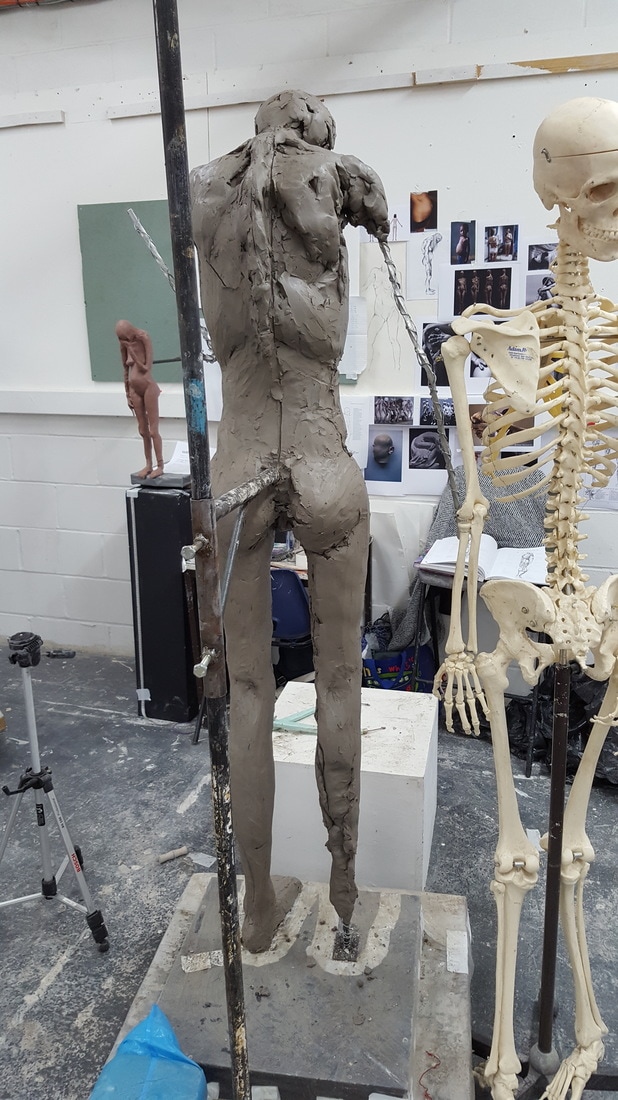
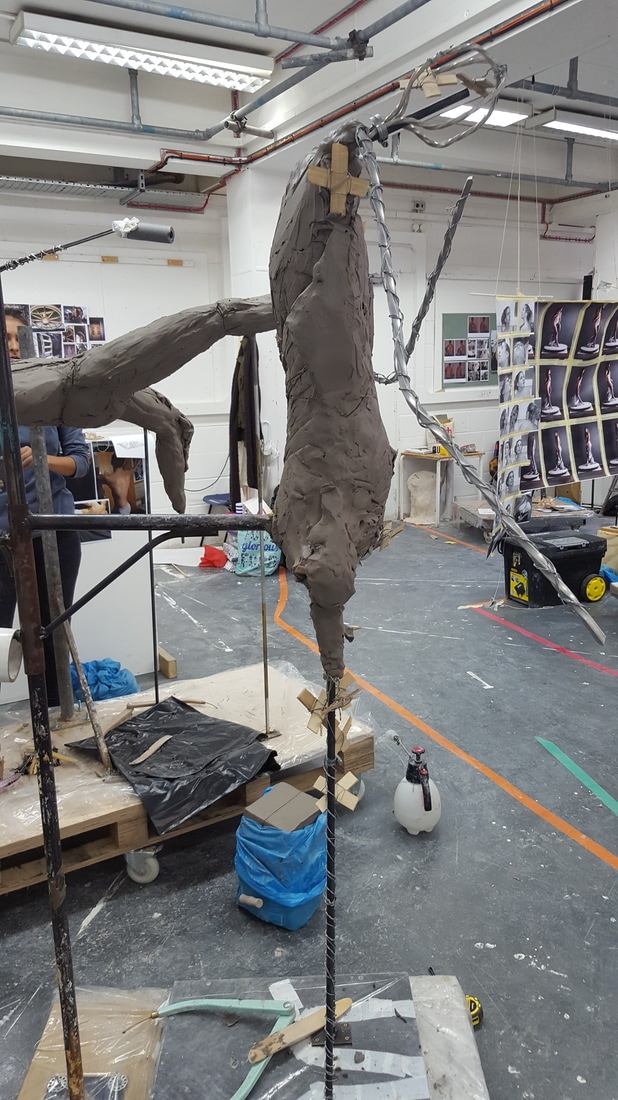
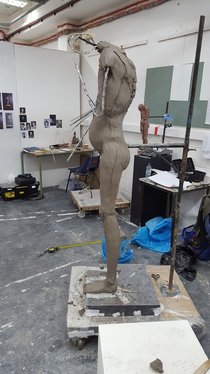
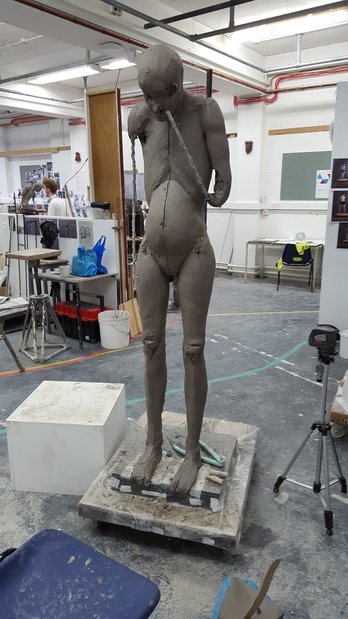
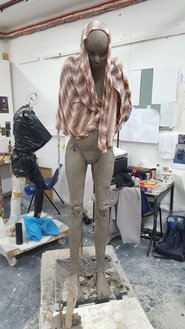
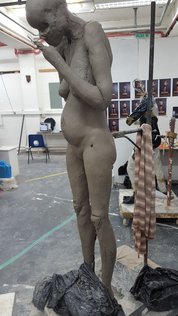
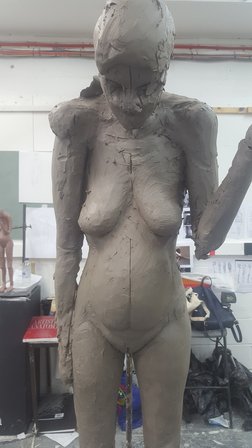
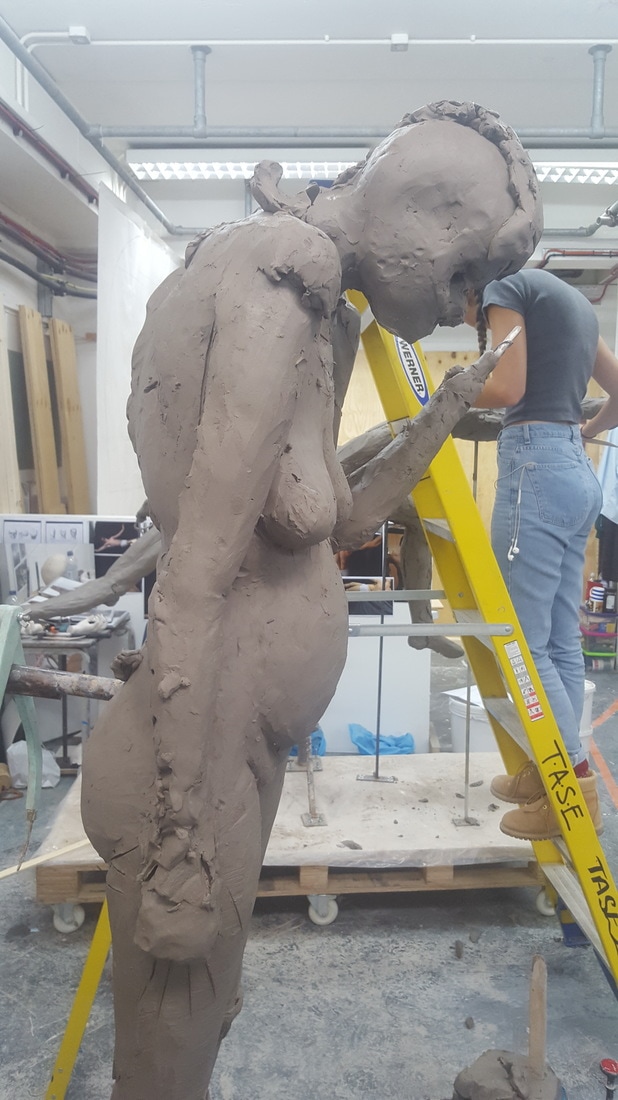
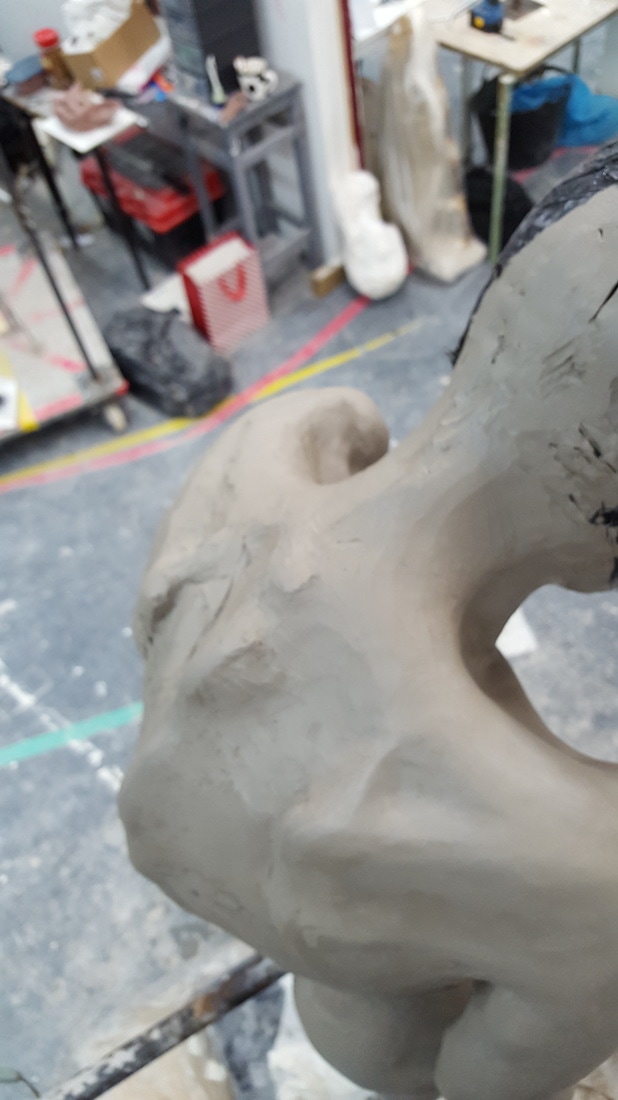
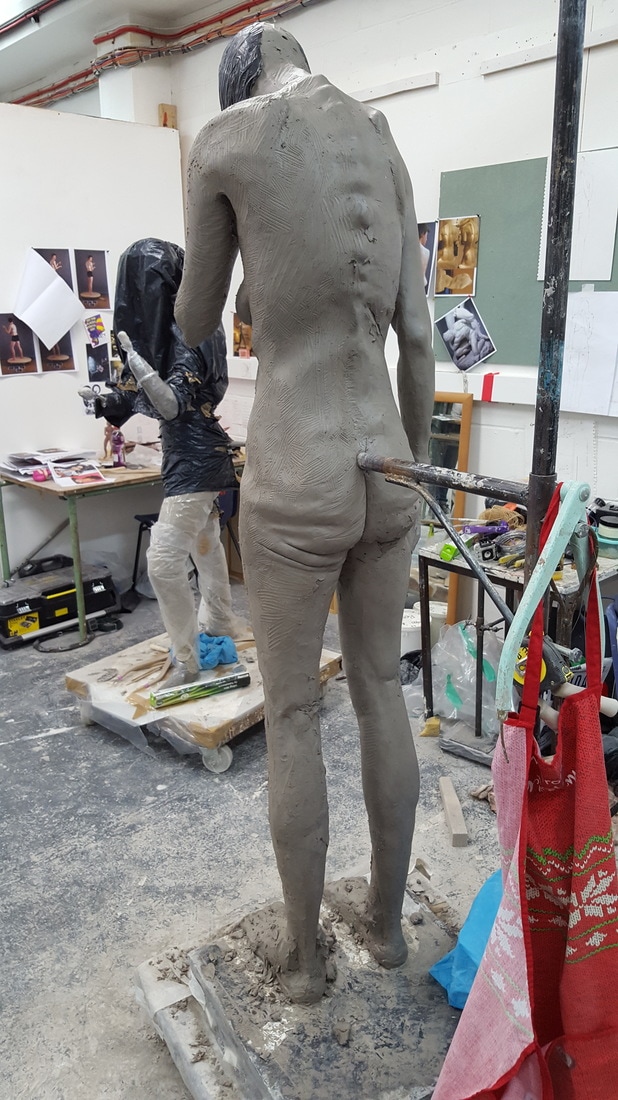
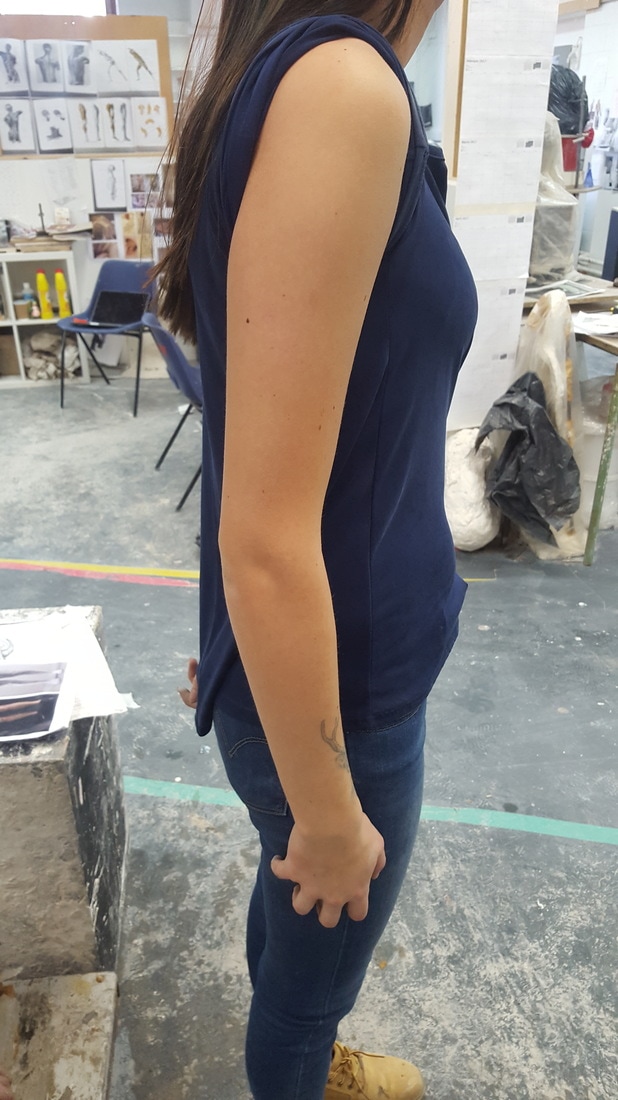
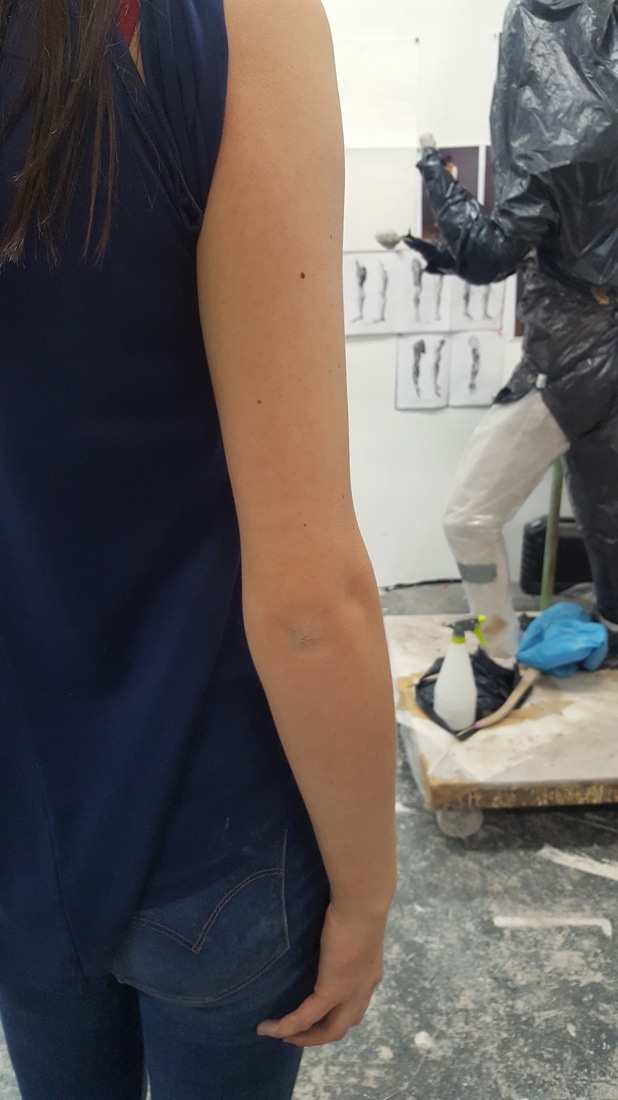
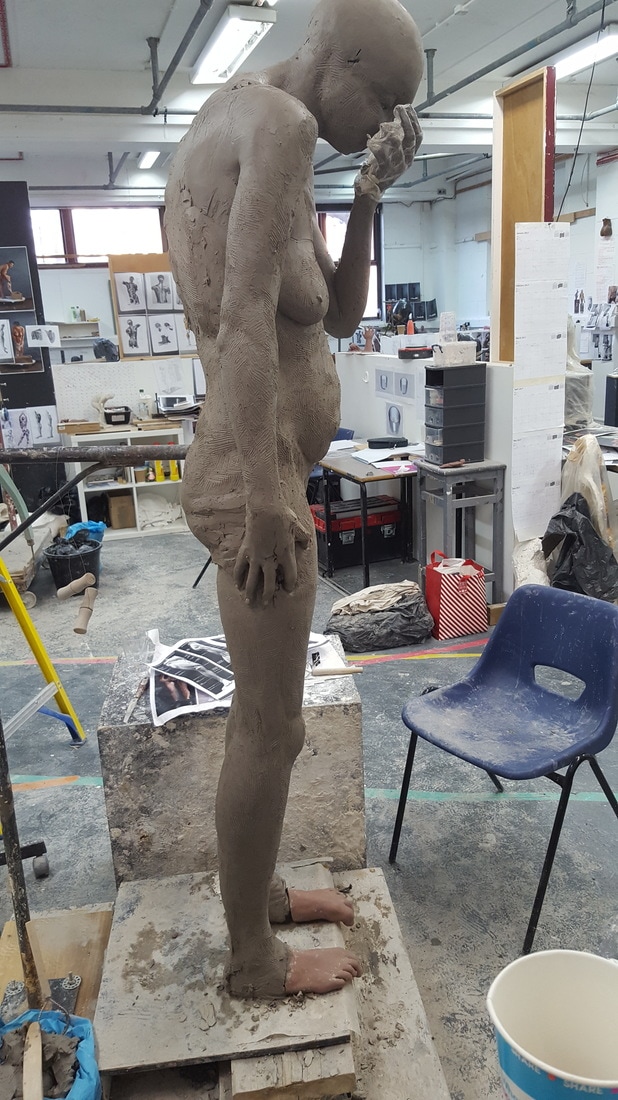
When I'm happy with the positioning of the figure I continue to then add more highpoint bones such as the shoulder blades. I am careful to measure correctly the width between the shoulders as the figure is not standing straight, her shoulders are drawn in tight to the body. The width of the shoulders will eventually determine how wide the lower body will be. I continue to add the arms and work further to develop the shape and size of the skull. the shape of the hips can then be shaped to size once the shoulders are the correct proportions. I locate and draw on the knee, this allows me then to create simple muscle shapes on the upper and lower leg. The feet at this point are basic shapes, to give me reference of proportion. At this stage I am continually using my callipers to measure each aspect of the sculpt. I use myself as a point of measurement reference. The buttocks and the stomach can now be built up to match the highpoints of the bone structure I have created. I keep the sculpt quite smooth as I prefer to work on a smooth surface to get an accurate reading of measurement. At this point I am happy with the sculptures progress, I can see that the sculpt needs more building up as she if far to thin, but I can see the general shape of her posture and size and can decide where needs more and where im happy with the proportions.

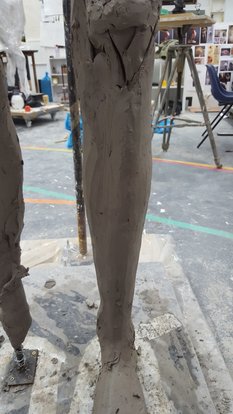
The leg bones in the knee are determined firstly, by measuring from the floor to knee, and the knee to the iliac. To plot the bone I simply draw a triangle where the knee will eventually be located. once the knee is plotted I can then continue to plot how far the genital bone comes down. This will determine how long the torso will be. I plot the ankle bone simply and also by using my anatomy textbooks I draw harsh lines where the muscles will eventually wrap around the bone structure I am developing.
|
|
|
|
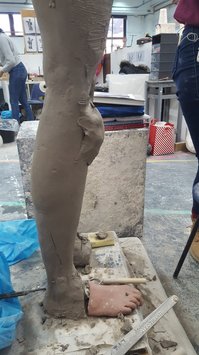
This photo shows the drawings I used throughout the sculpting process, by drawing onto the clay the centre point and where the major measuring points of the bone structure are I can maintain a cohesive piece that is based upon real human anatomy. it is important at this stage to keep taking a step back and looking from far away to see how the sculpt is progressing and if it is beginning to look similar to a human form. The sculpt at this point is still too thin, but I would rather work onto it rather than take chunks off later in the process.
|
|
|
|
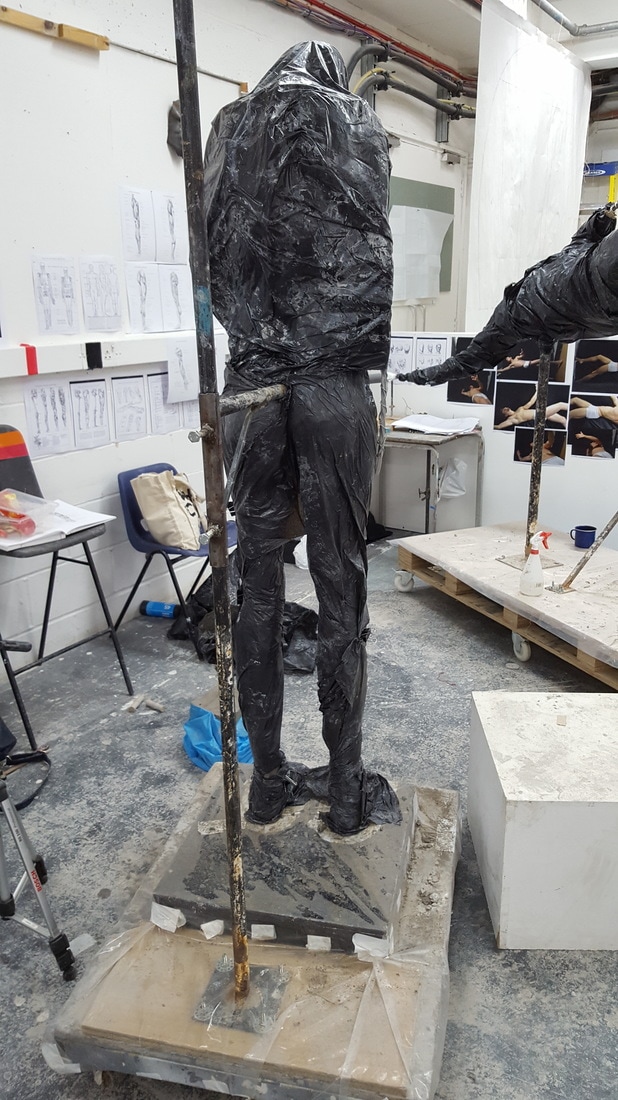
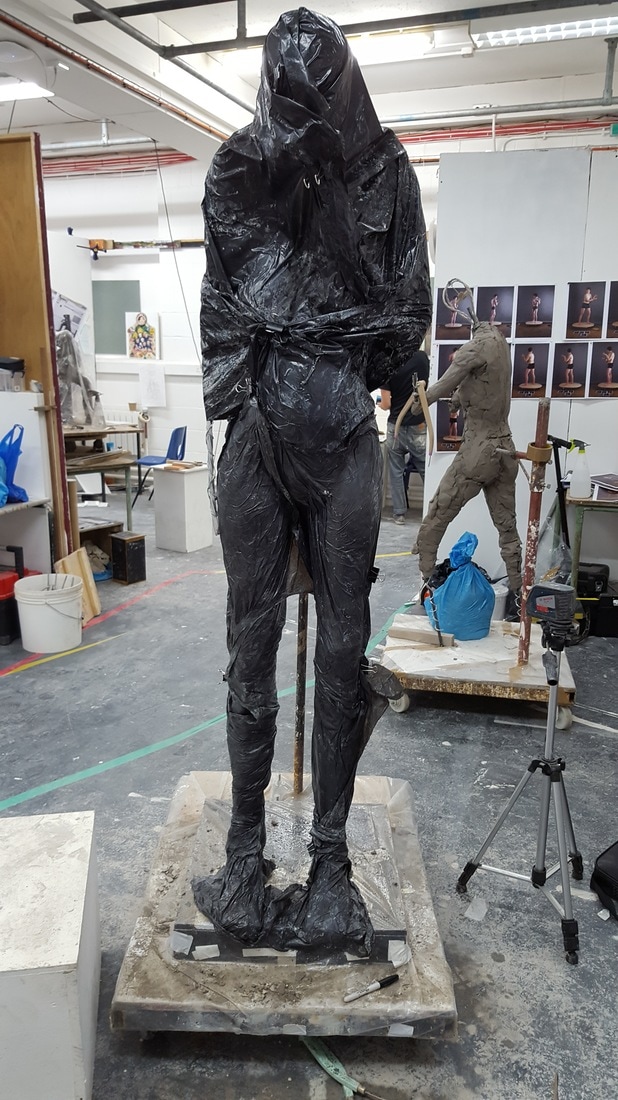
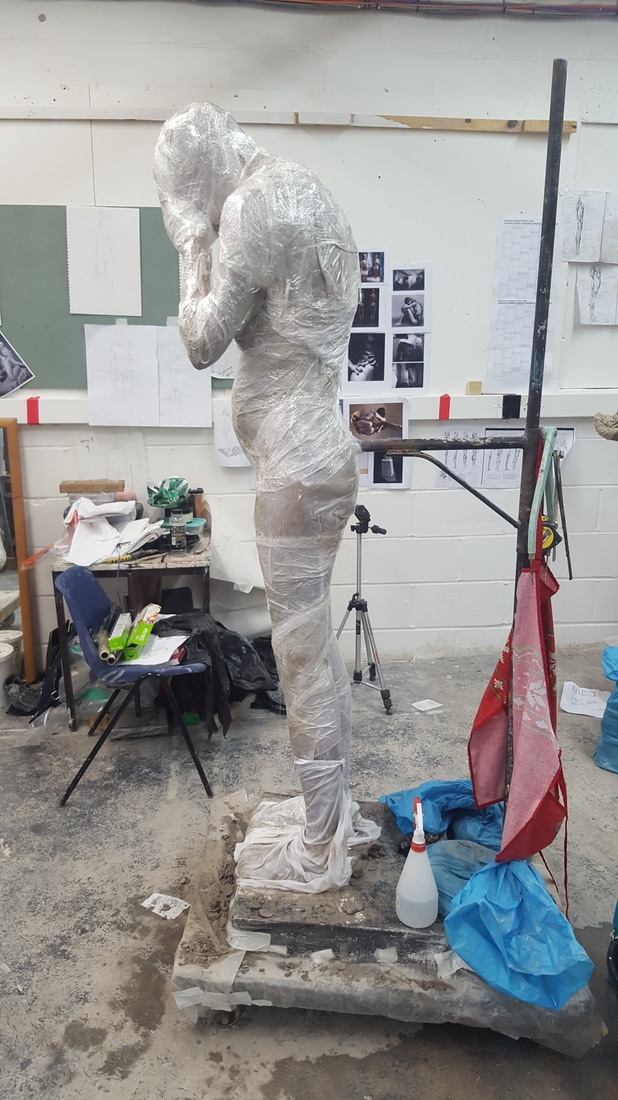
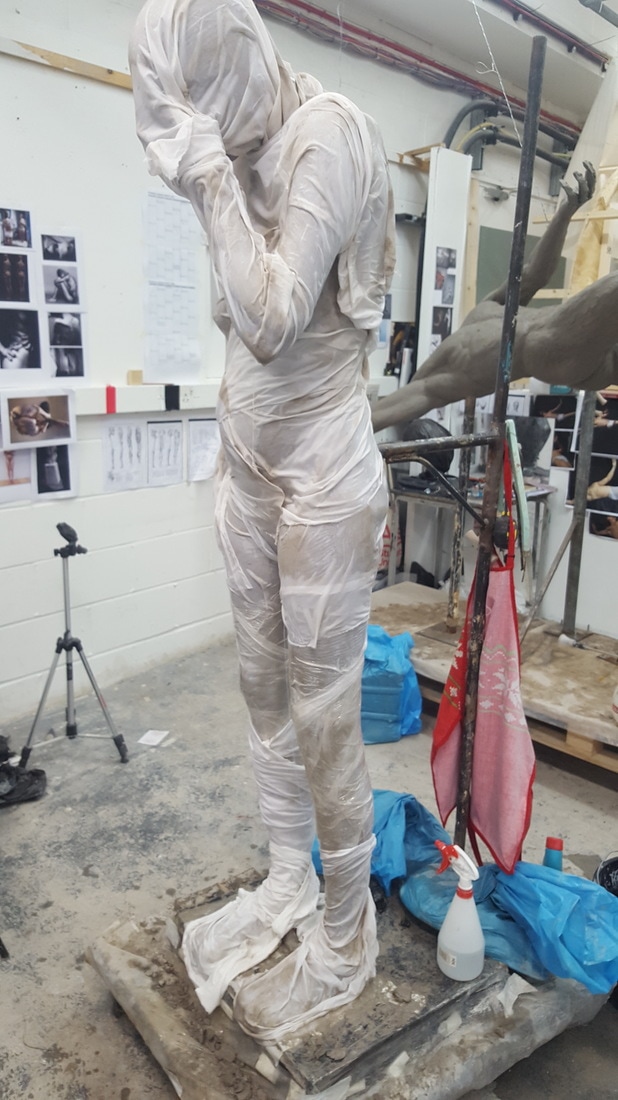
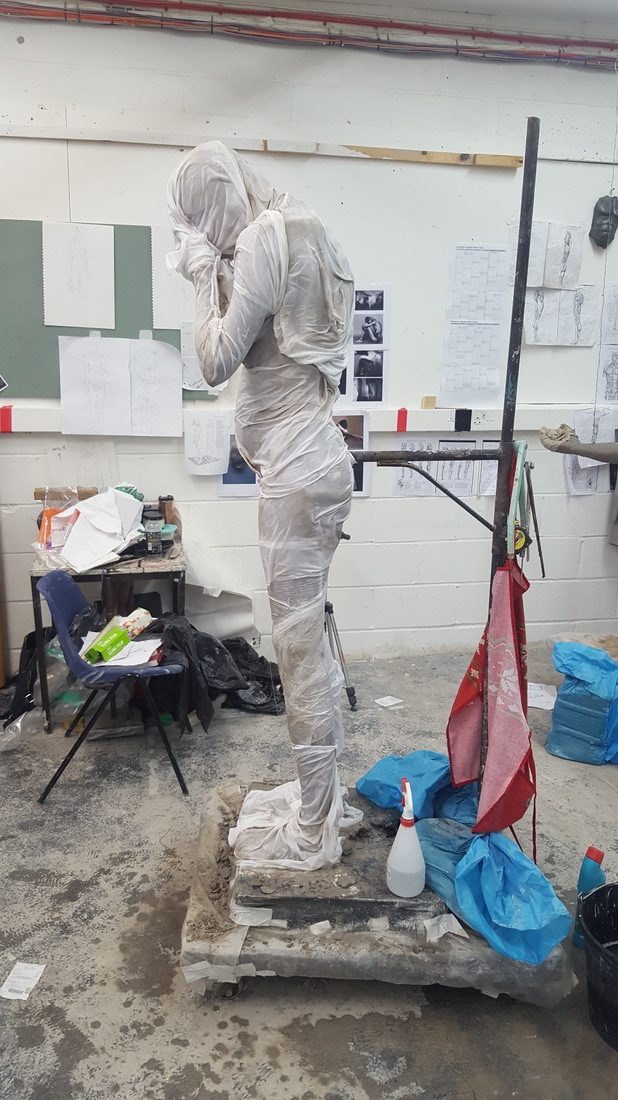
While working on the clay sculpt, in order to keep it wet enough to work with, I sprayed it down at least 3 times a day, with a garden sprayer. Along with spraying it I covered the whole sculpt at night with a wetted cloth (bed sheet) and covered the bed sheet with a layer of black bin bags. The bin bags were kept in place by using paper bull clips, we were given this little trick by our sculpting tutor as a handy re usable way of attaching the bin bags compared to using tape. By reducing the air getting onto the clay I could maintain a clay wet enough to use. It was also important to use BLACK bin bags as this would stop fungus growing on the clay by reducing how much daylight the clay was exposed to .

|
|

|
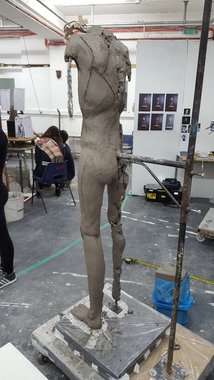
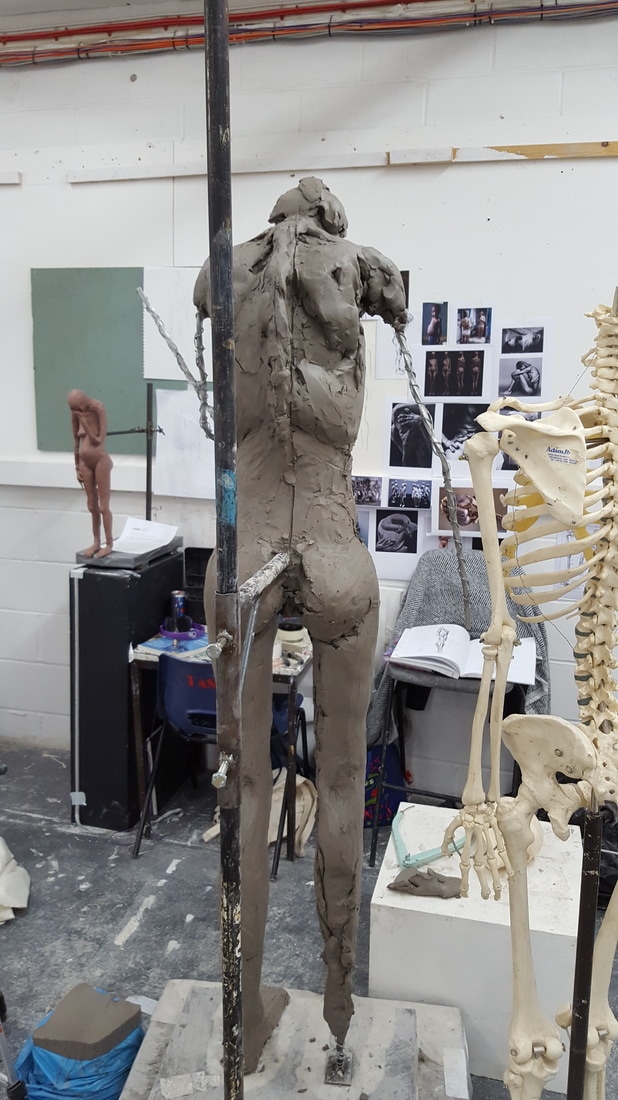
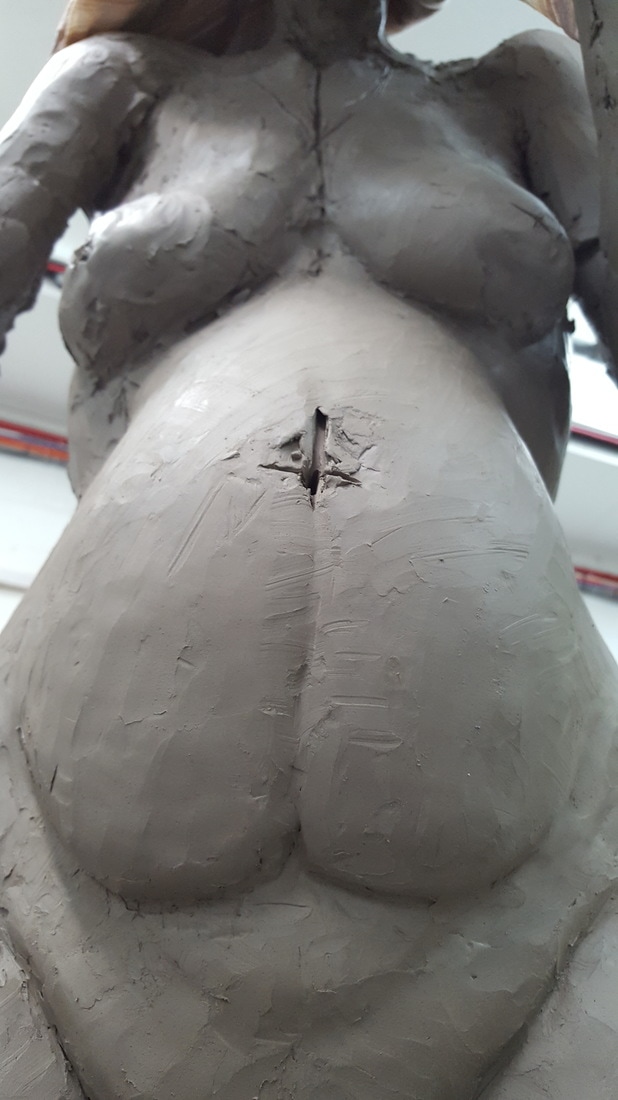
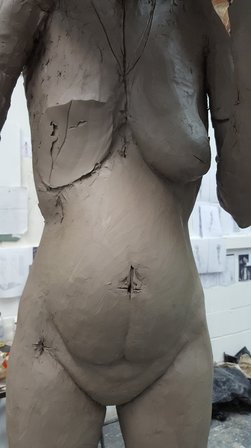
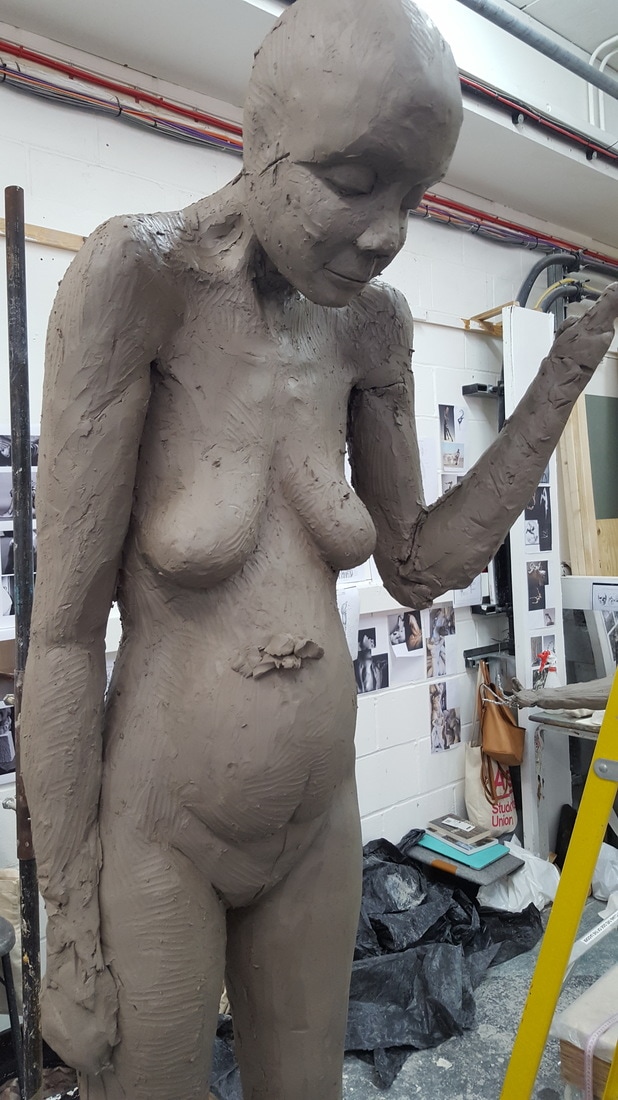
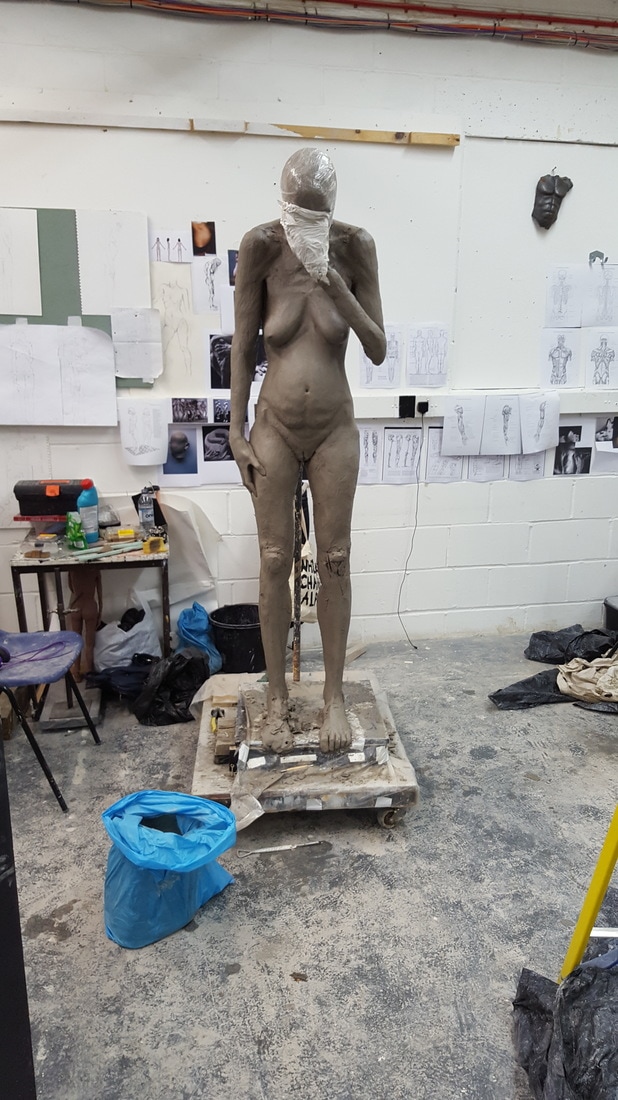
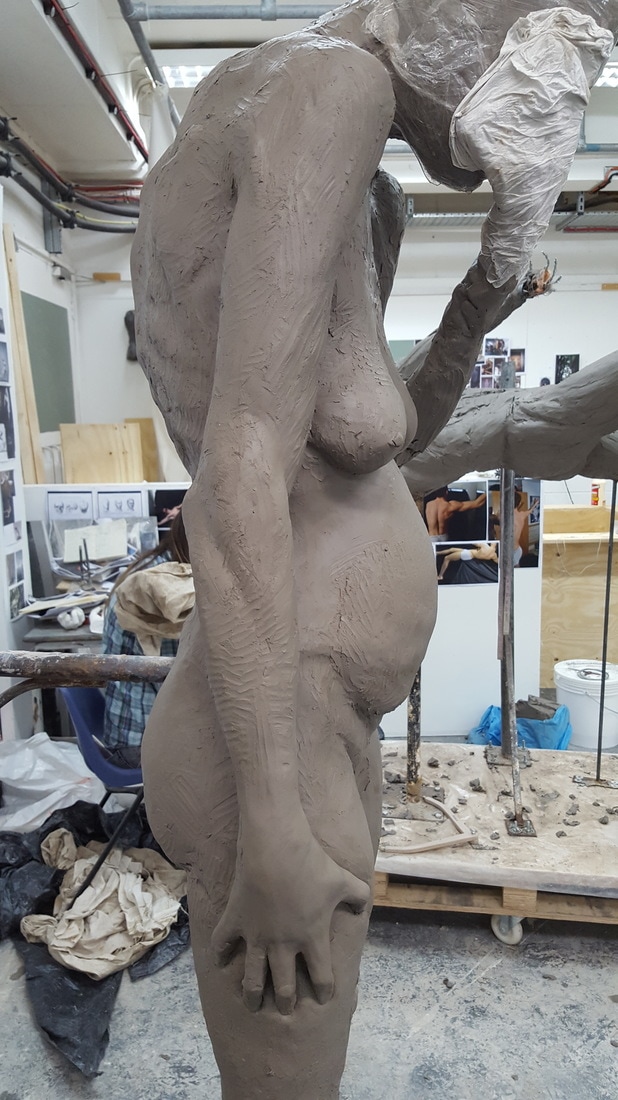
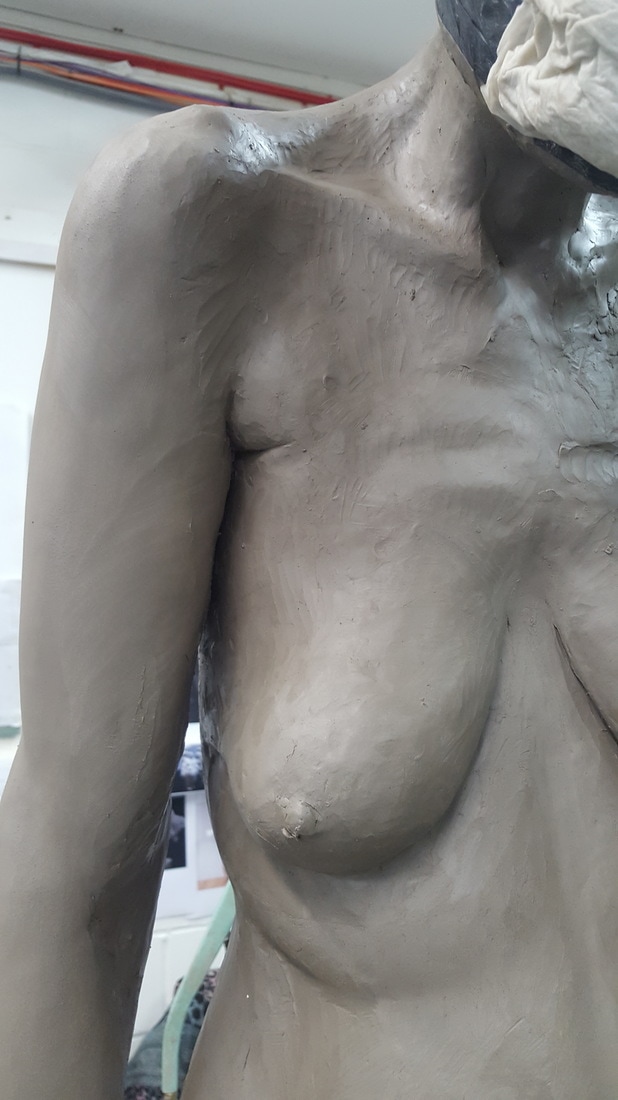
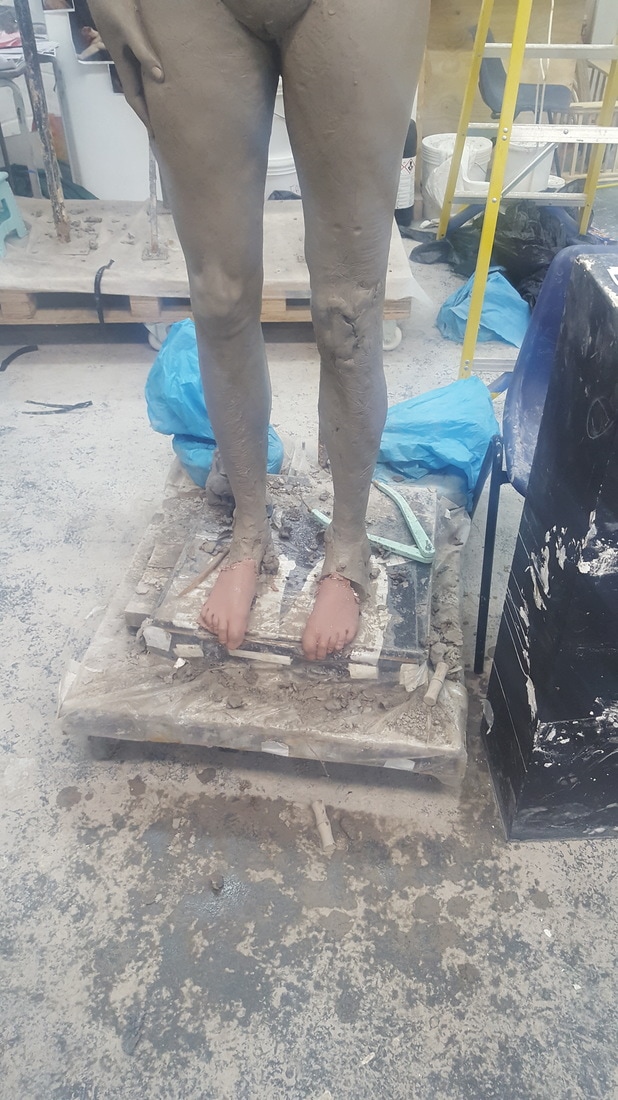
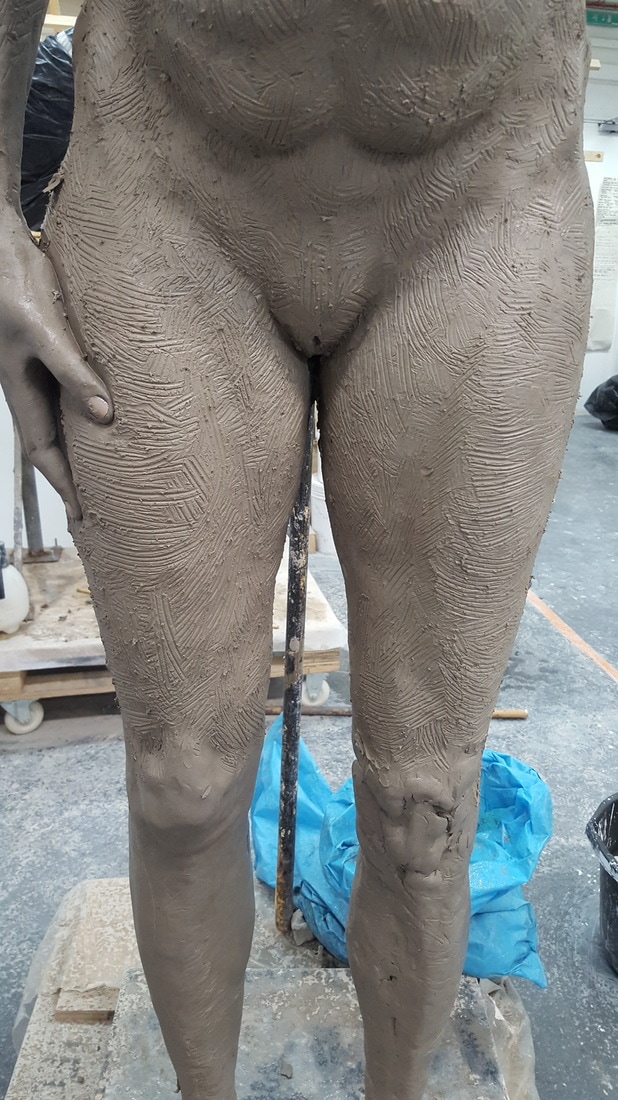
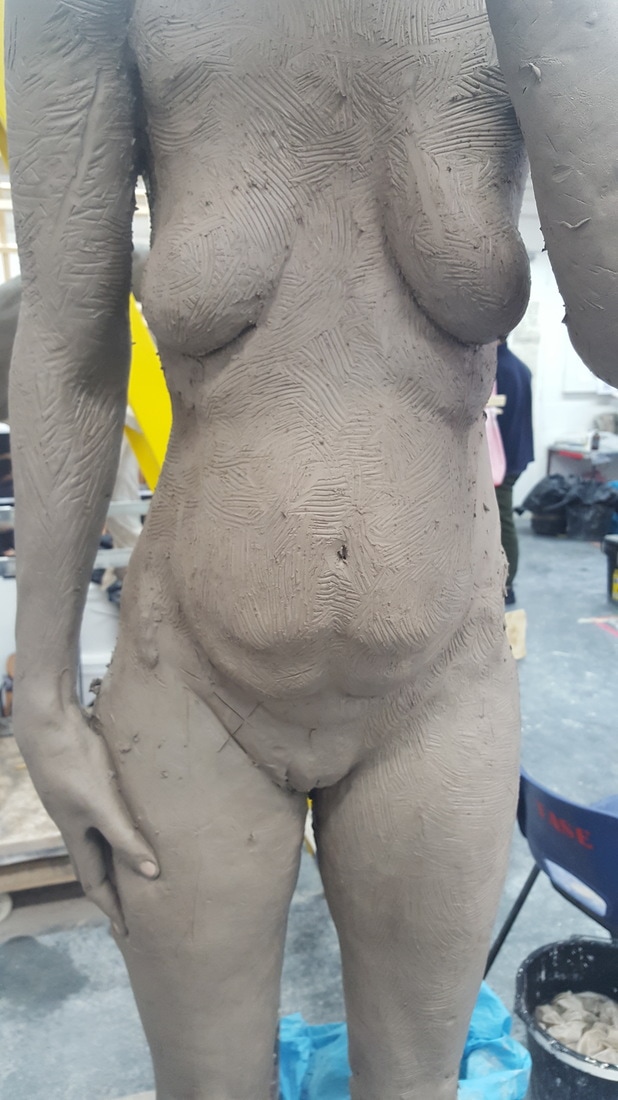
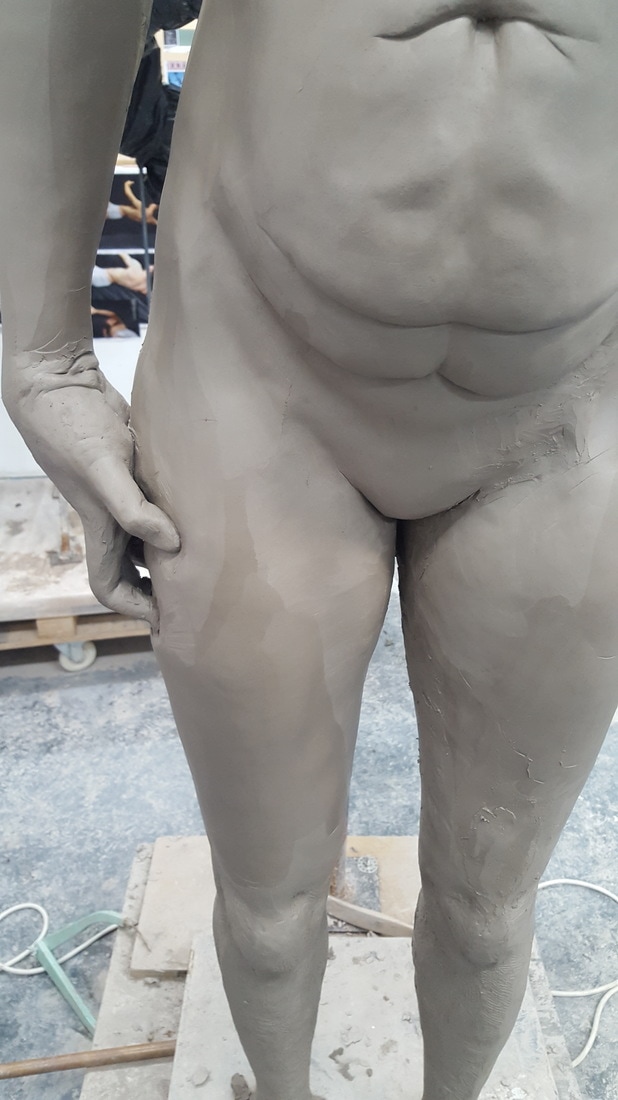
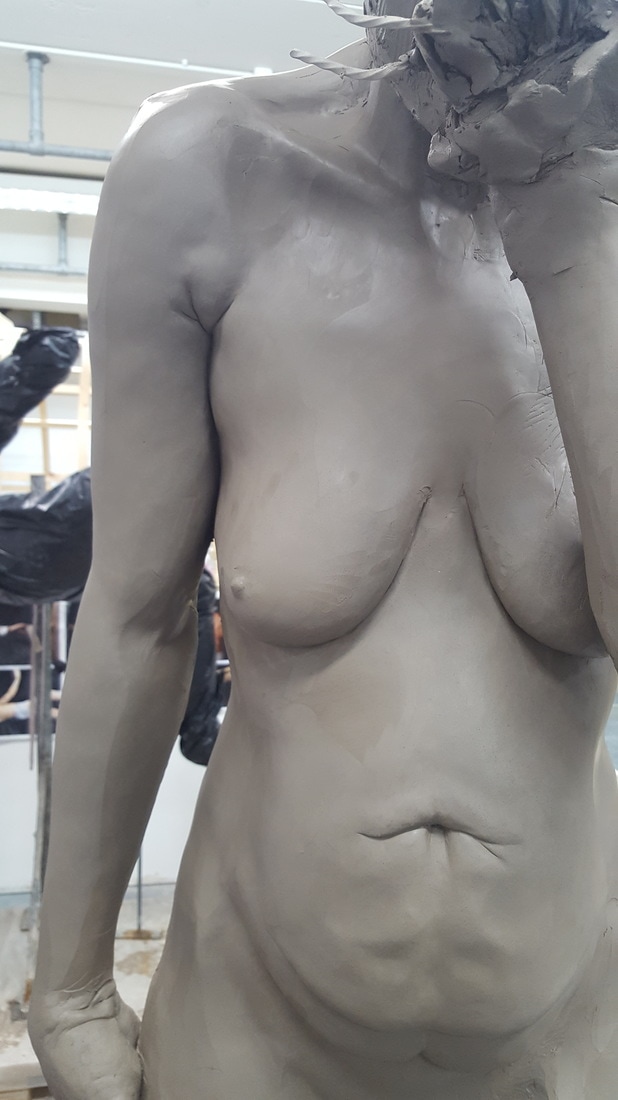
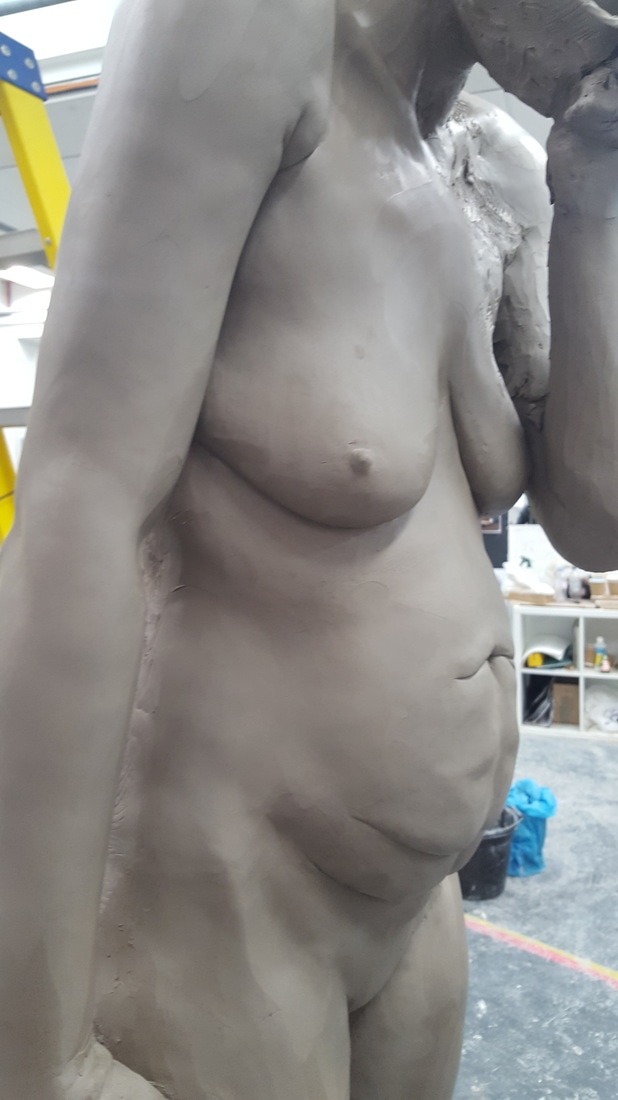
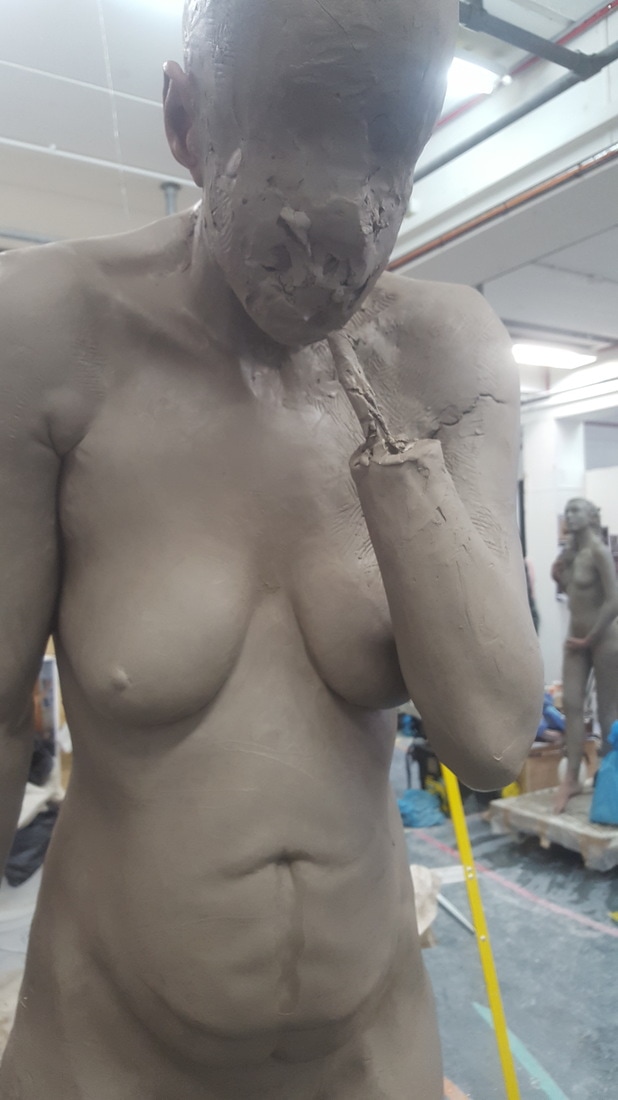
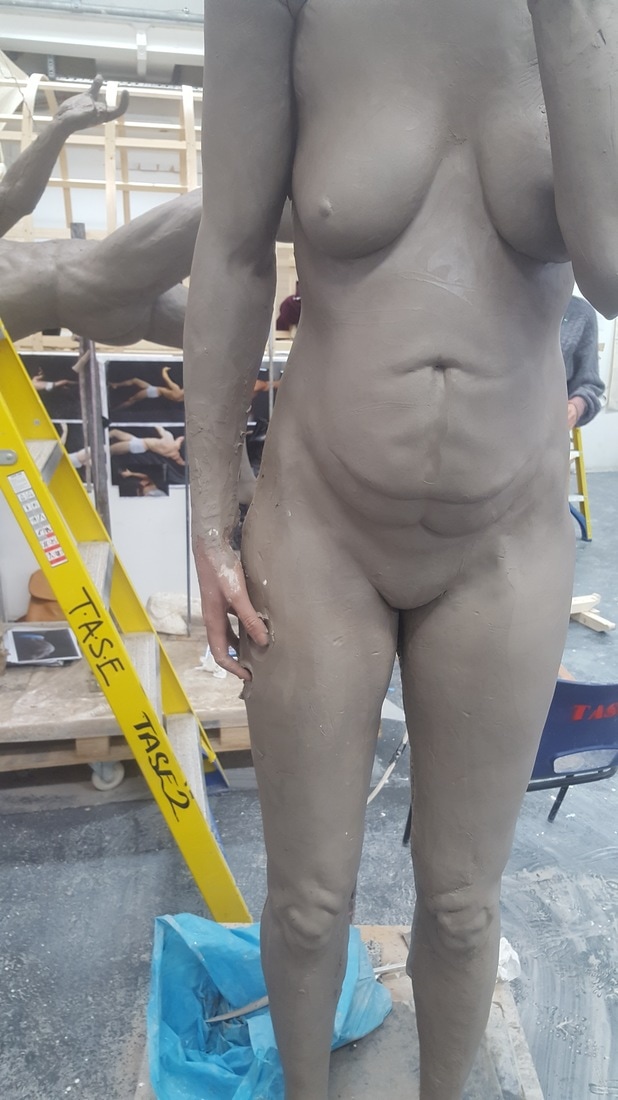
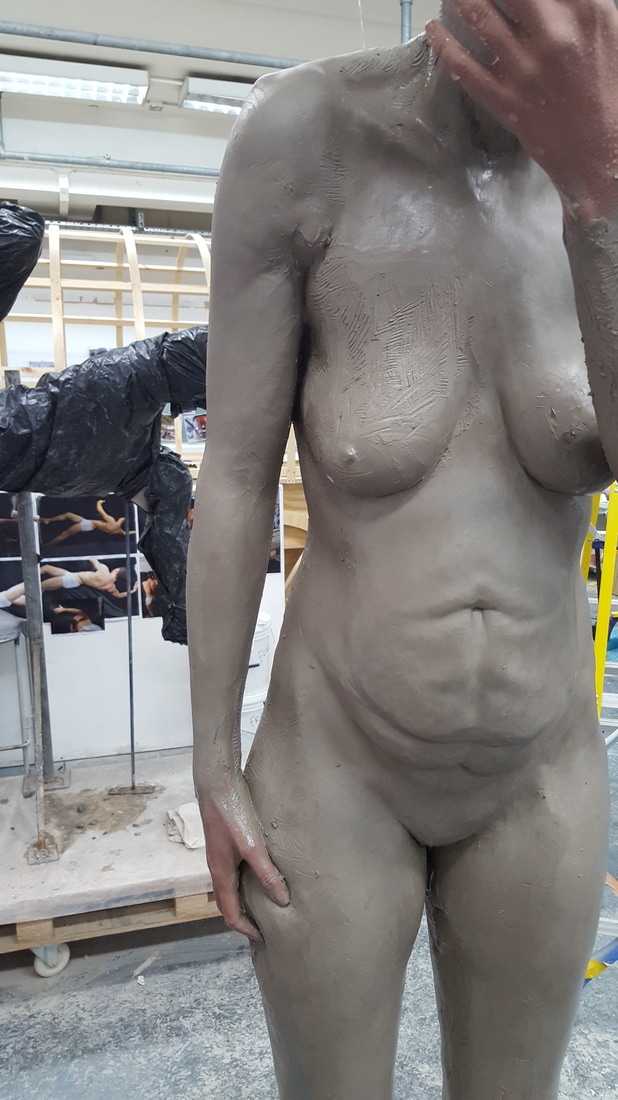
When I was happy with the ribcage shape and size, I added the breasts. They changed the dynamic of the sculpture, and I could see once they were added that the torso was too long, and that the genital bone was too low down. I changed this and began developing the breasts further. The hip bones were now in the correct placement and I began adding weight and mass to the hips. The legs began to be formed by maintaining measurements from all angles and referencing from my anatomy books. I Kept the iliac markings at all times because they were a simple point that I could measure from.
|
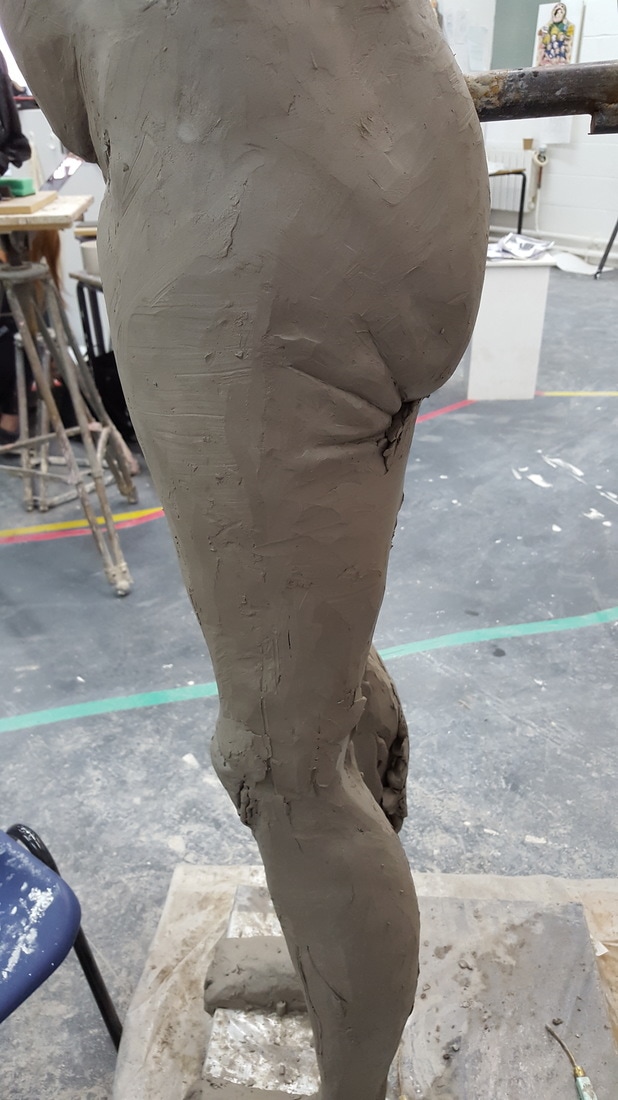
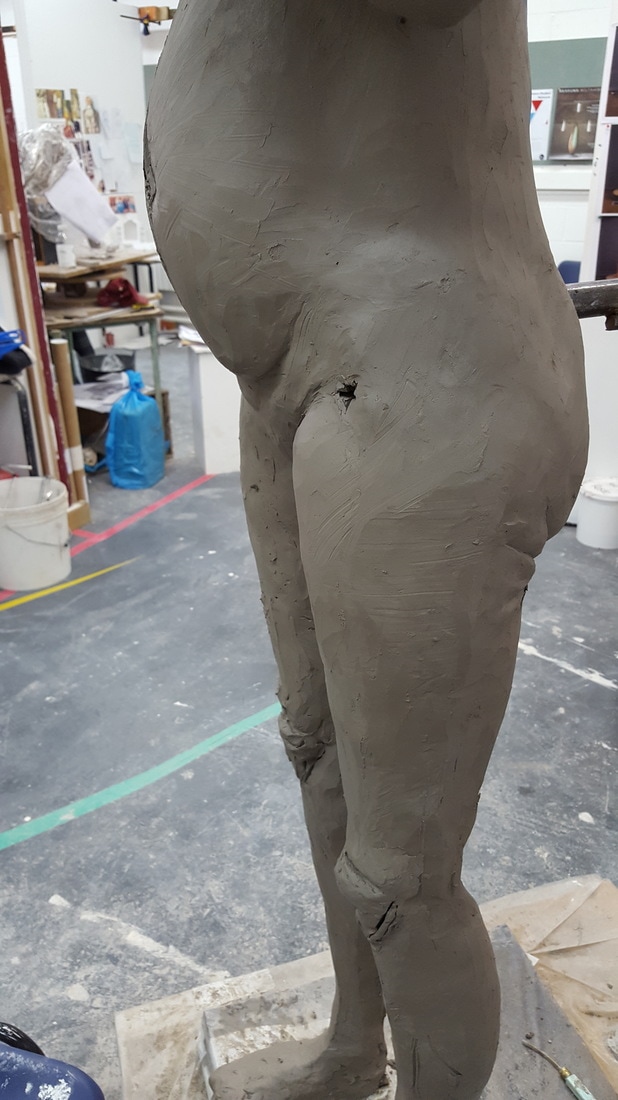
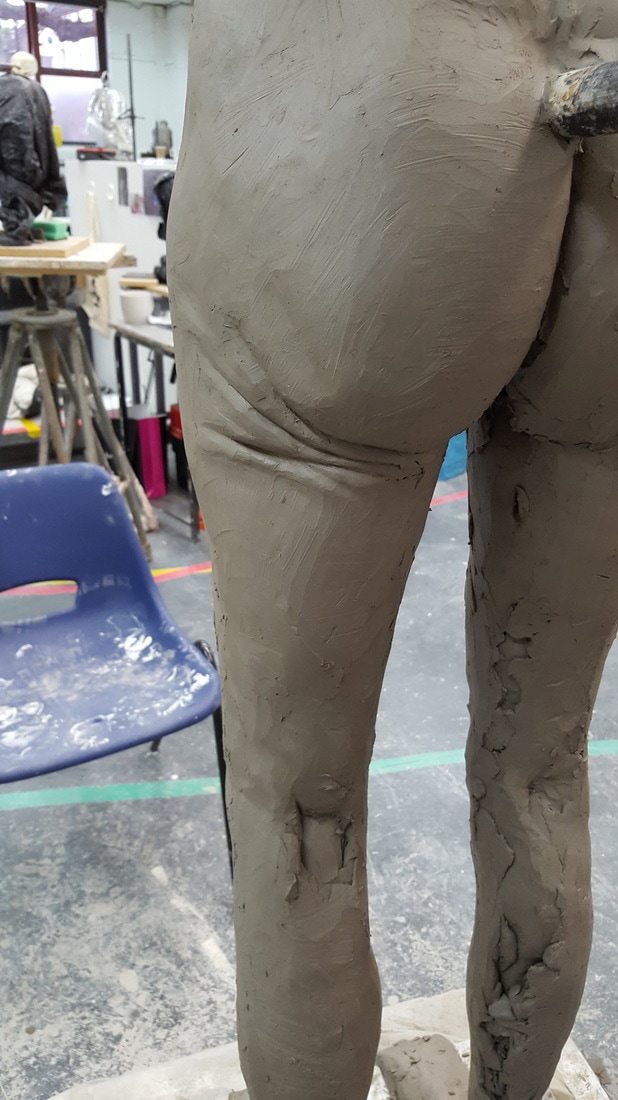
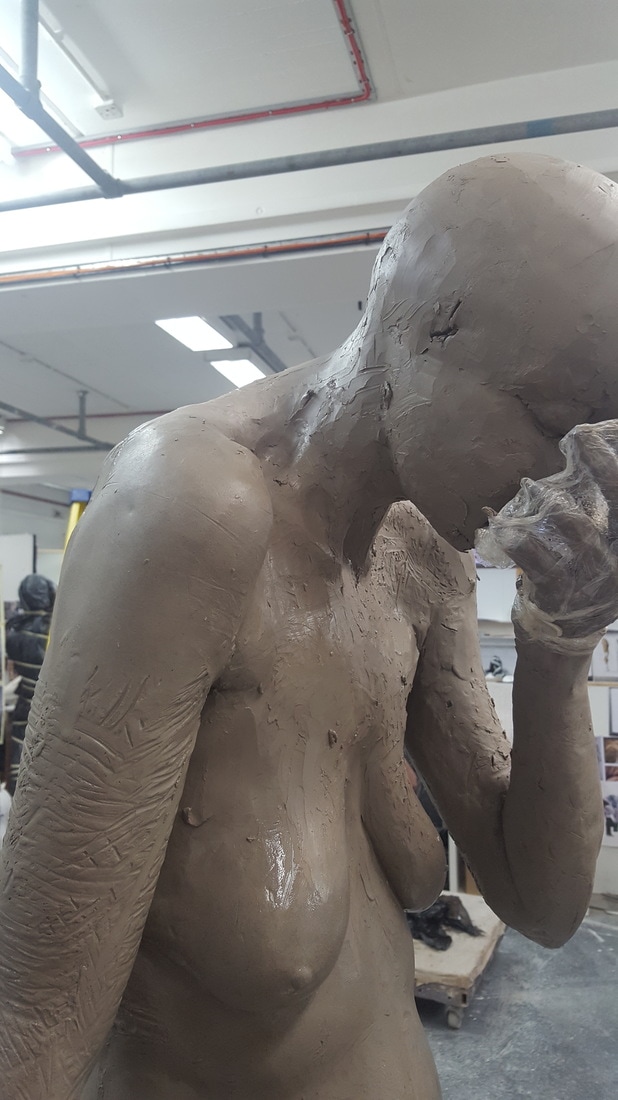
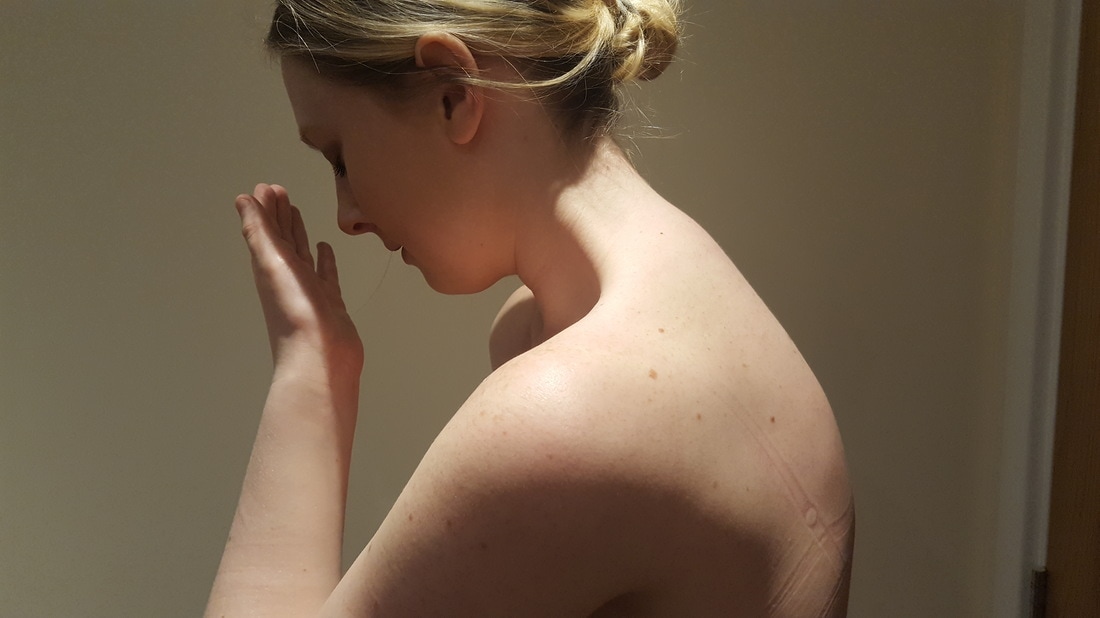
Now at a stage where I could attempt to add basic detail in, I began by experimenting with the bum. because of the nature of the piece I wanted to use areas of the body that are a concern for me personally, so I focused on the bum, breasts, stomach and upper thighs. This initial experimentation was to let me gauge what I wanted the specific aspects to look like generally. I began to play with ideas that I thought could make for an interesting piece. The difficulty in this project was that I was not working from a model, which meant that the only reference material I used was the drawings I had made, and human anatomy.
|
|

|
|
|
|
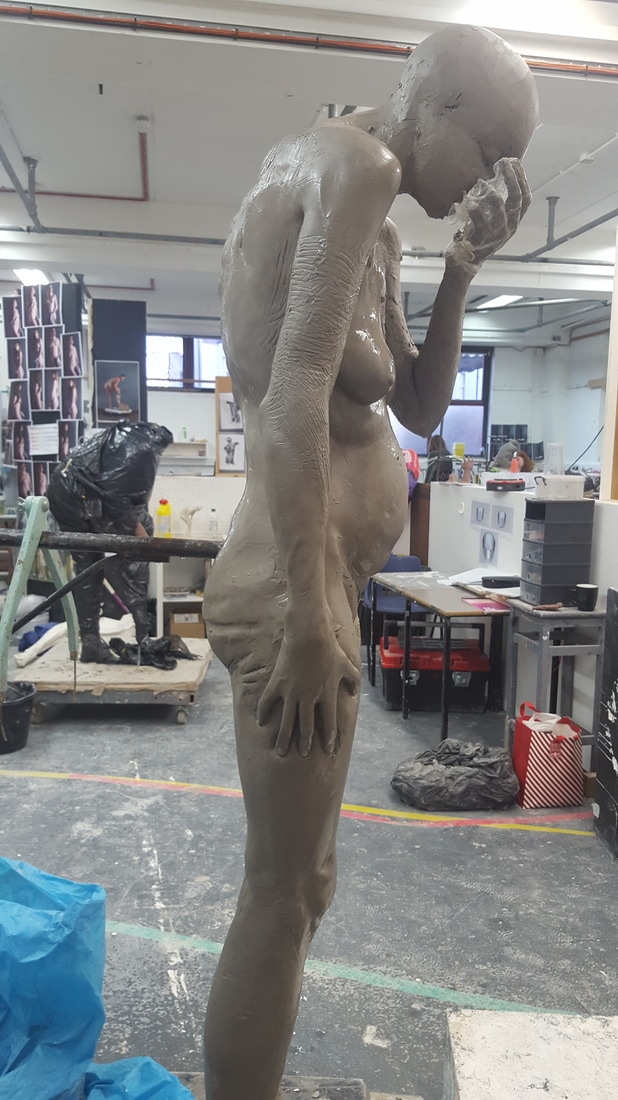
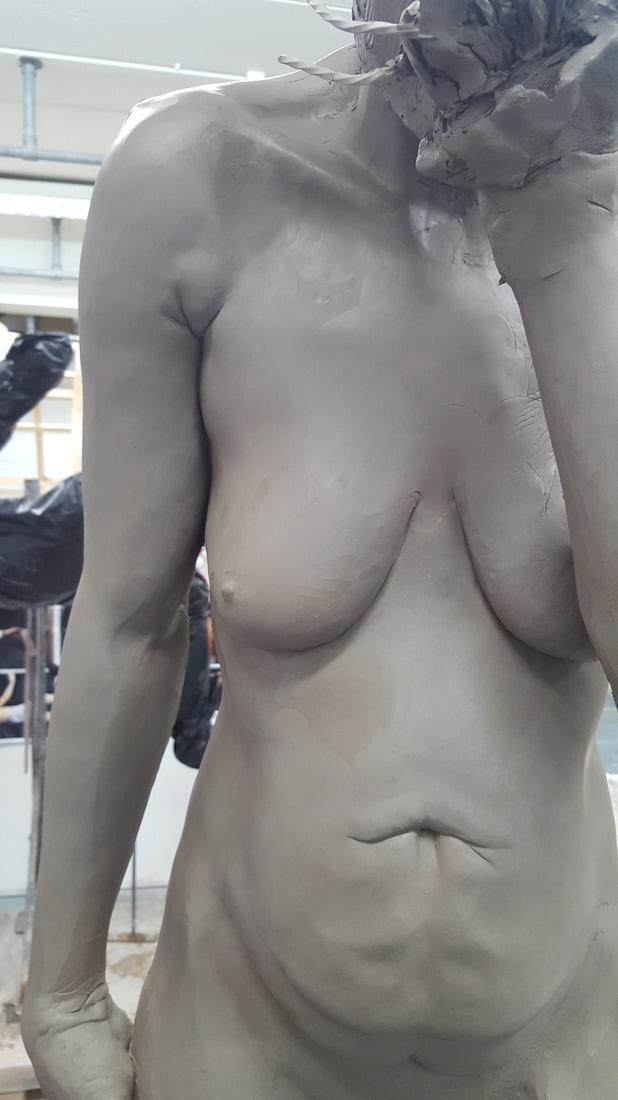
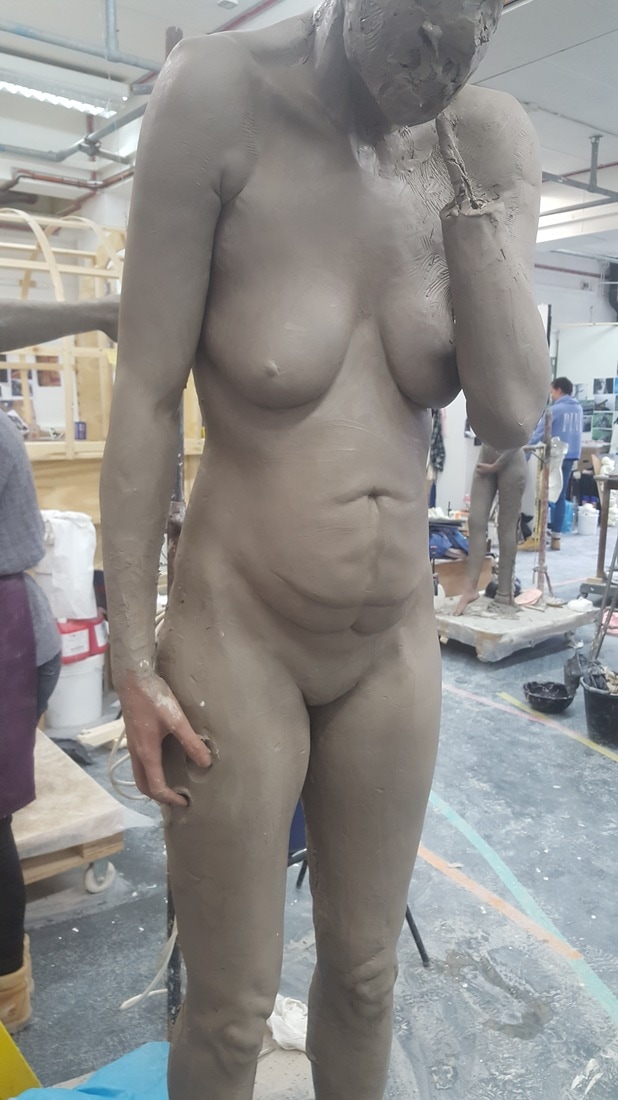
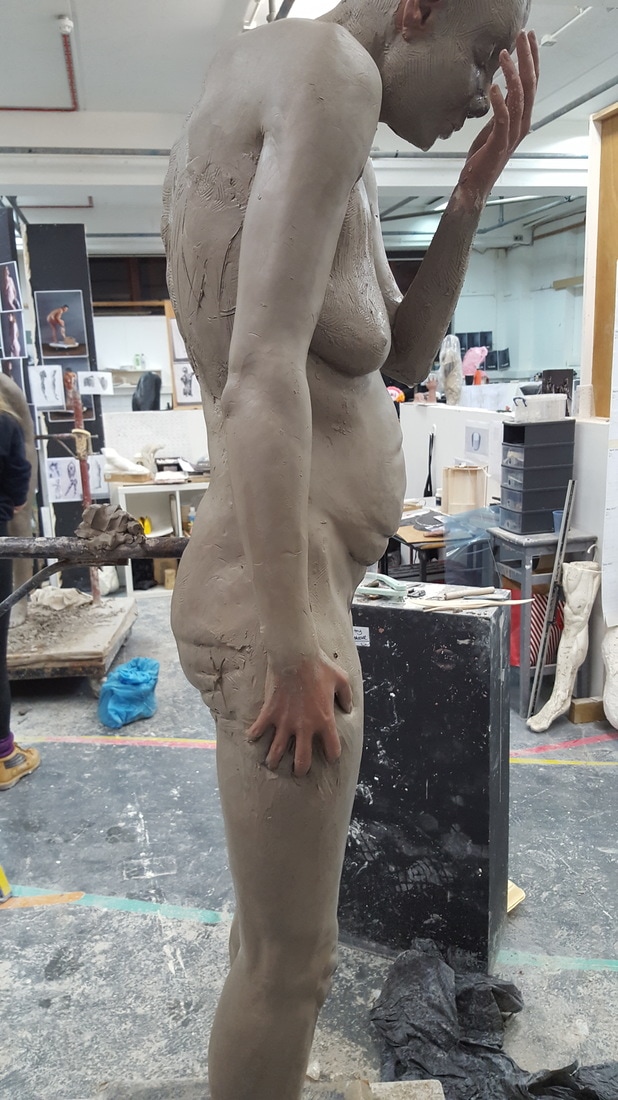
This experimentation continued towards developing the spine, stomach flab and breasts. I wanted the stomach to look like it was sagging under its own weight, I was trying to replicate severe weight loss and excess skin. The spine I wanted to contrast with the stomach by having it look emaciated and for it to protrude out of the back of the sculpture. The breasts were going to be saggy, drooping slightly.
|
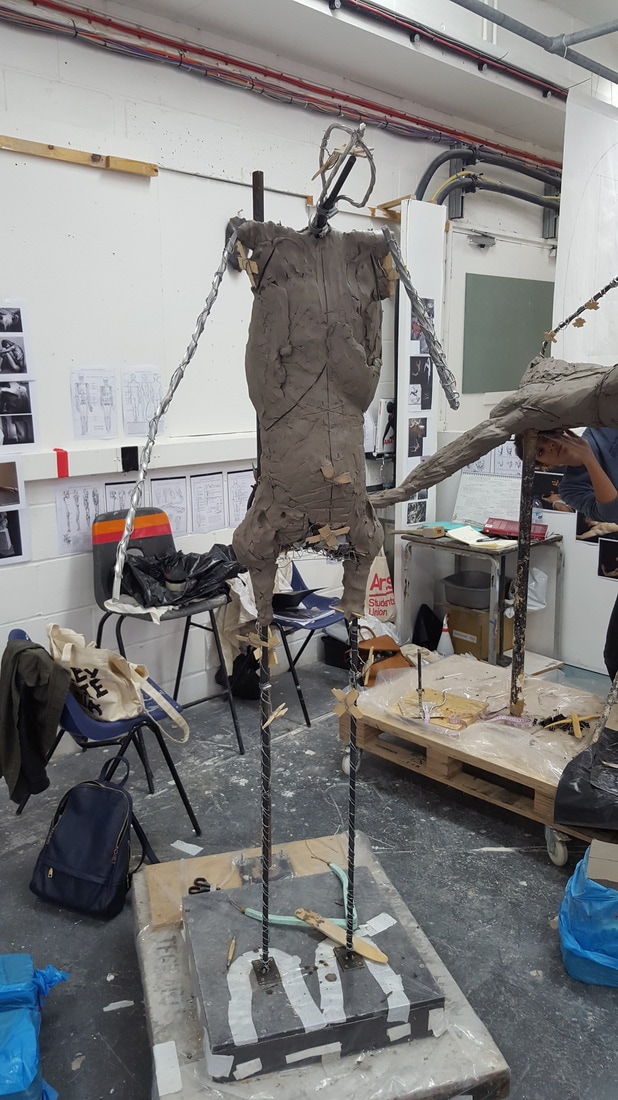
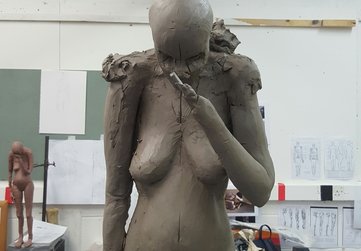
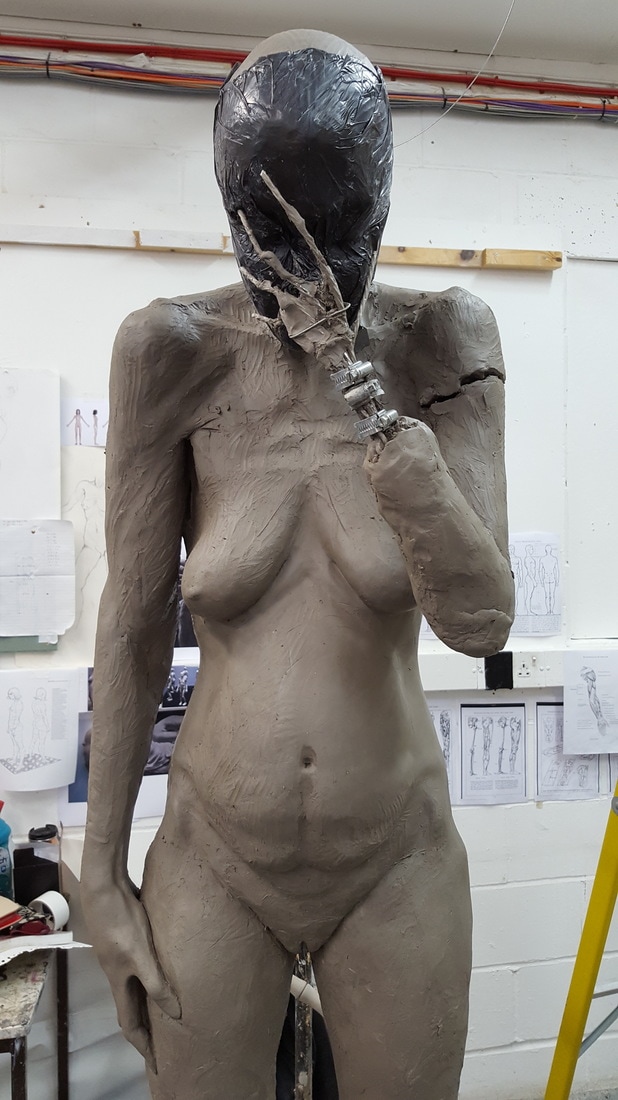
Once I had added some simple detail I could then take a step back from the piece and begin to see the inaccuracies in the sculpting. I realized that the shoulders width was too small and that the left breast was not sitting correctly on the ribcage, meaning that the ribcage would have to be altered. This meant removing the clay and working into the ribcage. When I had added the correct amount of clay to the shoulders, the entire figure then became out of proportion, and showed me that the hip and waist and ribcage were much too small. I Began adding clay using a line to define the centre point.
|
|
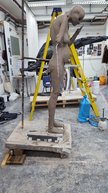
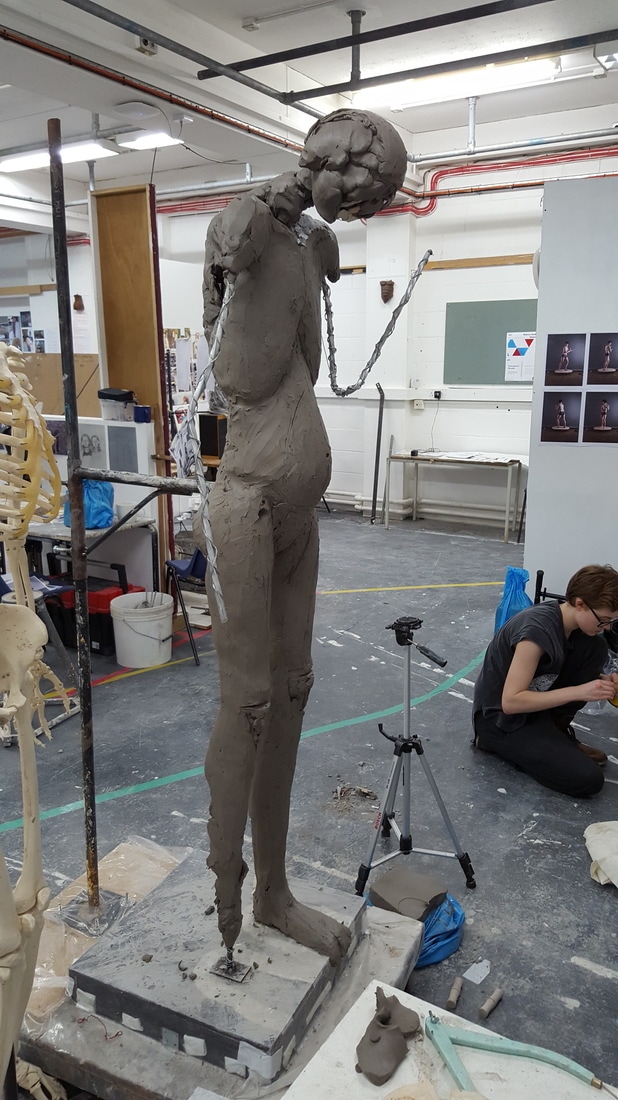
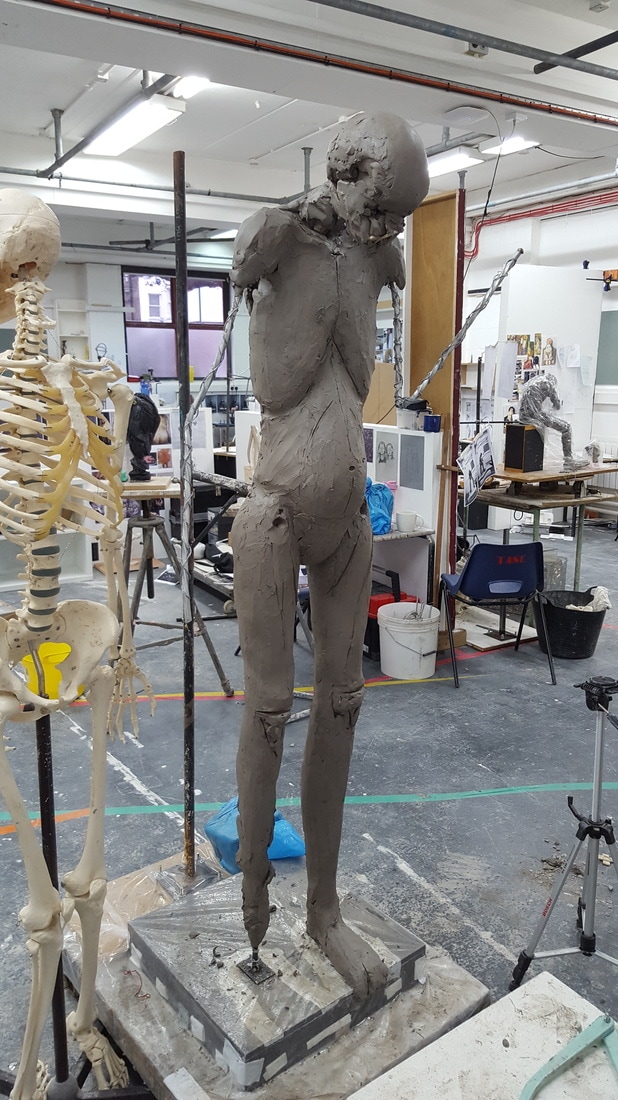
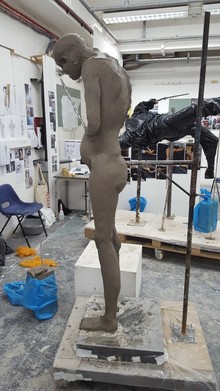
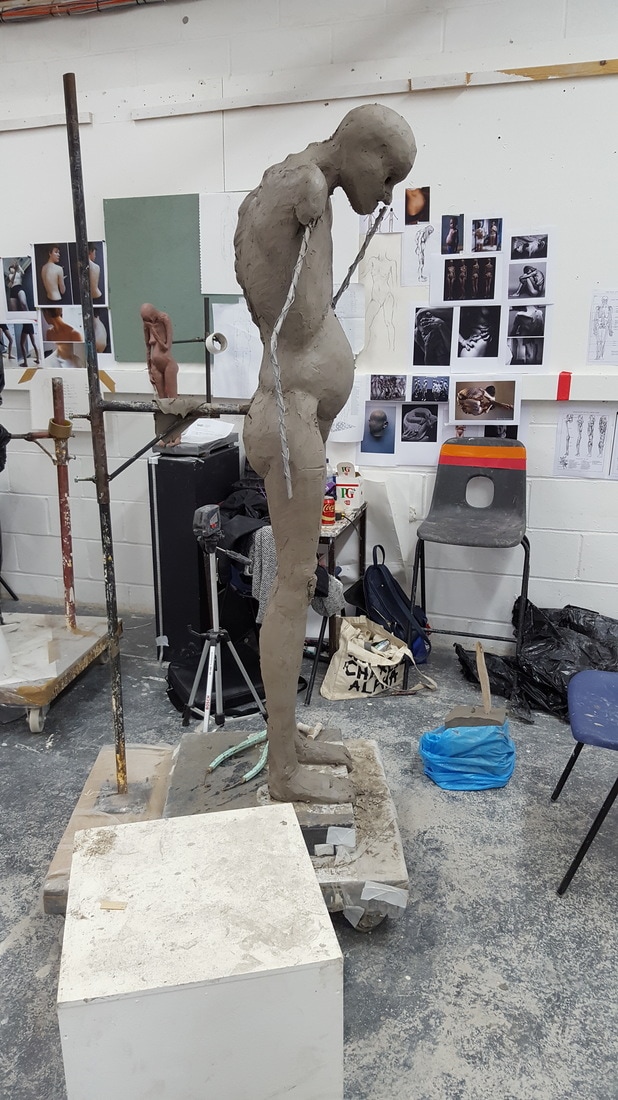
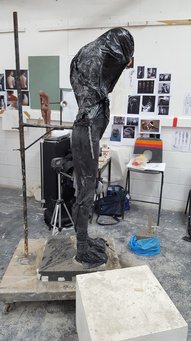
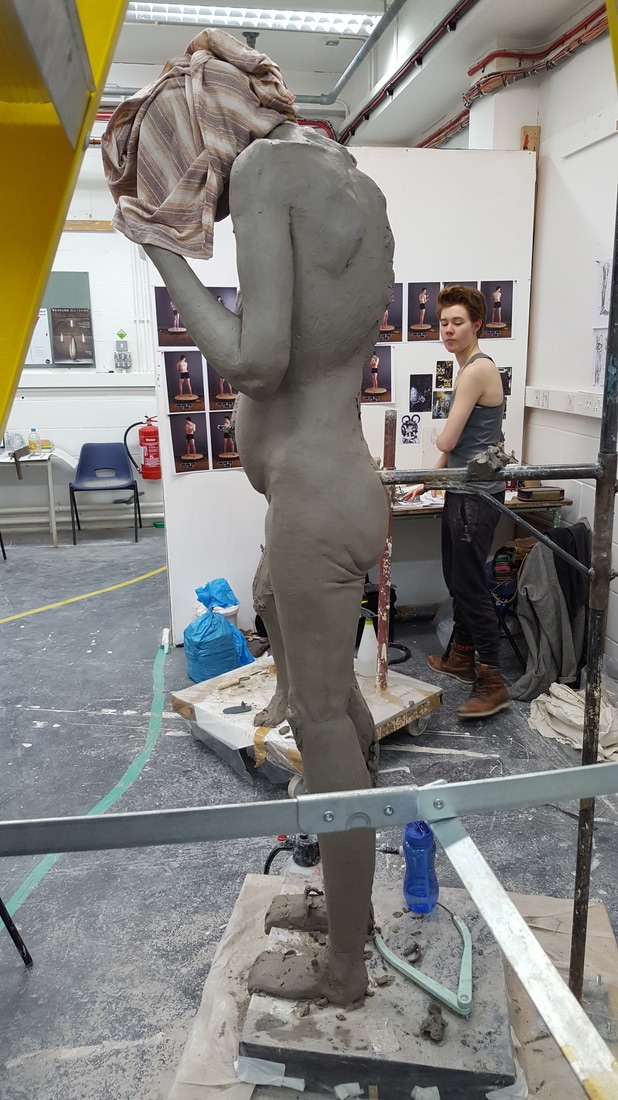
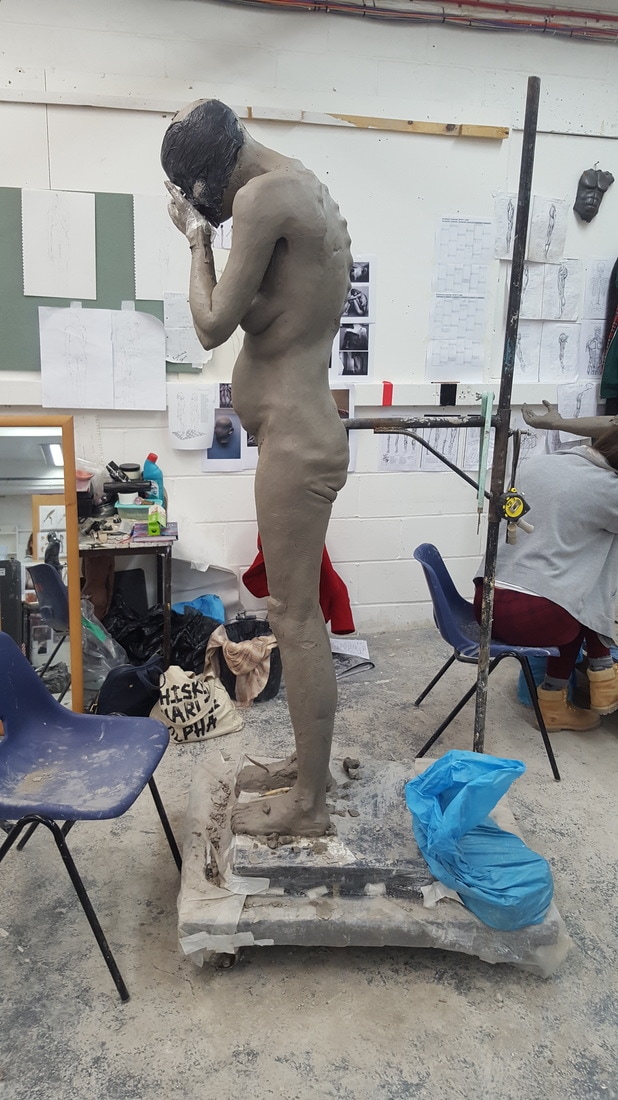
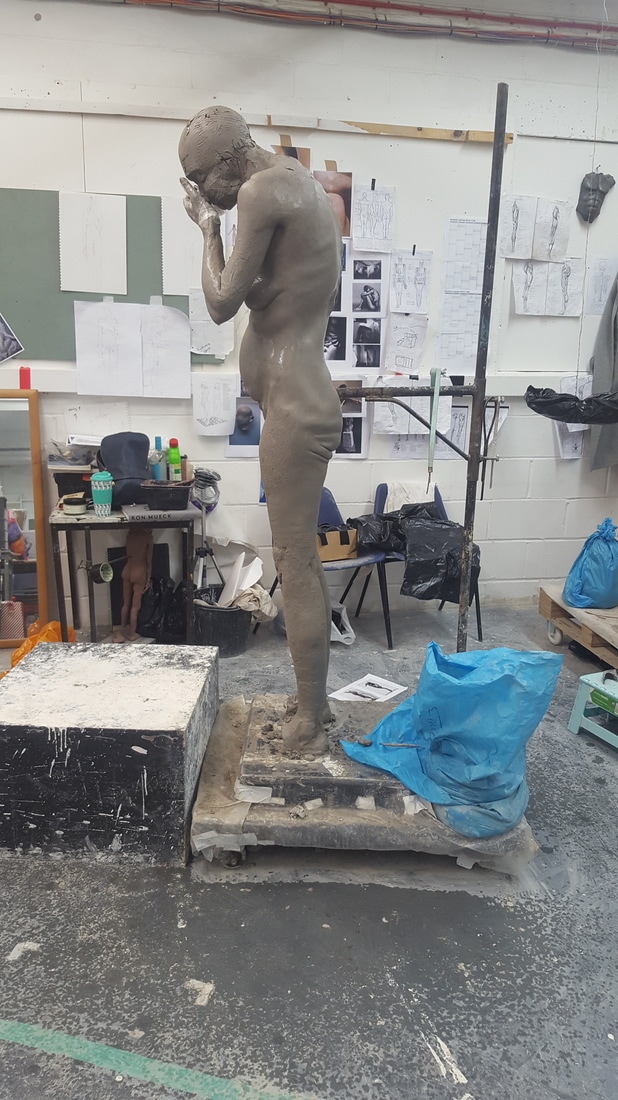
Noticing that the proportions were off by so much I became worried I was losing the final effect I was trying to achieve, I was concerned about the front viewpoint that I dint begin to think of how the side angles were working. Eventually the sculpt will be on a plinth placed right at the very edge, as if about to jump. A main aspect of the work was to give the sense that the figure was just about to tip off the edge by leaning over slightly. At this stage my figure was stood up extremely straight and wasn't leaning over far enough. The tilt could be achieved in the casting stage but my tutor explained that it would be important to view the sculpt whilst at this stage in the correct position. To do this we simply raised the back of the sculpting base up using old pieces of wood.
|
|
|
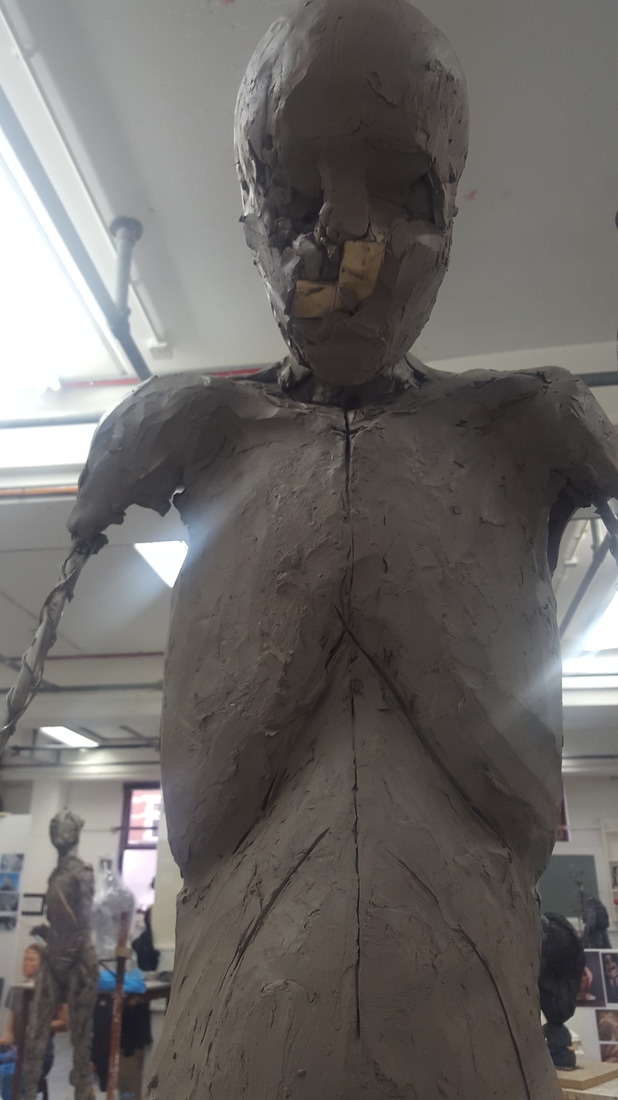
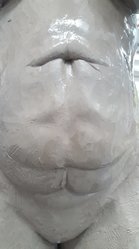
I began to sculpt the right arm. I started by bending the aluminium armature to shape, and then using a thinner wire, I cut it through the clay and tightened it so that it pulled the aluminium tight to the body. when this was attached I could then begin to add clay to it. I drew out the hand shape onto the clay and began sculpting the palm. I also began adding details to the face. As the face will not be in view, I wasn't too stressed with getting an accurately realistic face but it was important to have something there.
|
|
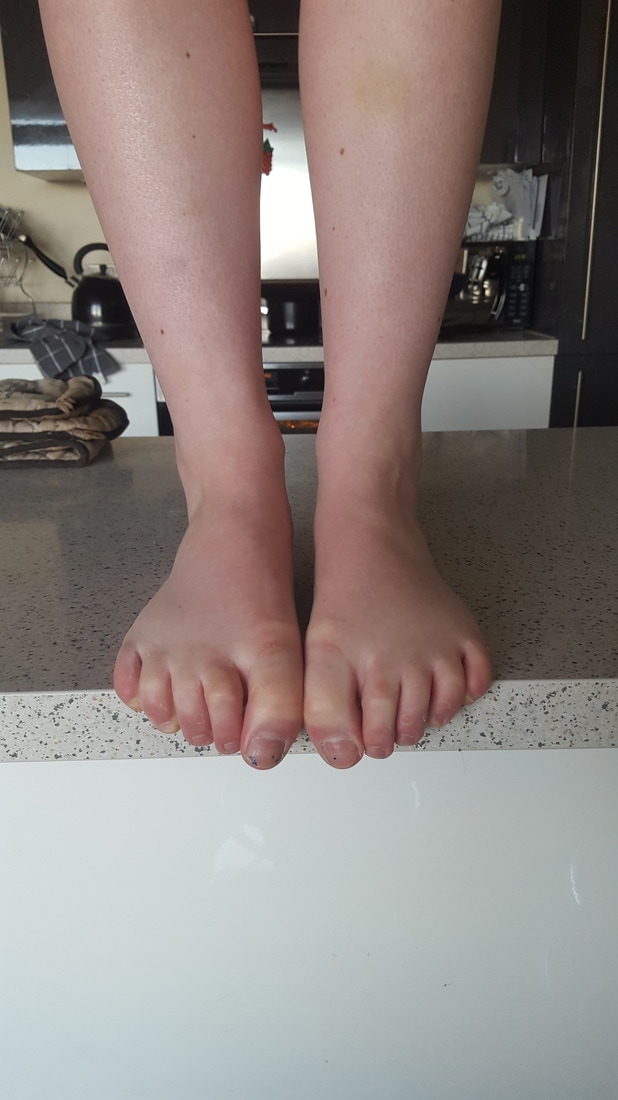
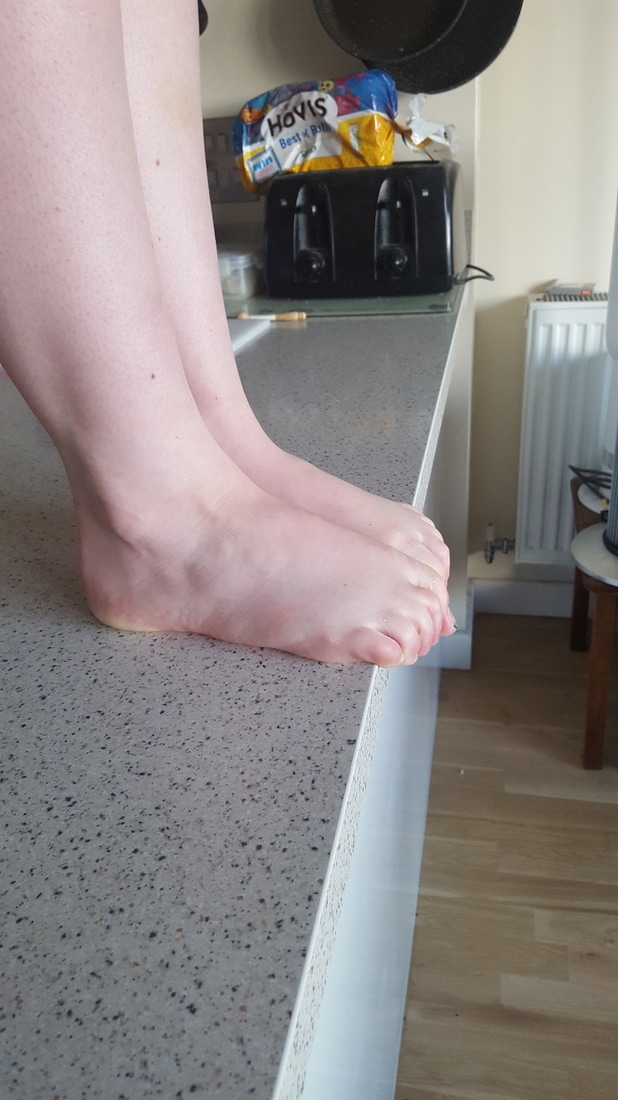
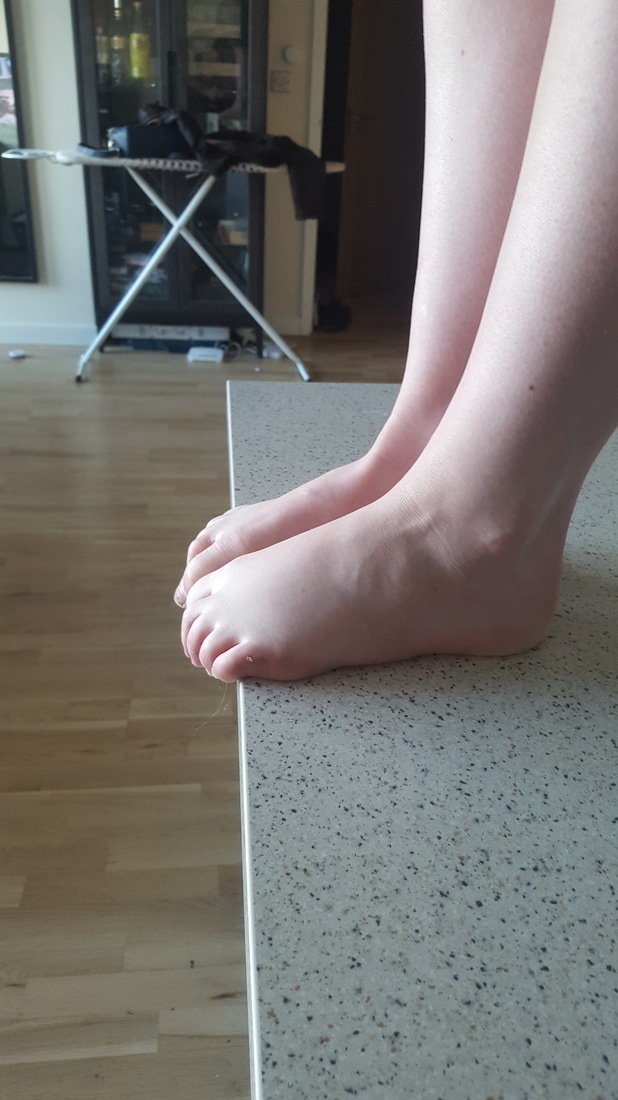
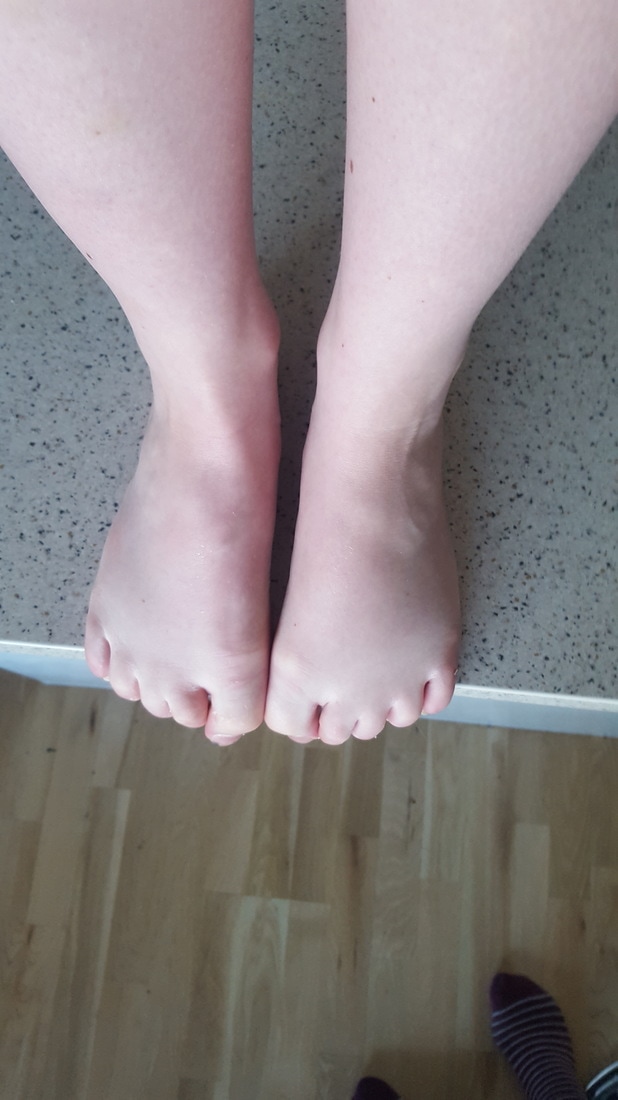
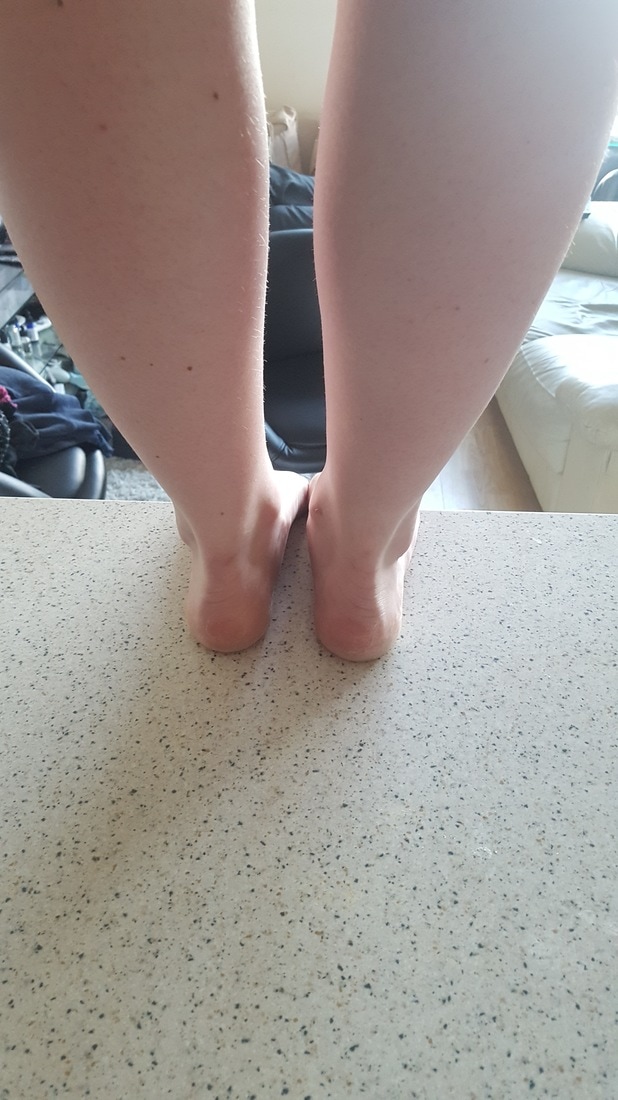
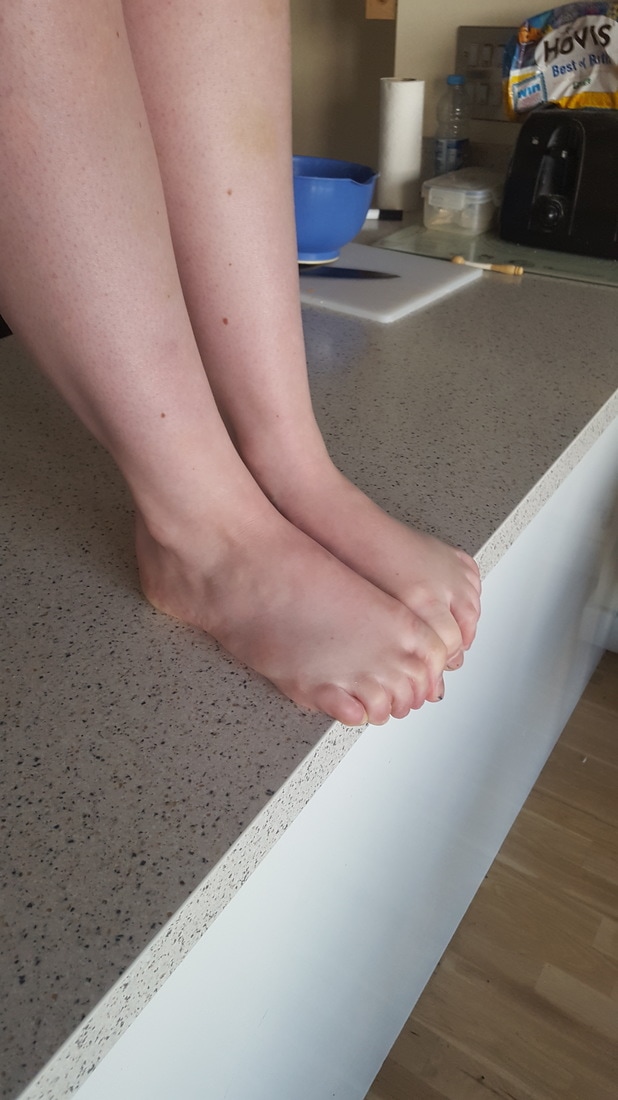
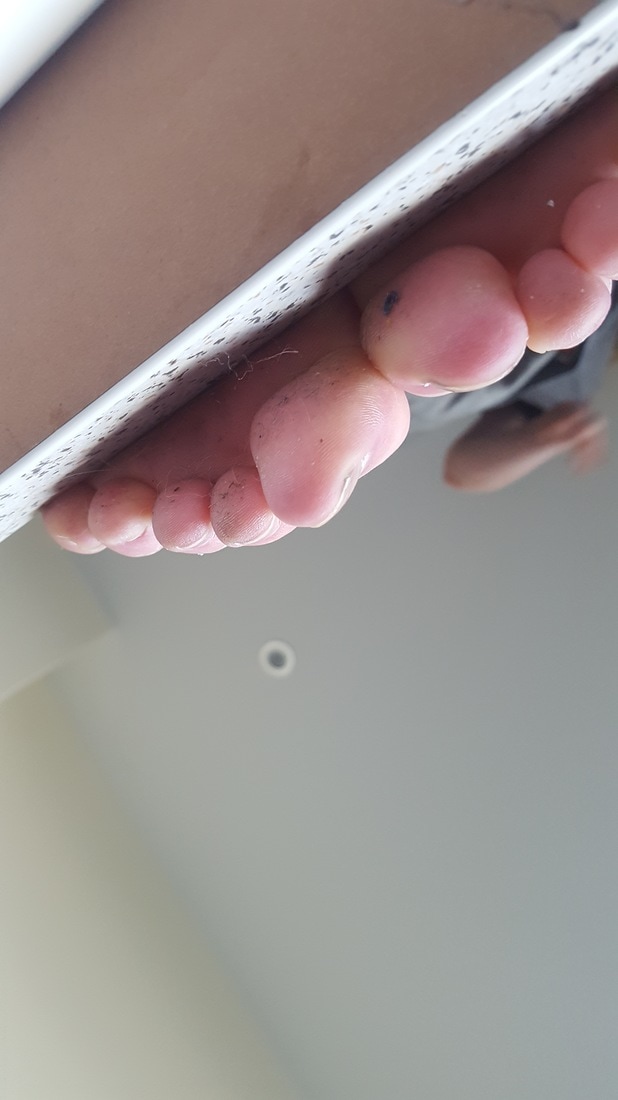
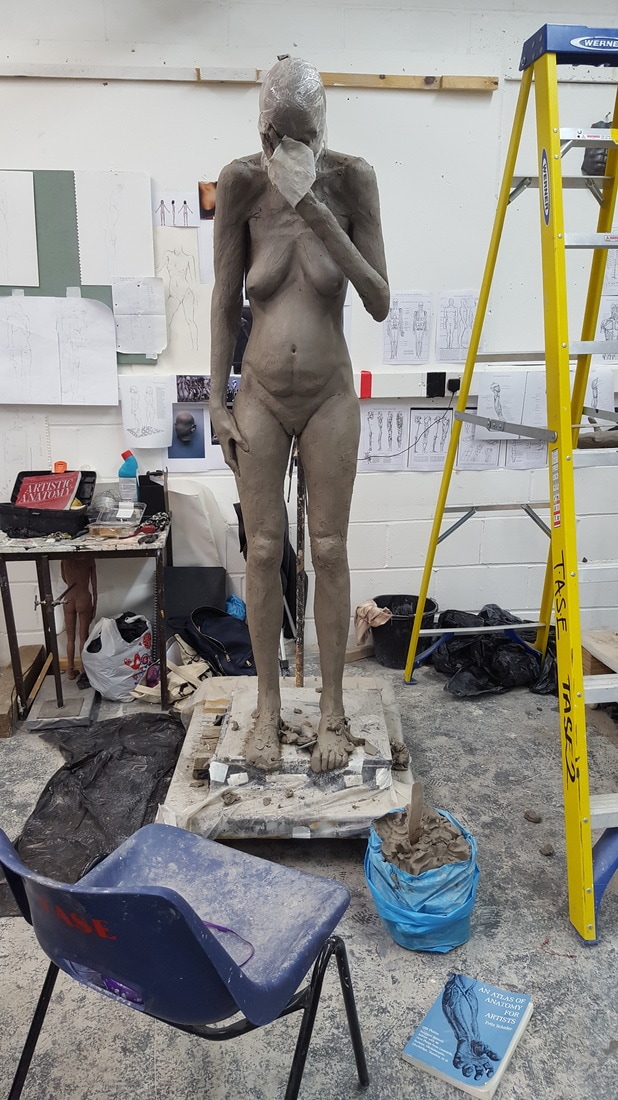
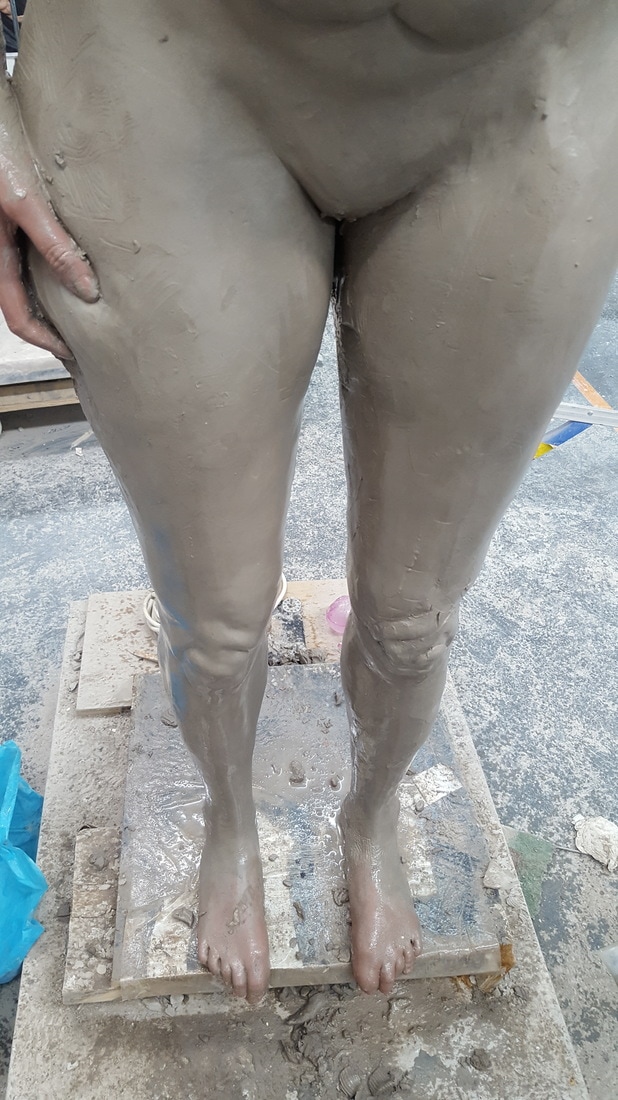
I began sculpting the feet, and I needed reference so I decided to use my own feet. I needed to get reference of how the feet curve around a hard edge. this shape turned out to be extremely difficult to sculpt, and because of the time constraints and the accuracy I decided to cast the front of the feet.
|
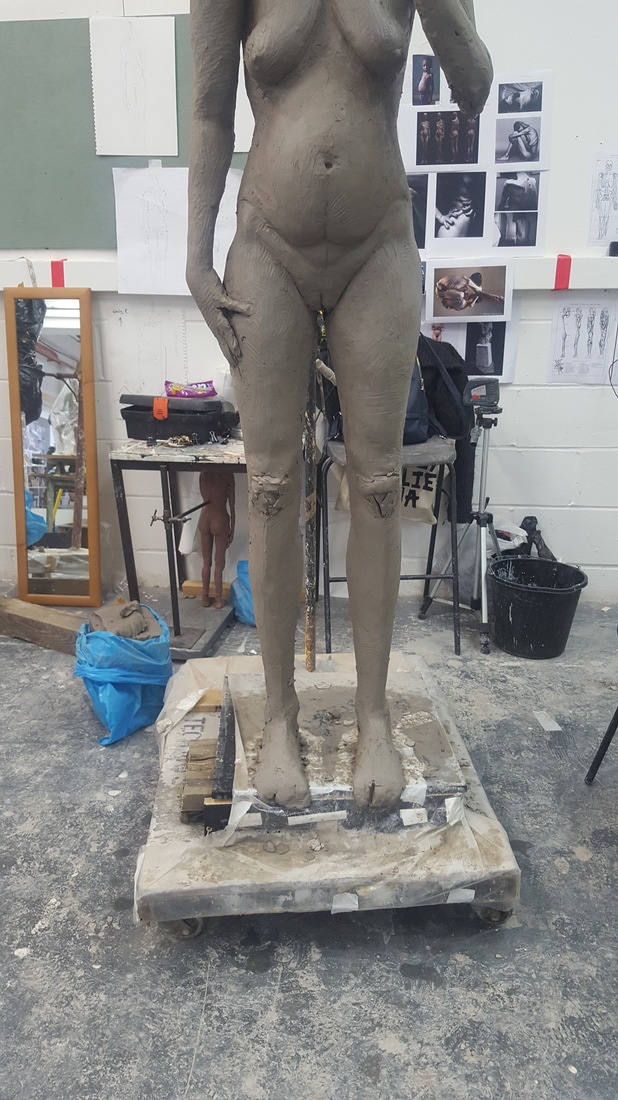
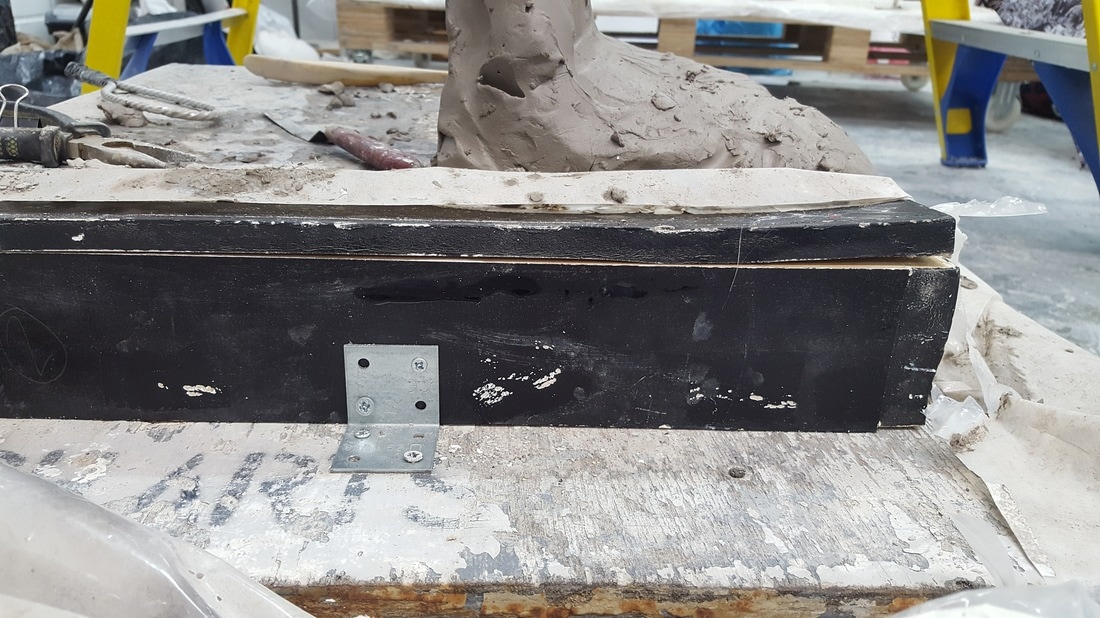
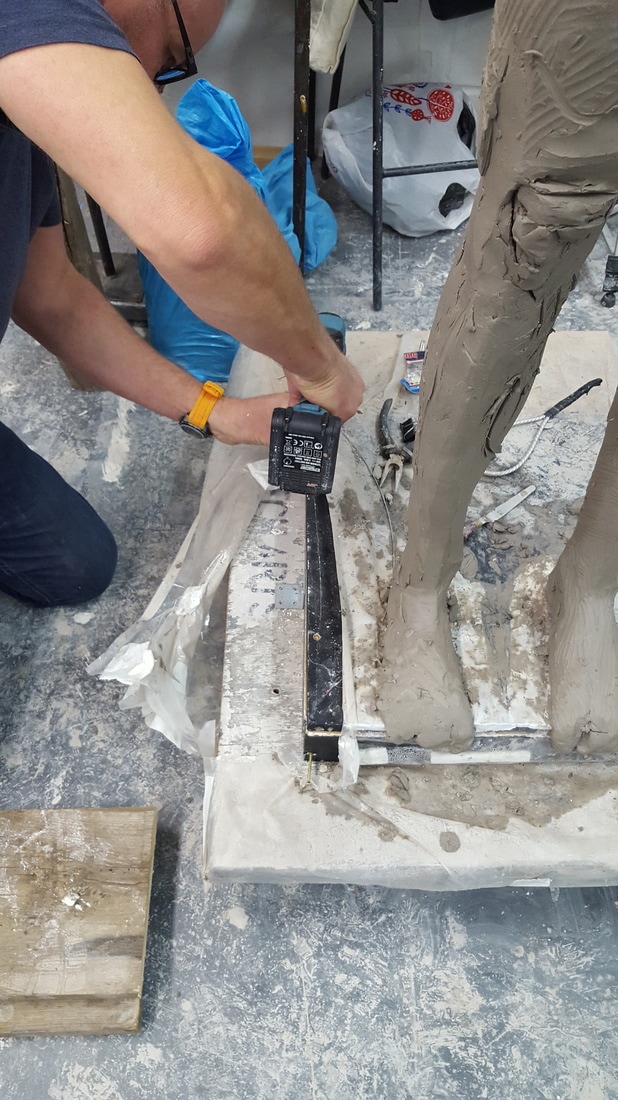
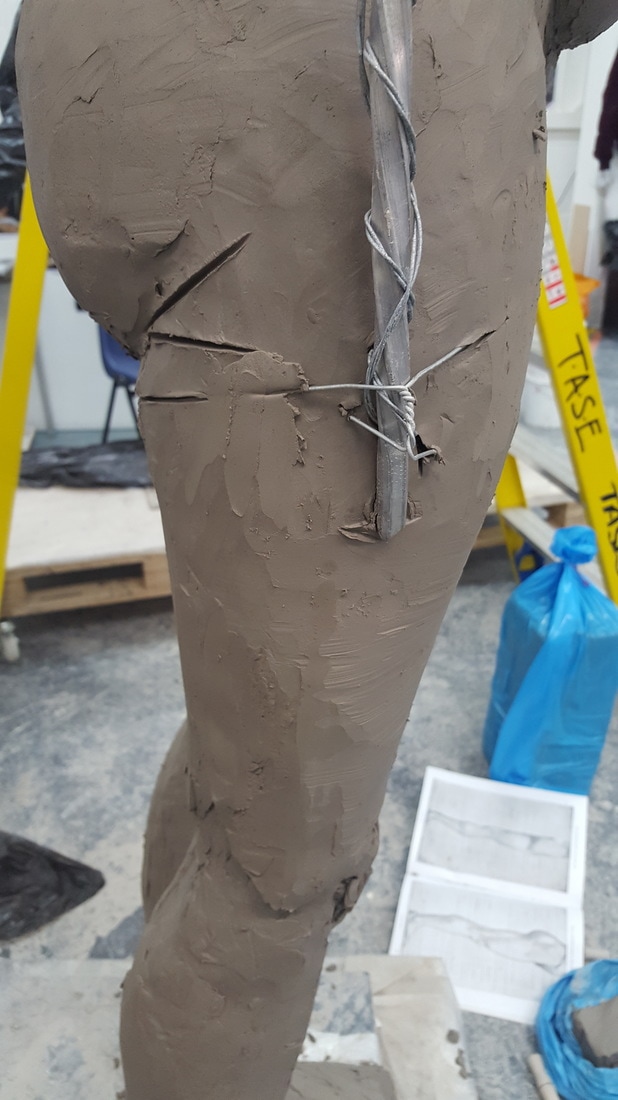
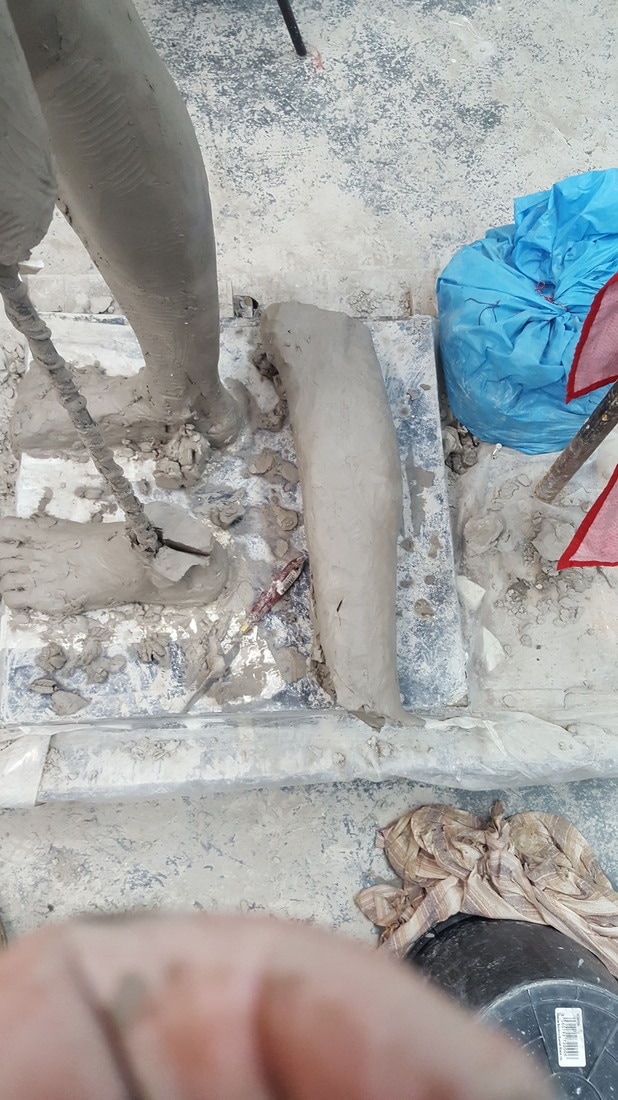
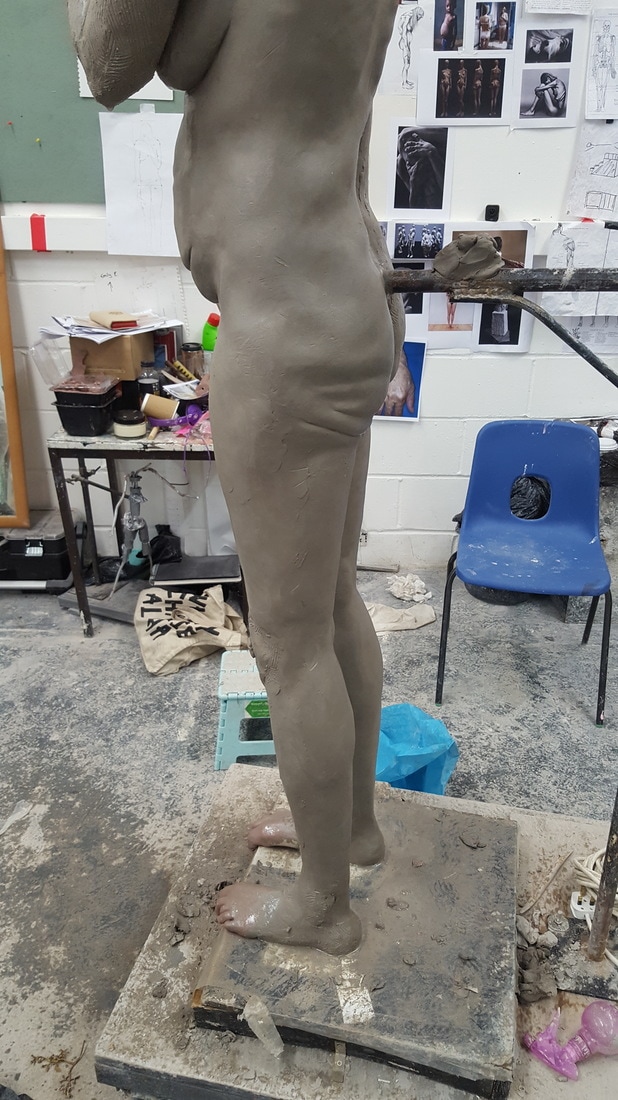
Two months into sculpting I began to realize that the board on which my sculpt was standing was not nearly strong enough to support the weight of the clay. The base I used was a simple MDF box, and eventually the water from the clay began to weaken the MDF and it began to sink. The side profile shows how far the box bent. To fix this problem, we started to unscrew the box side panel, and knocking a chunk of wood in to fill the void and give support to the base of the sculpture.
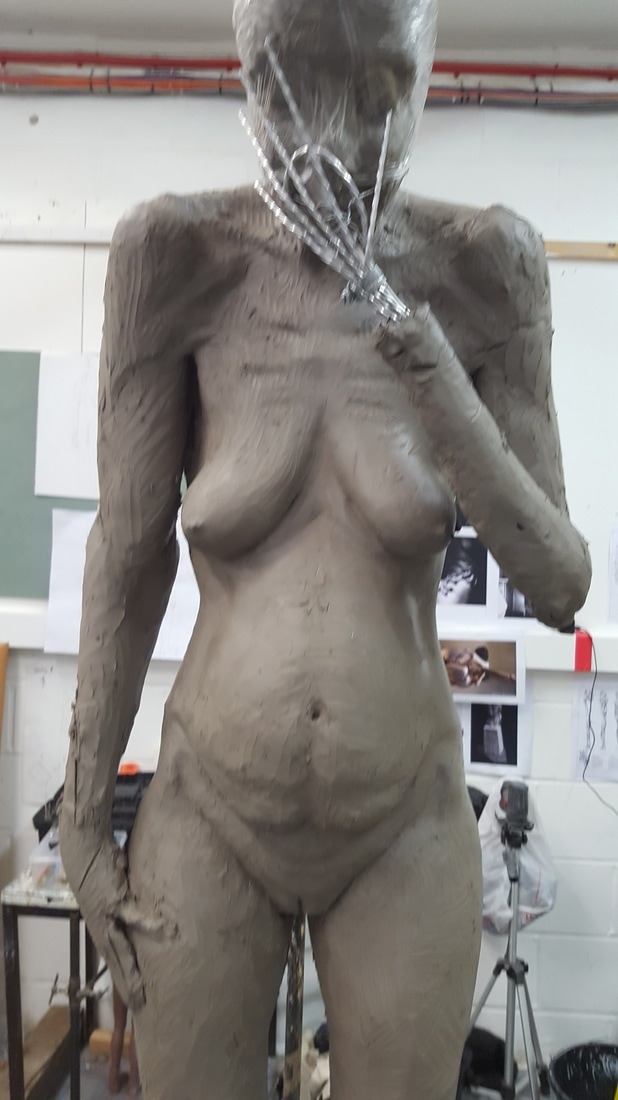
The hand that will eventually cover the face was created by making a simple aluminium hand armature. I did this the same way as the arm armature, by spinning the aluminium in a drill and attaching the aluminium to the arm by jubilee clips. To position the hand correctly I used my fellow student Fran to place her hand on top of the armature in the position I wanted.
|
|
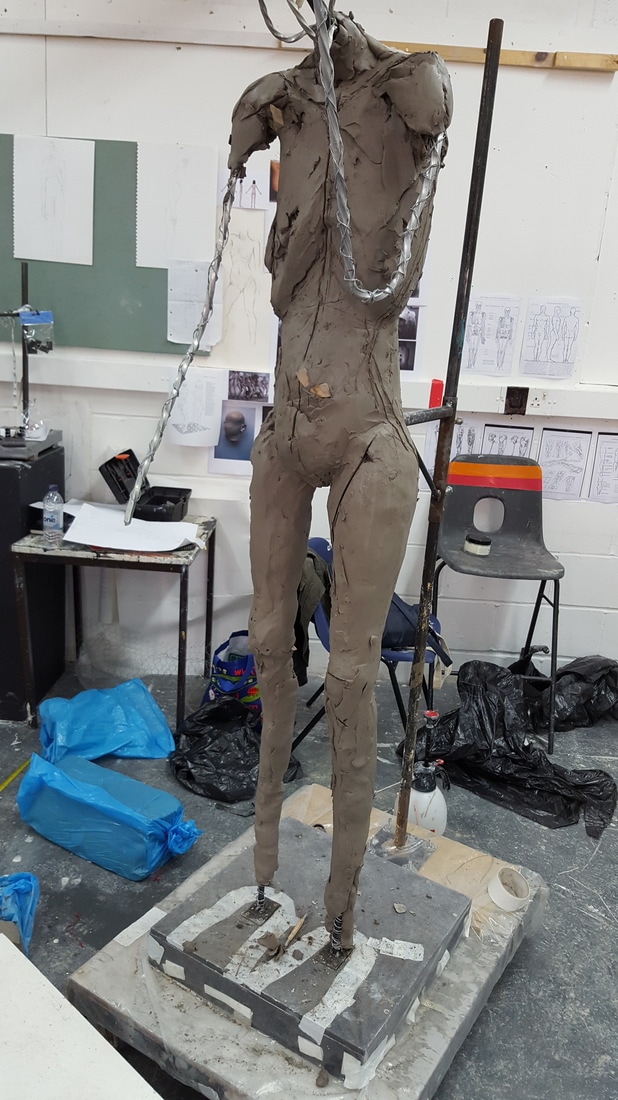
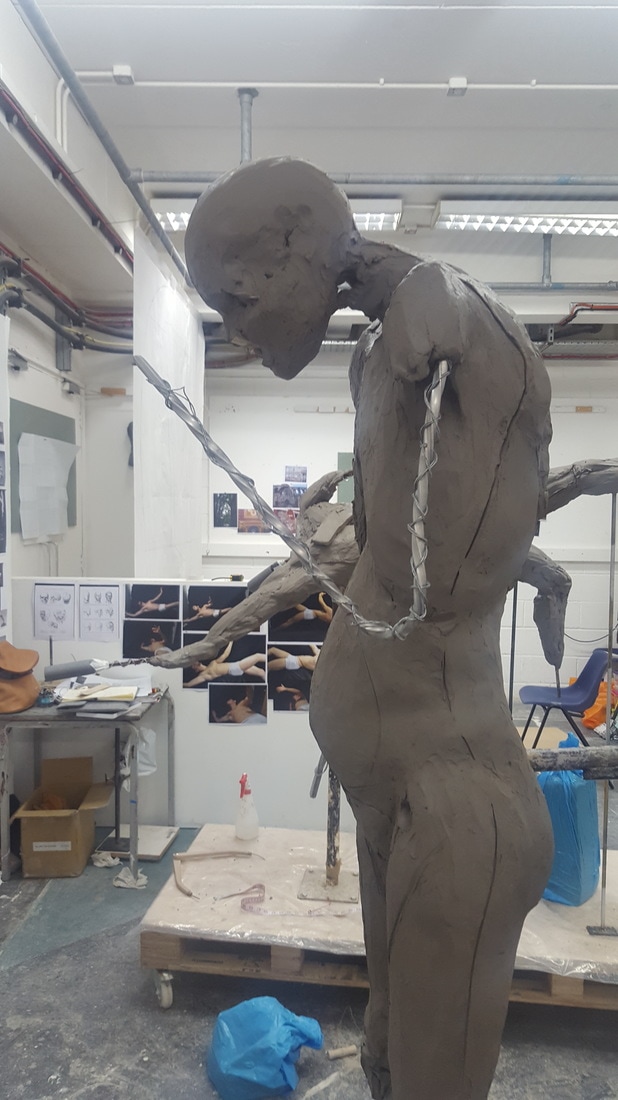
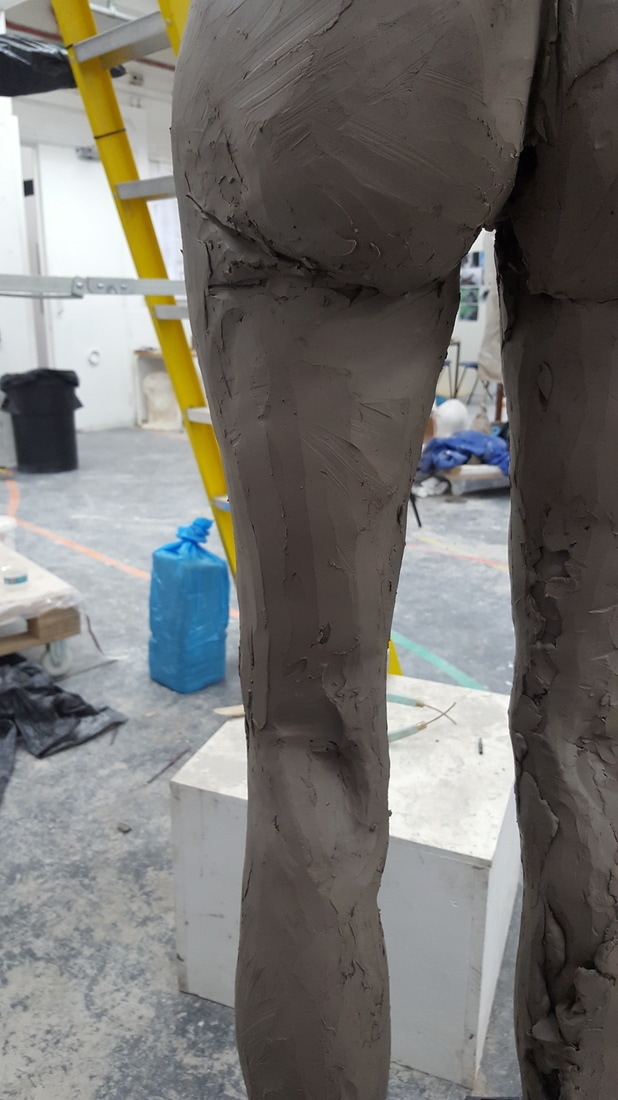
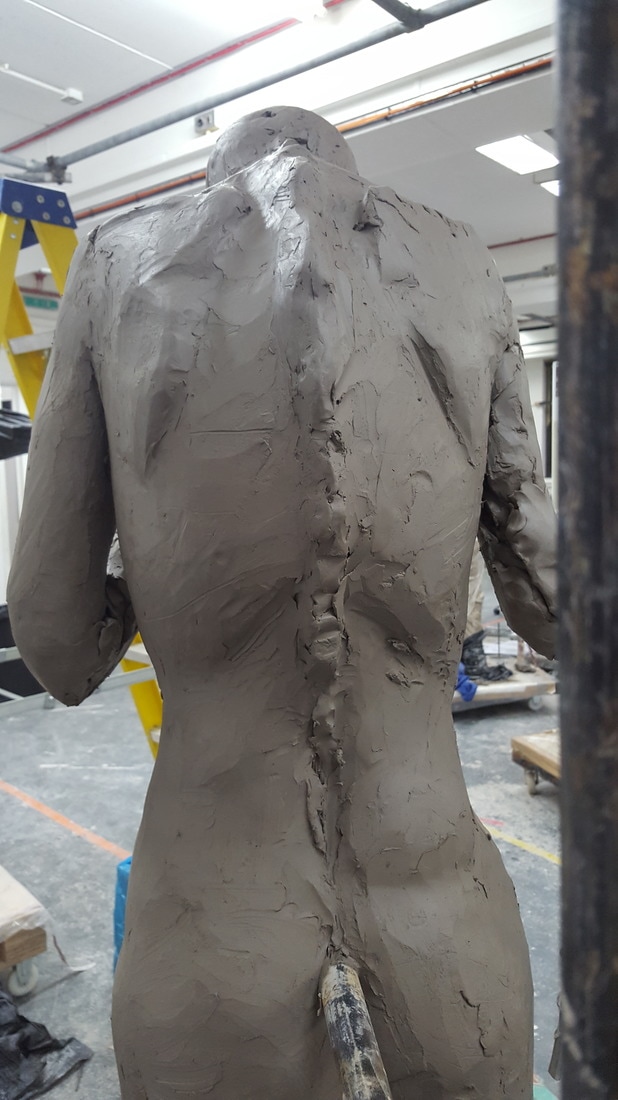
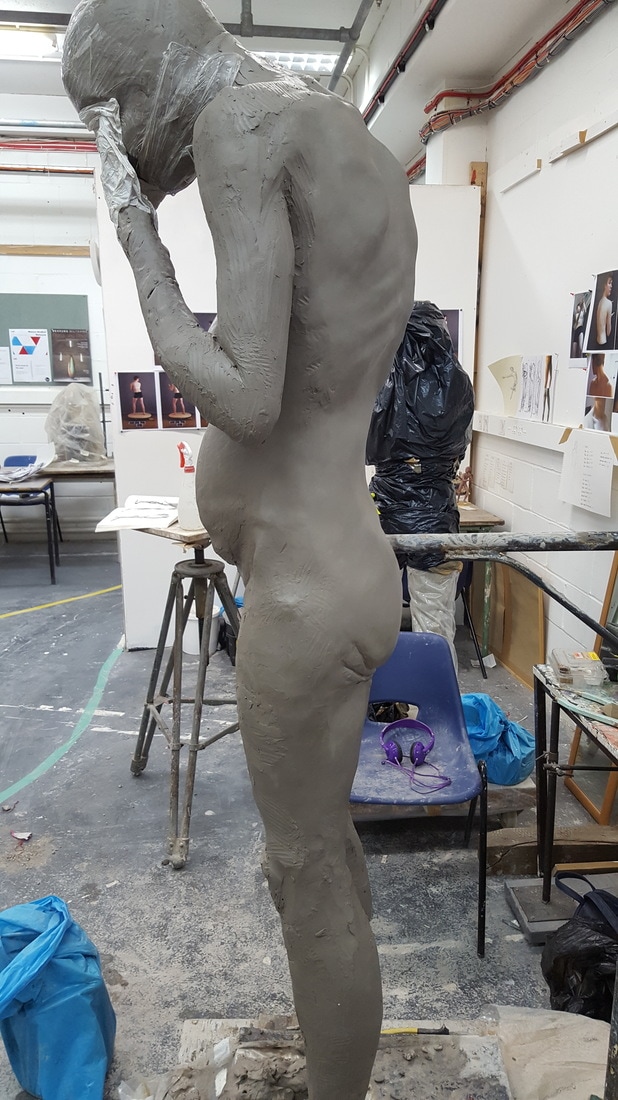
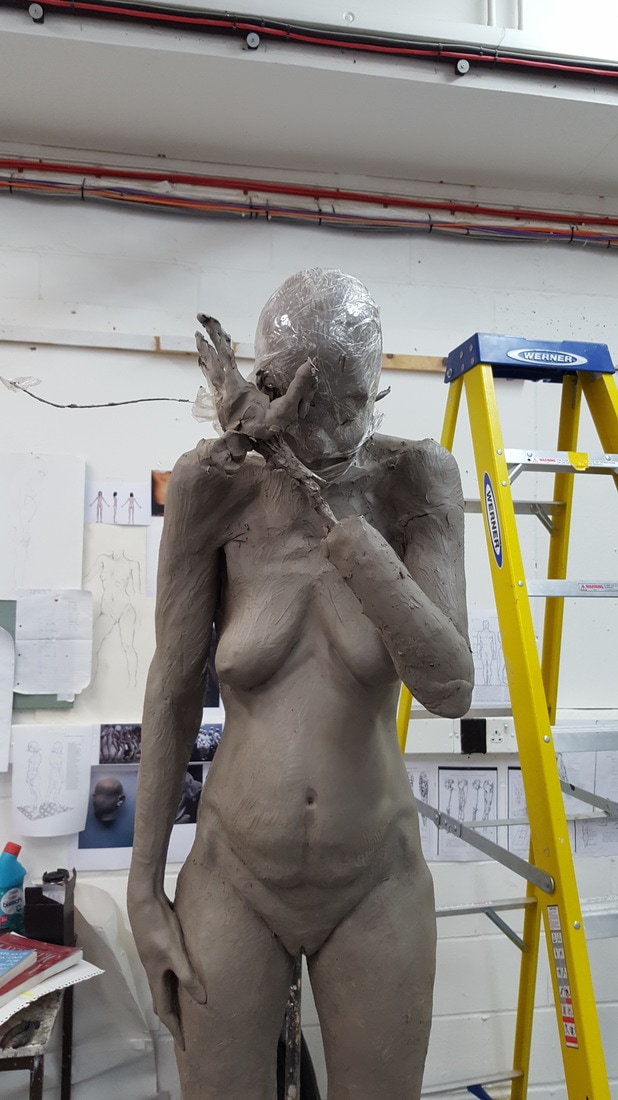
I was happy with how the back section was turning out so I started to smooth out the surface. I later went on to change this but it was good to see how the sculpt was progressing.
|
|
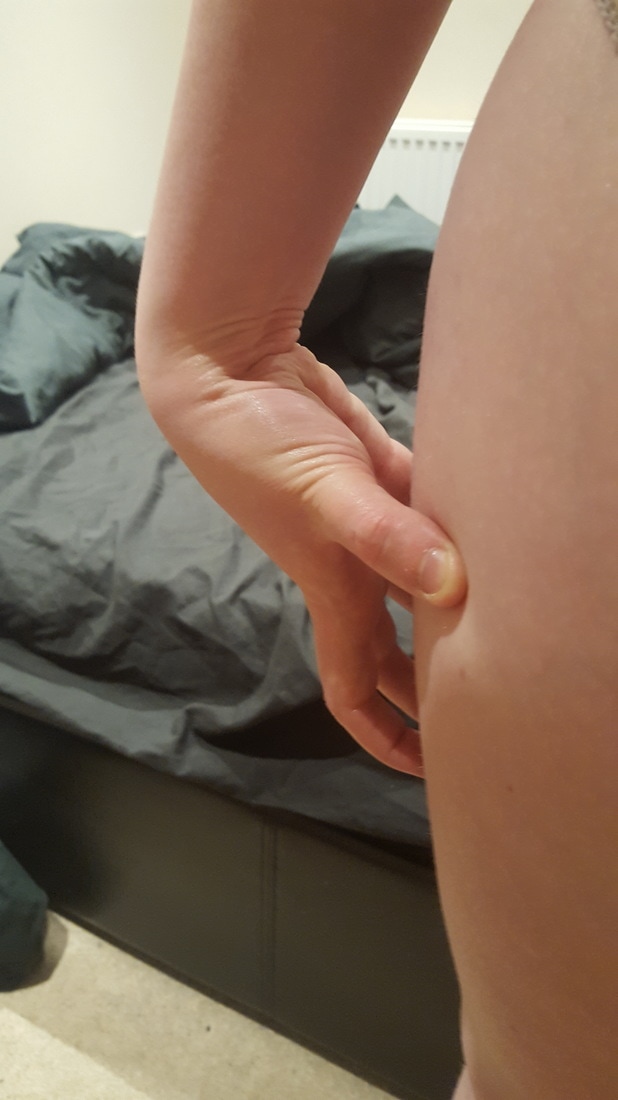
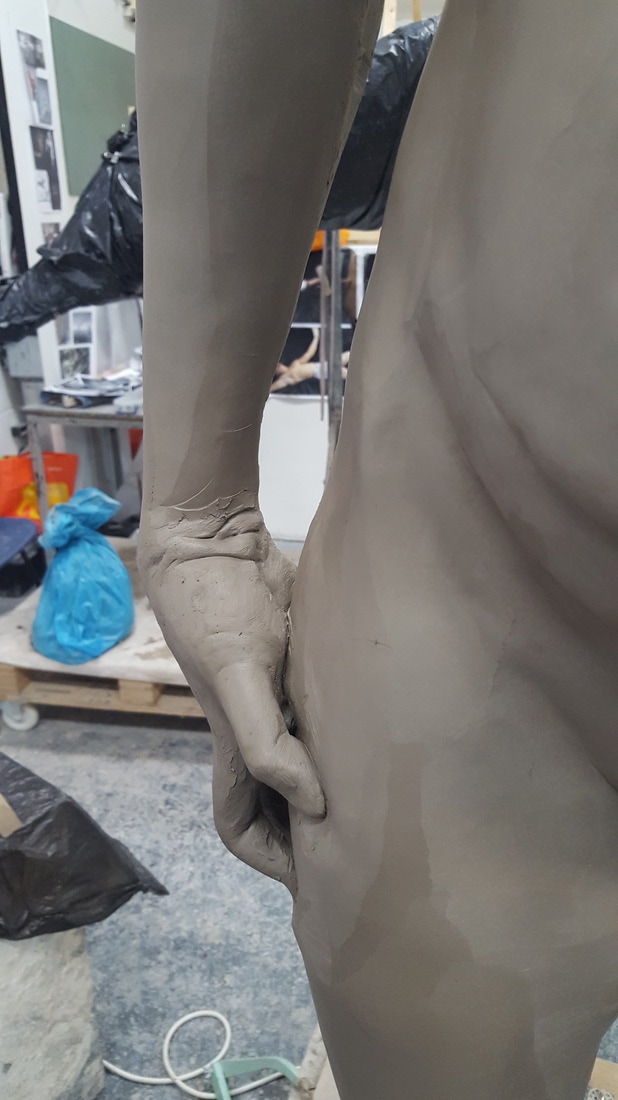
I concentrated on the right hand. This was a difficult sculpt because it was designed to look like it was grasping painfully at the side of the leg. to get clay ( a soft material) to look like it is grasping anything is difficult, I used my own hand as a guide and looked at it in position on my own leg repeatedly.
|

|
|
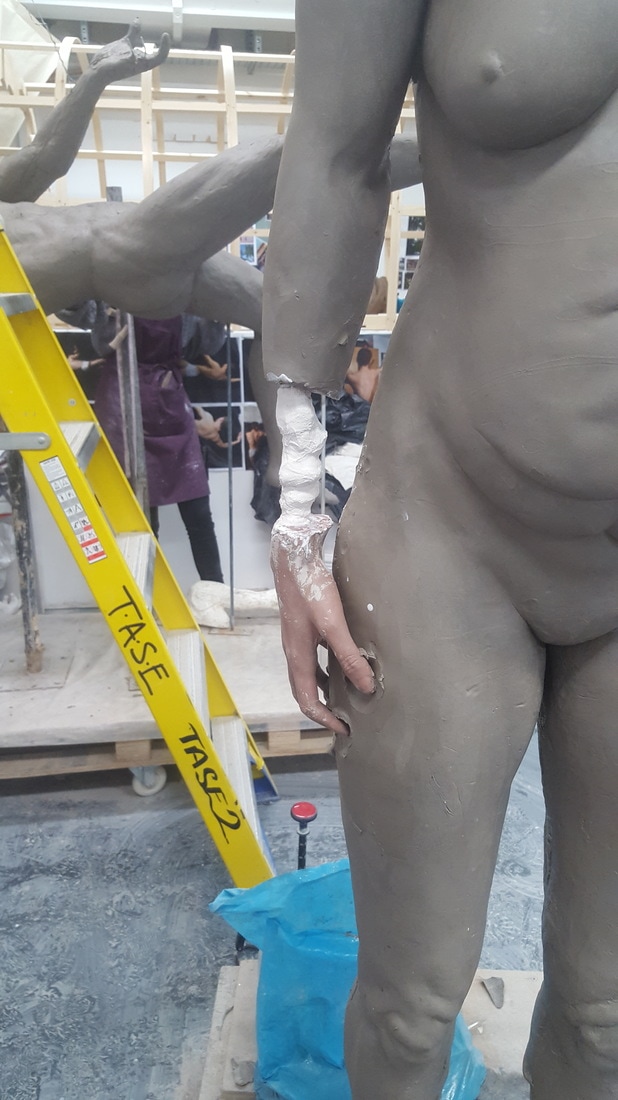
As I was spending so much time working on the right arm and hand, I then began to look at the left and realized that the arm was much too long, an that the arm was in the wrong position. to fix this I simply cut the top of the armature off where it met the hand, and pushed the arm outward so that it was touching the face once again.
|
|
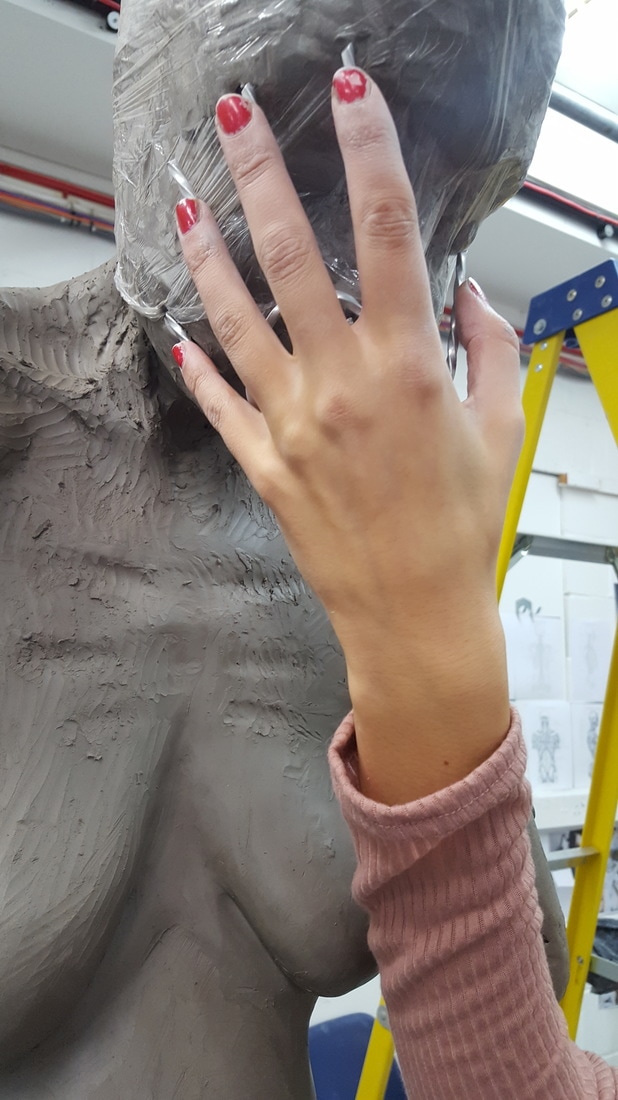
Again as reference for the sculpt I used a fellow student, Rosie as a reference for how the hand will look once the hand is in position and will give me guidance towards sculpting it realistically.
|
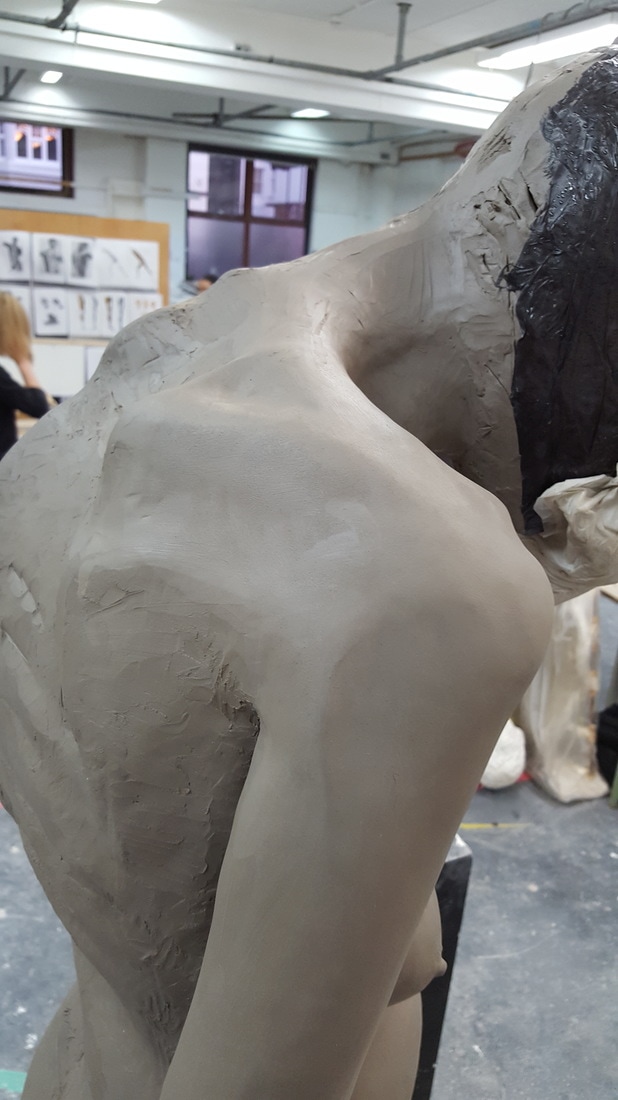
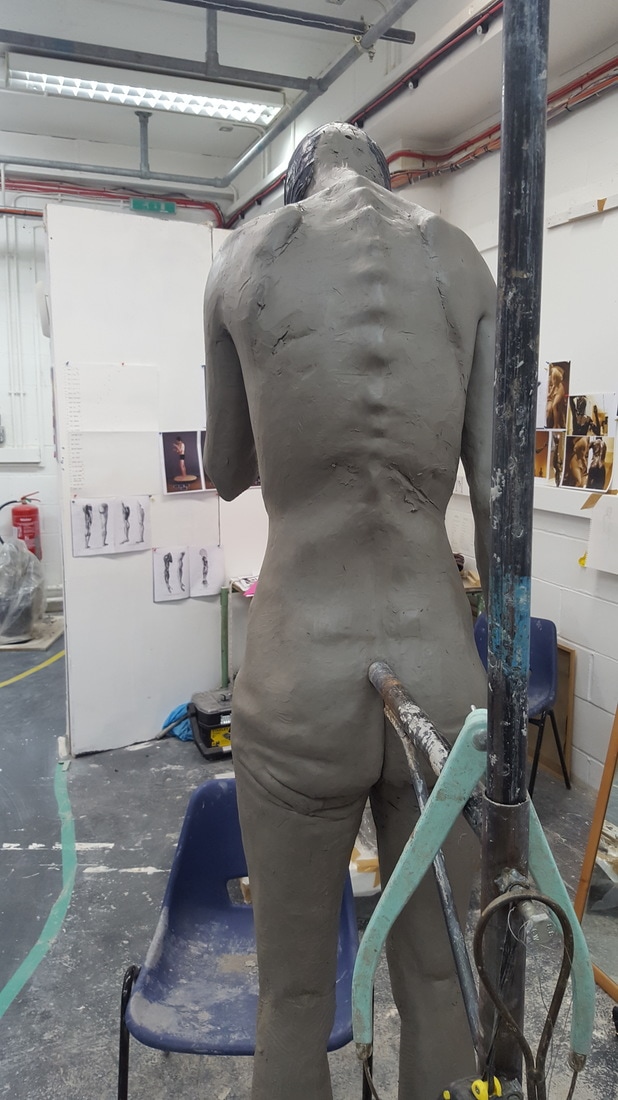
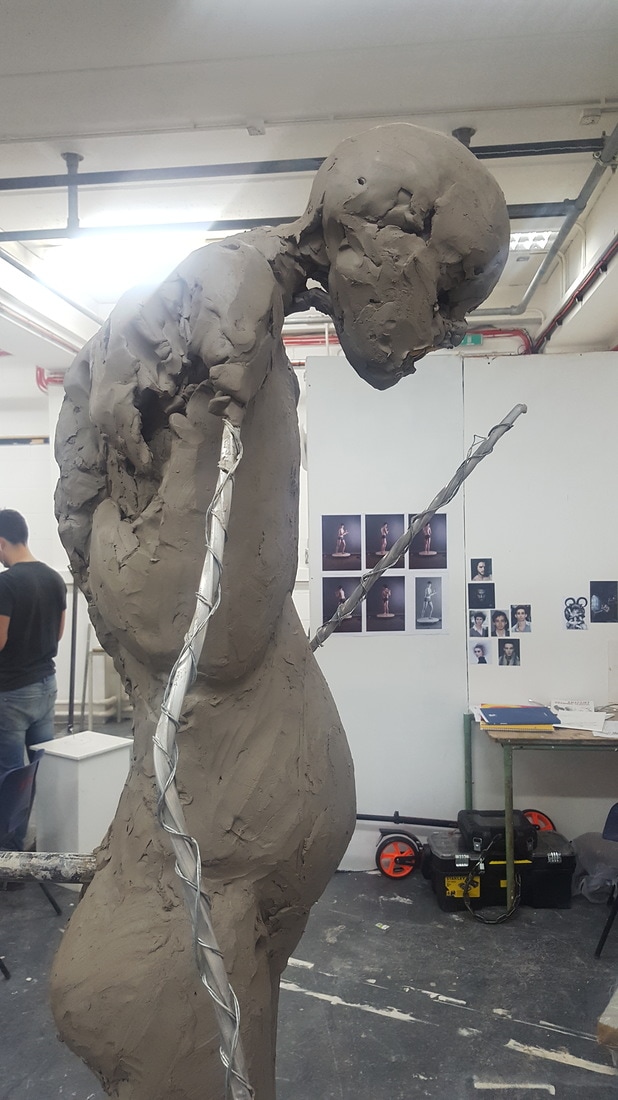
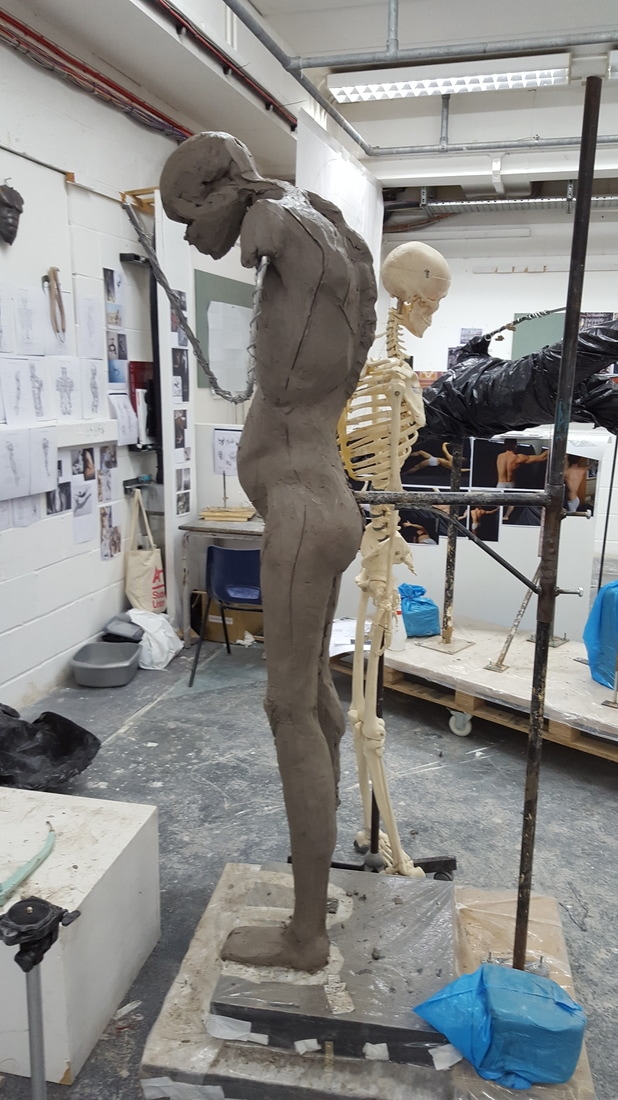
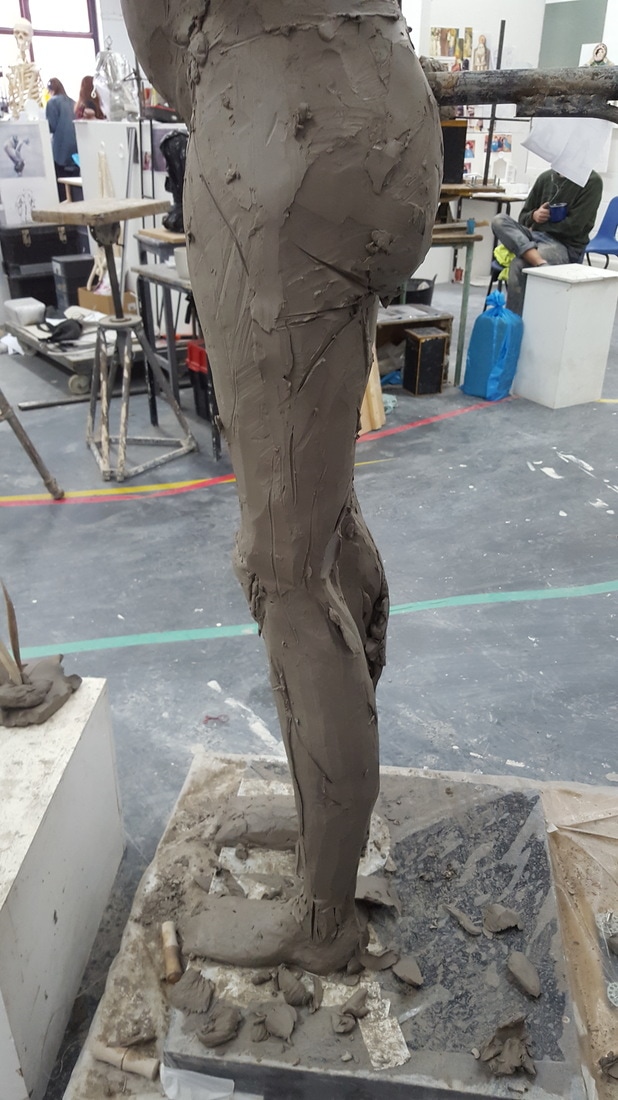
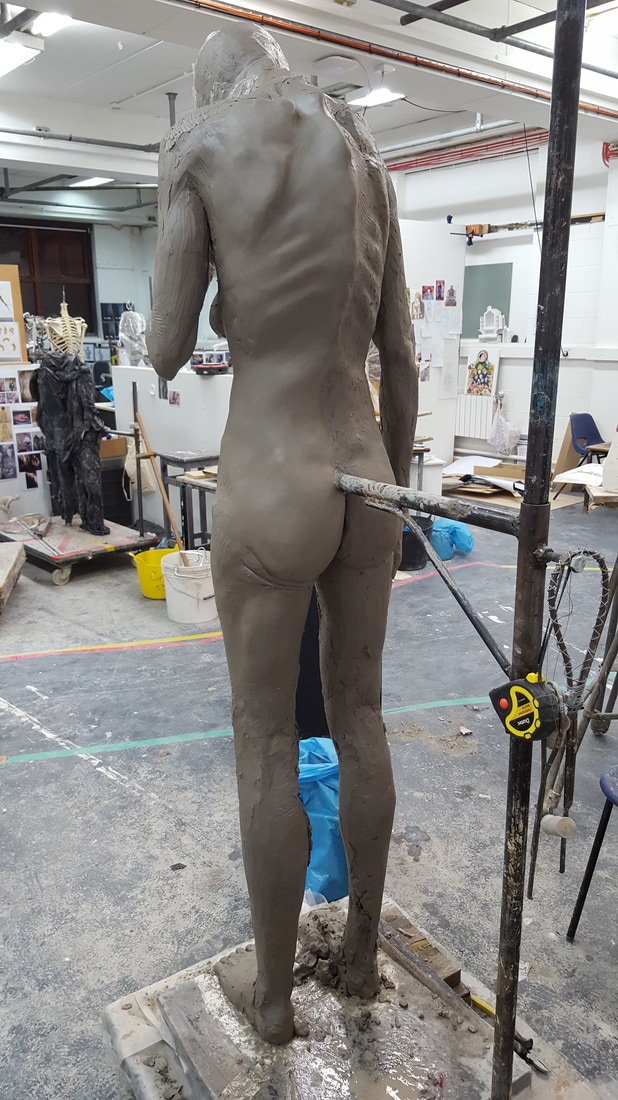
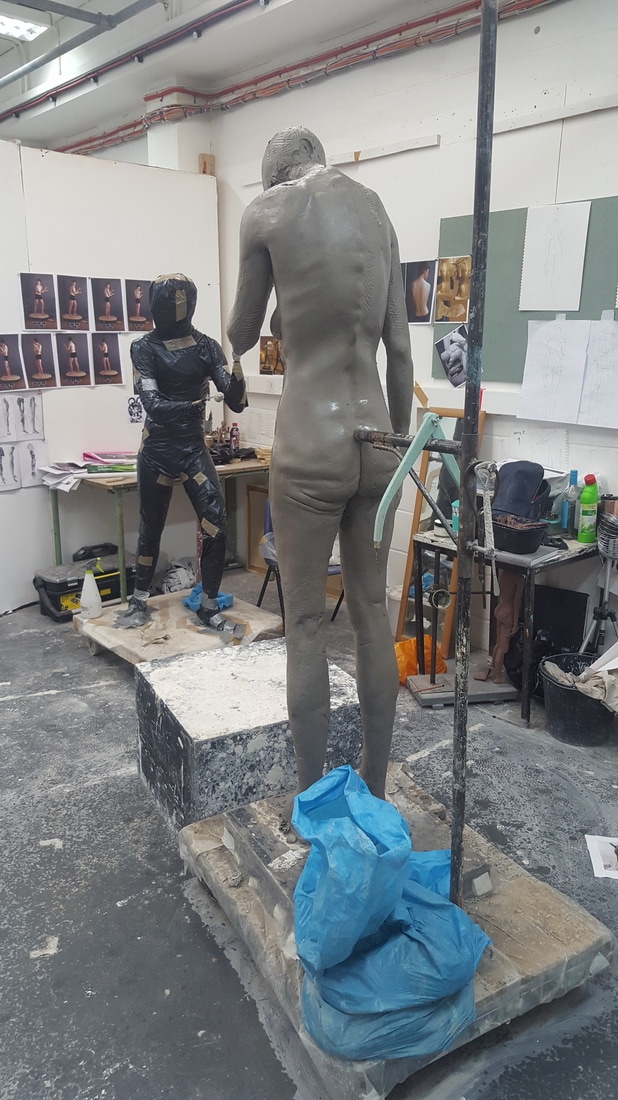
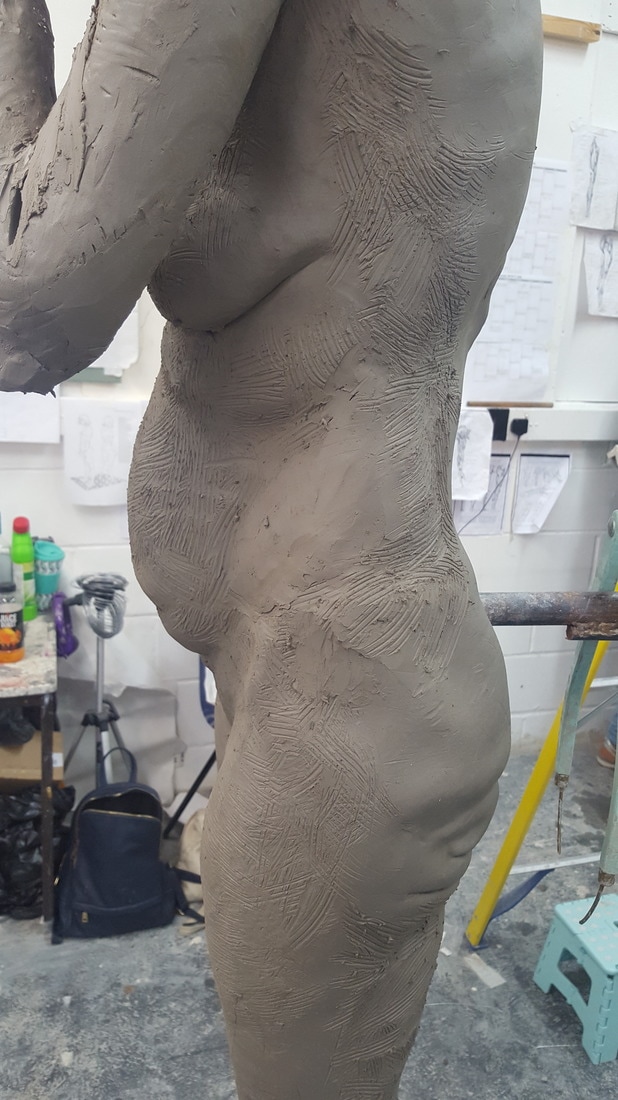
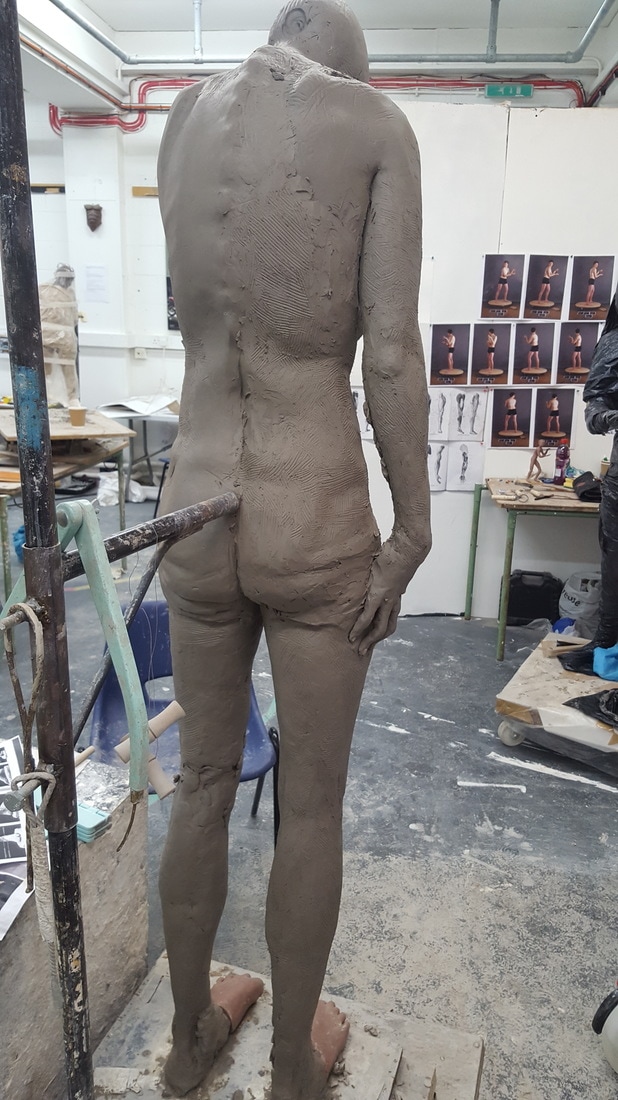
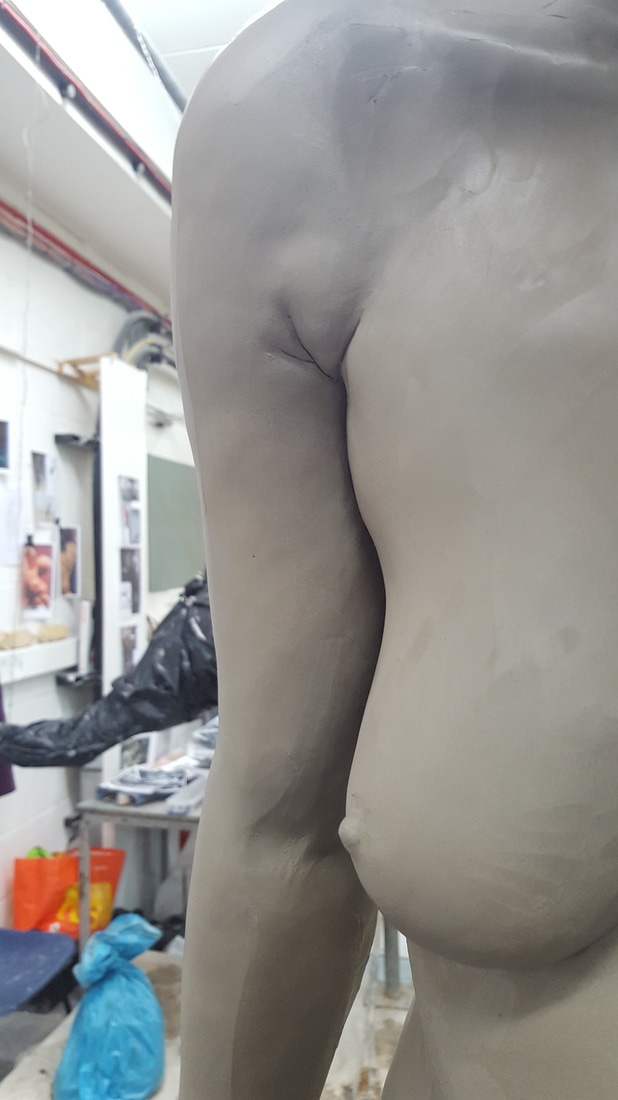
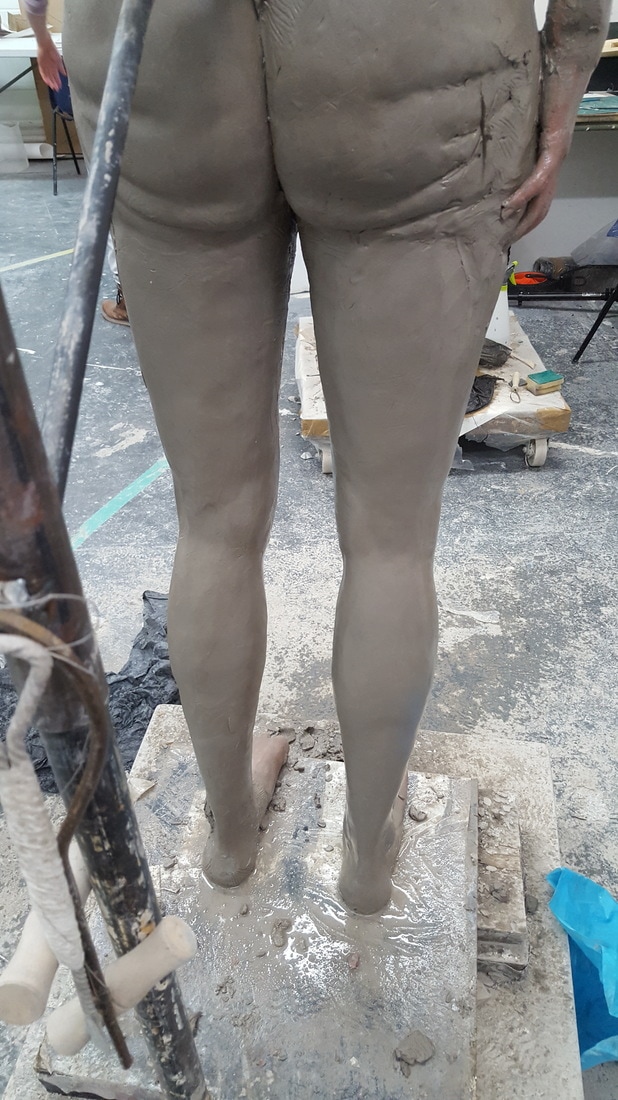
I worked on the back and the ribcage. I was still not happy with how the spine was turning out. my tutor told me it was because it was very symmetrical and sculpture should never have equally spaced or repeated details. The ribcage was by far the hardest part of the sculpture, because I couldn't get my head around how the ribcage curved around the body and could not seem to replicate it equally on each side.
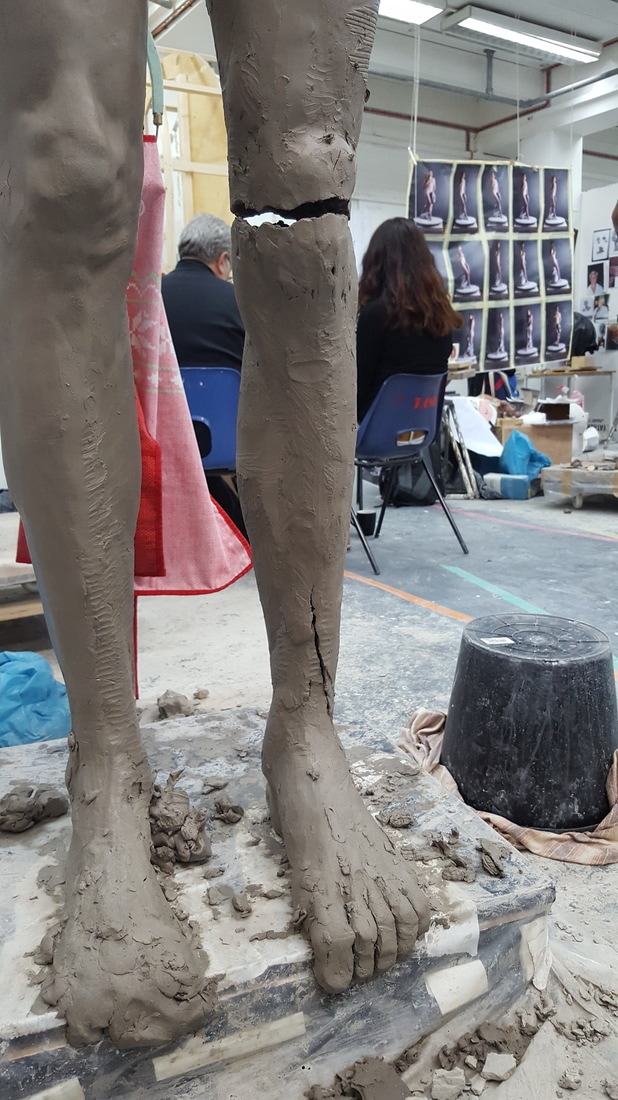
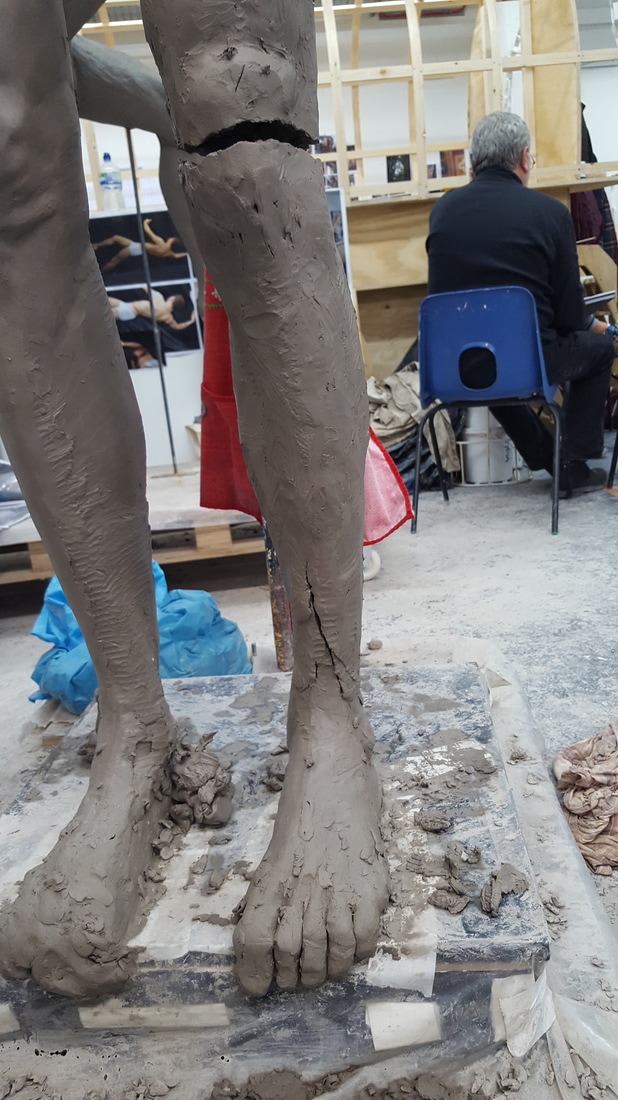


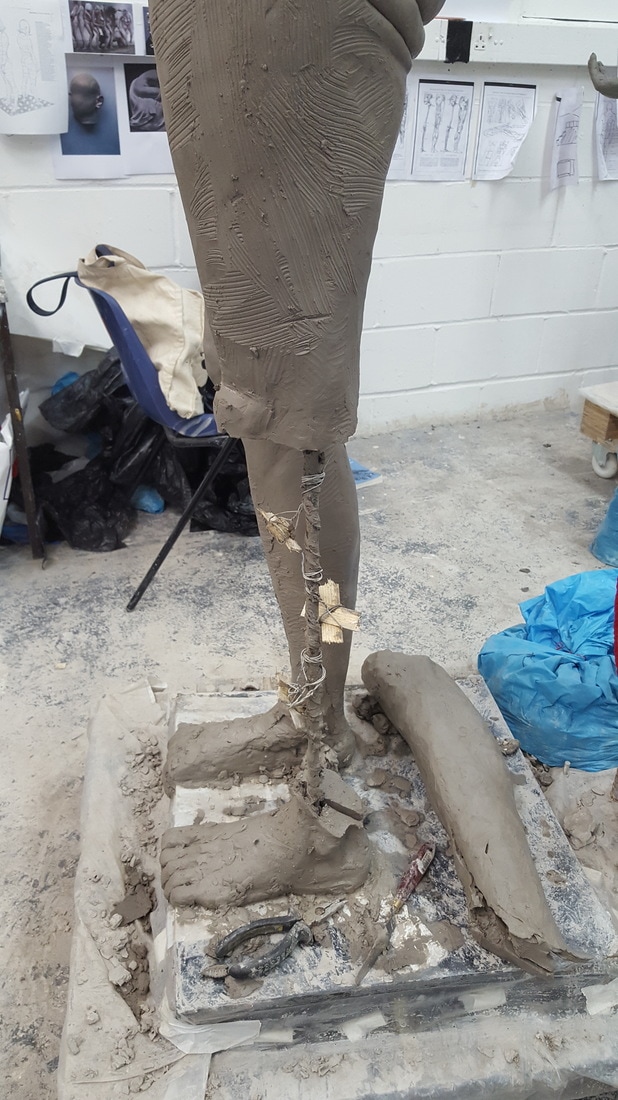
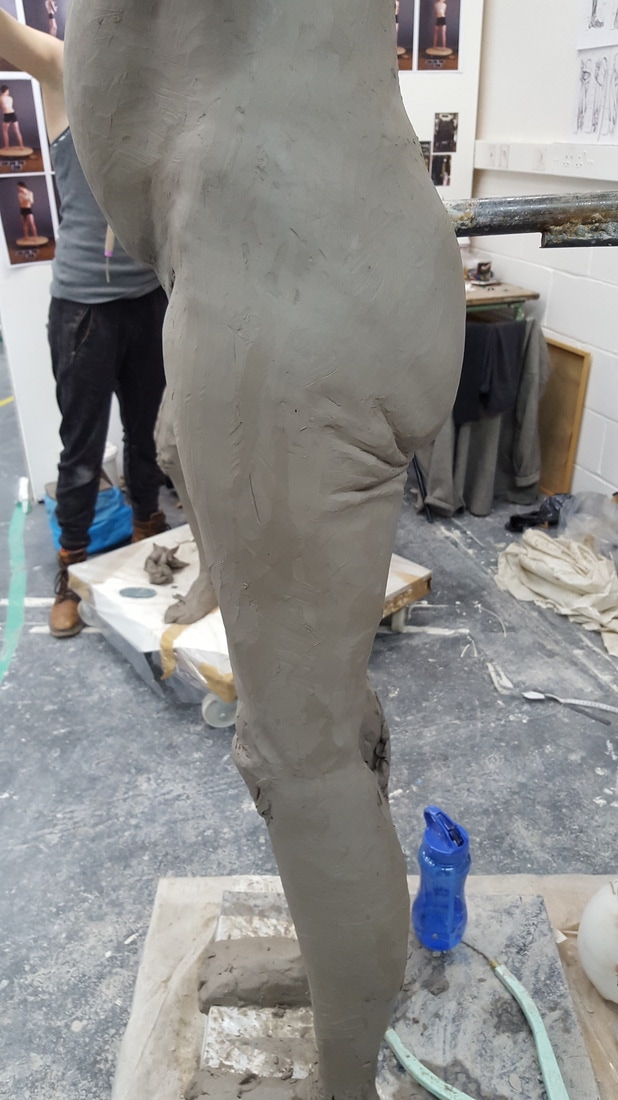
Whilst I was pre occupied with keeping the sculpture wet, I failed to notice that the left leg was beginning to sag. When I entered the studio before Christmas, it had developed into a serious crack in the clay, and the weight of the whole left calf had dropped. The reason behind this was that the left leg had little to no support in the way of butterfly clips, and as the clay was getting wetter and wetter the weight of it began to slip down the armature. To fix this I simply cut the calf at the knee and removed the clay from the armature. I then went on to attach several butterfly clips onto the armature and proceeded finally to re apply the clay leg. Luckily it was a relatively un worked area of the sculpture so I simply carried on and eventually sculpted it correctly.


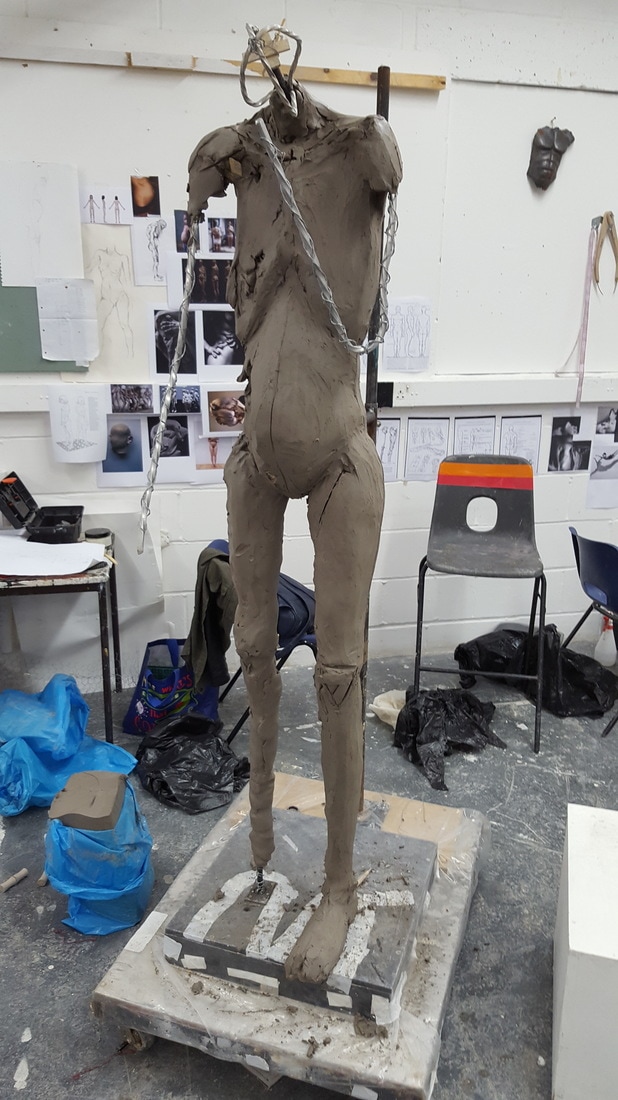
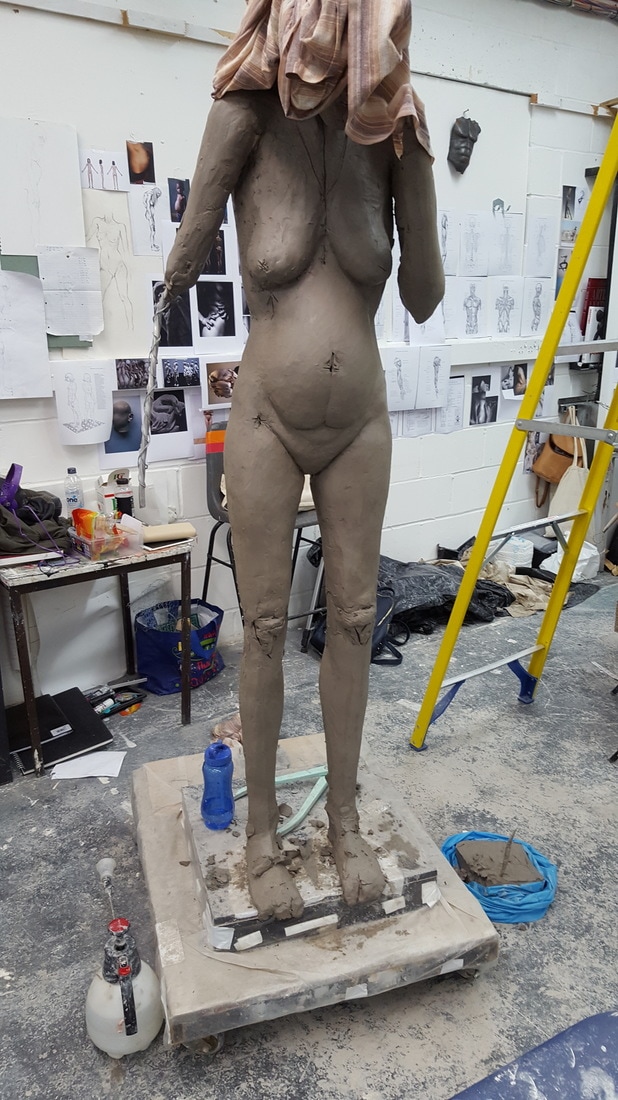
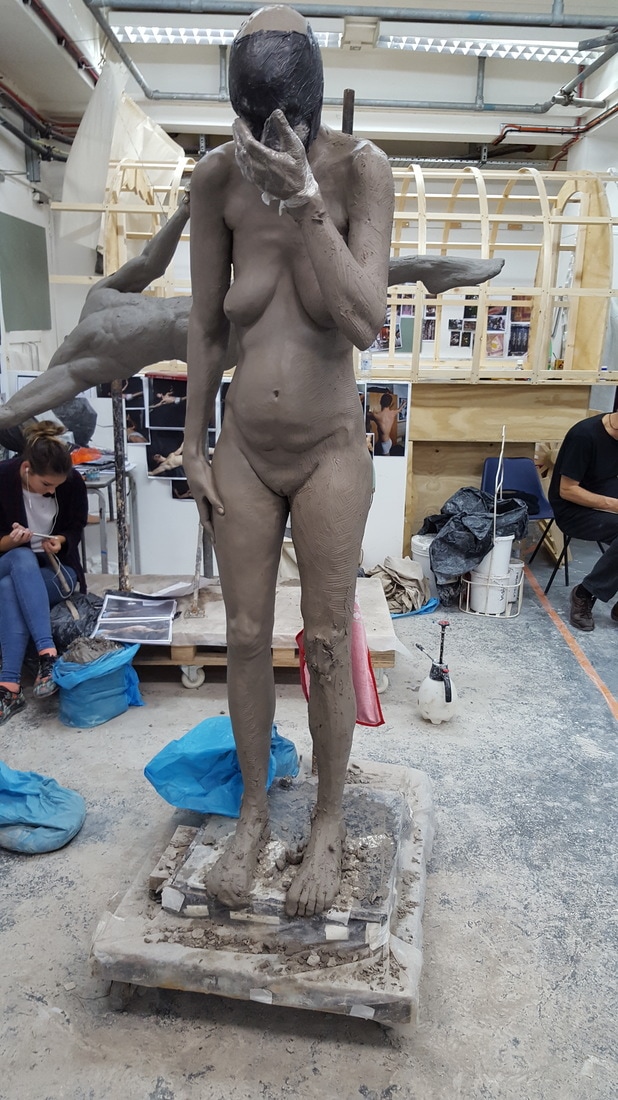
This is what the sculpt looked like before term ended and we left for Christmas.as we would be away for Christmas break for 4 weeks, it was crucial that we kept the clay wet and workable. This was done by first covering the entire sculpt in a brand knew wetted down bed cloth, and then wrapping that tightly within a couple of layers of Clingfilm. Then this was wrapped in a layer of heavy duty black bin bags. The whole idea is to get as much air away from the clay as possible before wrapping in the top bin bag. Air is the cause of clay drying out, so all areas of the sculpt was wrapped as tightly as possible and taped down, such as the feet and around the back iron. Black bin bags were used because it stops sunlight entering and causing fungus to build on the surface of the clay.
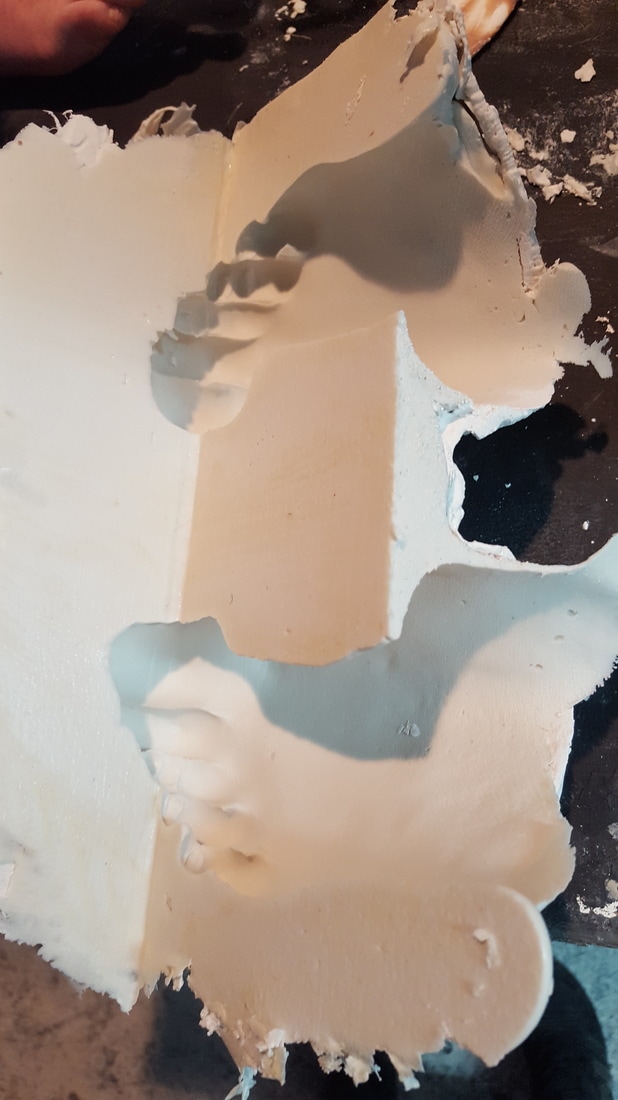
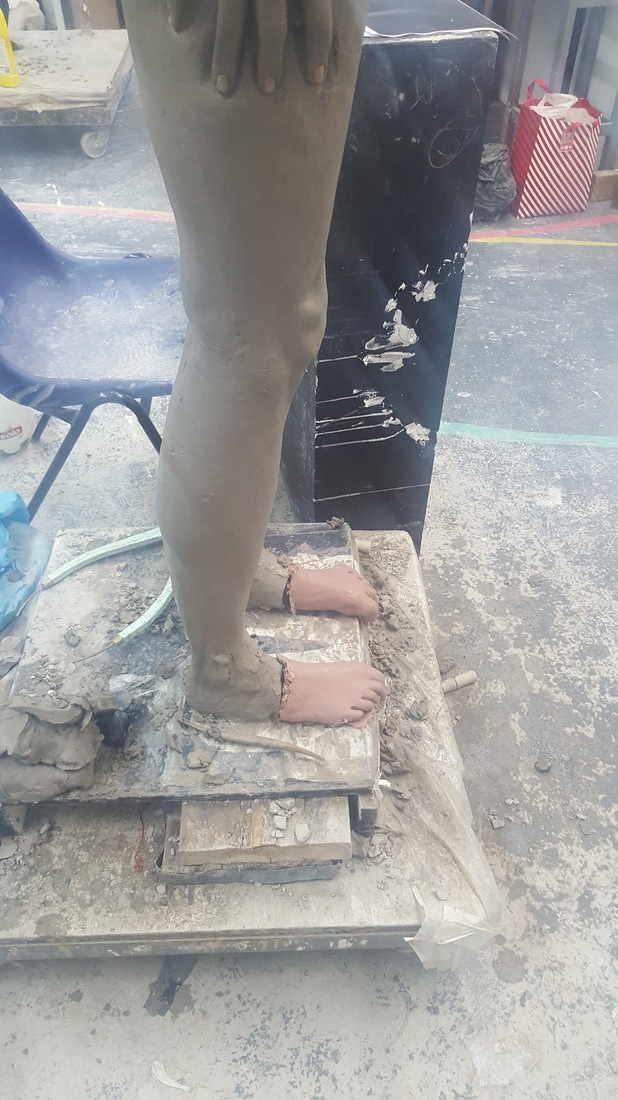
When I came back from Christmas break, the deadline for moulding the figure was looming, and I couldn't spend enough time on the hands and fee as I would have liked to. It was this time constraint that I decided that the feet would be cast from life using a fellow student as my model. I moulded the feet in alginate, making sure to have the models feet curving over a straight edge. I then cast the feet using monster clay, and simply attached them to my clay model.
|
|
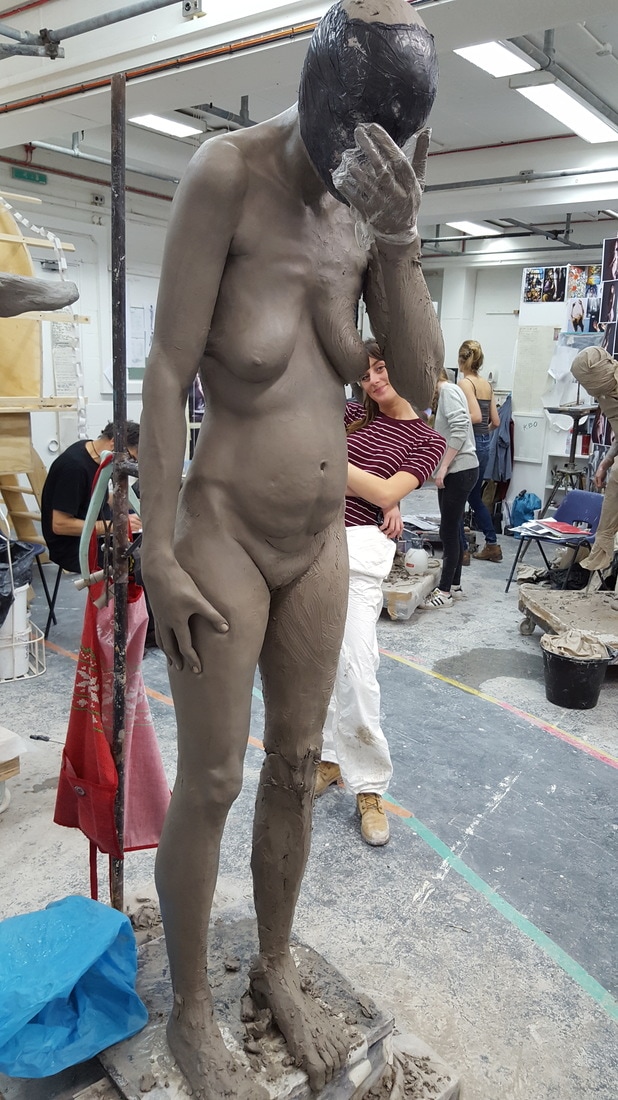
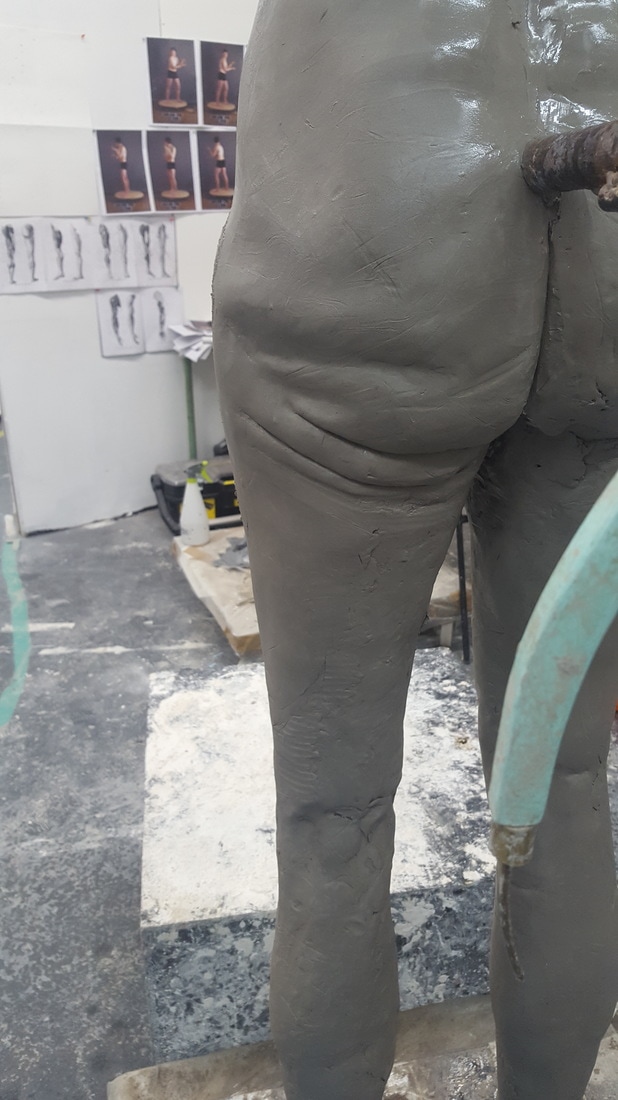
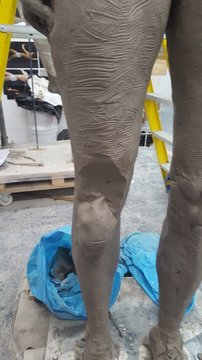
The sculpt had reached a point where I was happy with elements of it and others not so much. There were areas which still needed to be built up as they were too thin. so I used a handmade loop tool that was wrapped in a thin wire that would create the scratched quality you see in the photos, this was a good way of sculpting the clay and being able to keep a consistency all across the sculpture. I used the loop tool probably more than any other at this stage in the project, it was a key tool that I couldn't have done without. The tool also let me take clay away and by sculpting in the direction of the muscles I could achieve a more realistic interpretation of the muscles.
|
|
Whilst I was defining the muscle groups of the legs using my loop tool, I realized that the perportions of the leg were off. I couldn't figure out why I was having such a difficult time fitting in all the muscles until I realized that the measurement of the knee was off by 20cm. I simply re-measured, cut the knee down and positioned it lower. I could now fit all the muscles and the sculpt ended up looking all the more better for it.
|
|
|
|
|
Although initially I was happy enough with the arm and hand I had created, I began to think of how I could make it more realistic with the time constraints I was under. I needed reference for this complex part of the sculpt, so I used a fellow student and myself to help me understand it better. Even after working on it for a few days I just couldn't get my hand to the level I wanted it, so I decided to do the same as I did for my feet and cast them from life.
|


|
|
|
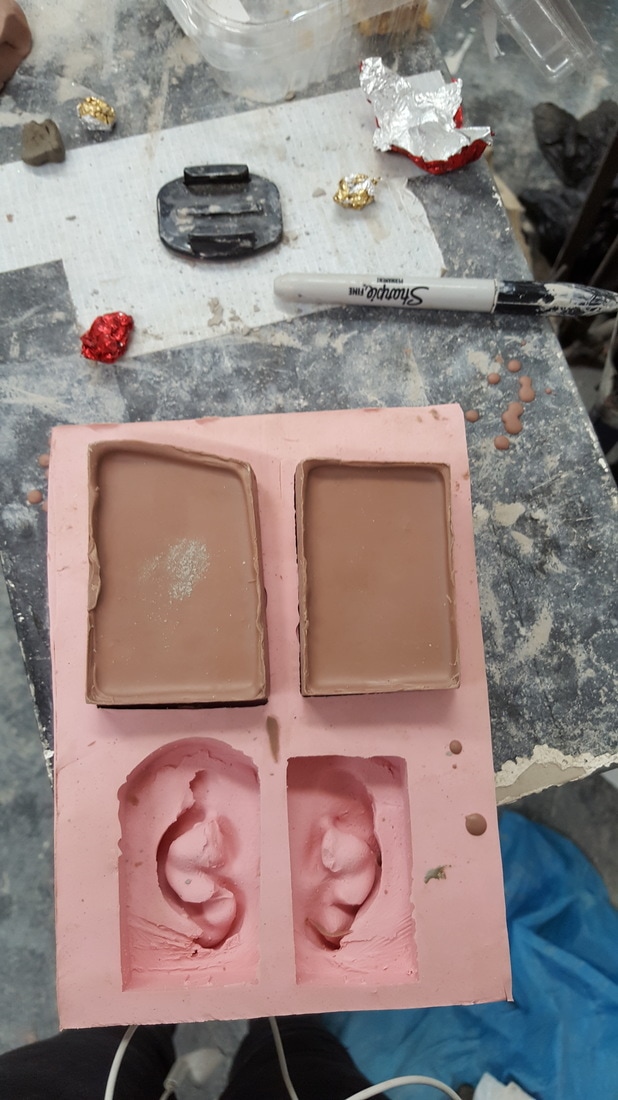
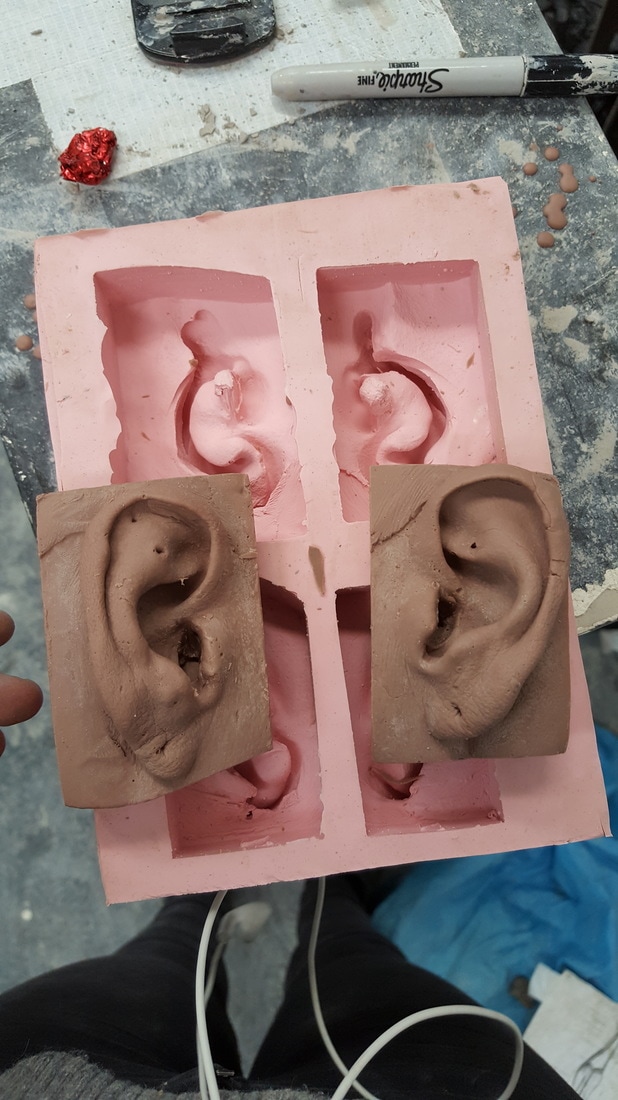
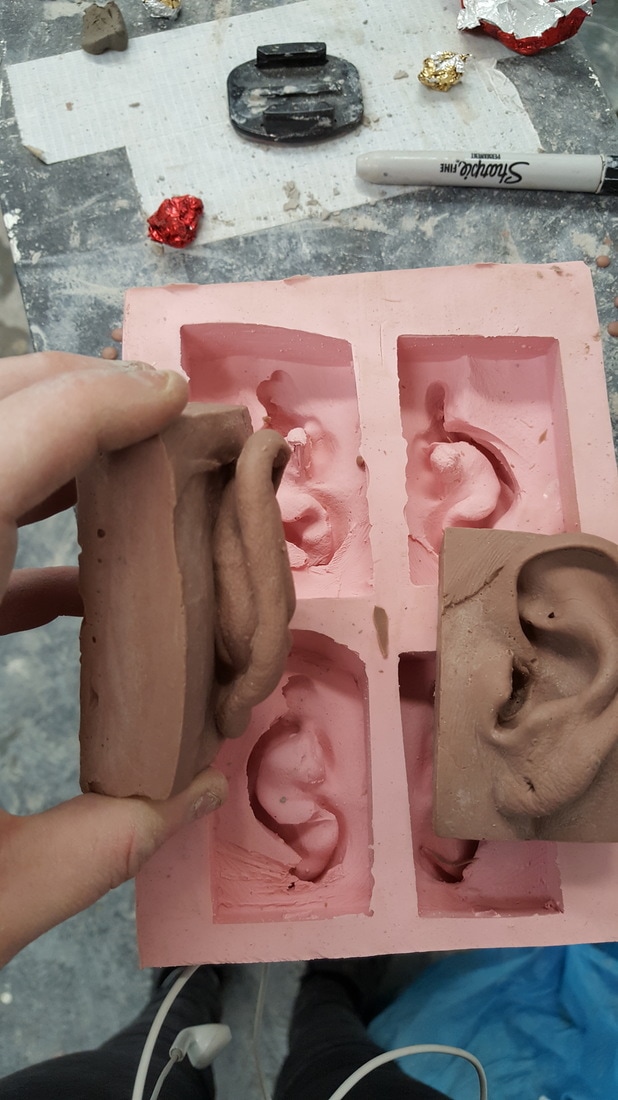
I also decided to cast the ears from life to add to the realism of the piece. I did this by using a silicone mould that was made using a life models ear. I simply heated monster clay up till it was liquid and poured into the mould and waited till they were solid. They will be sunk into the clay head and the joint smoothed over.
|
I began adding detail to the stomach. I wanted the stomach to be a counterpoint of the sculpt, and even though some of the details were fictional, and technically impossible for a human to have I wanted to add an aspect of grotesque to the belly. As my stomach is a major factor of what I don't like about my body I wanted the belly to look almost non human and to seem like someone who has lost a lot of weight in a very short time.
|
|
|
|
|
I was now at a stage where I could begin the process of fine tuning the details I liked and adding small details to the sculpt. I also at this stage started to smooth out the surface of the clay ready for casting, as I was soo near done with the sculpting element of the project I sill decided to make both hands out of monster clay.
|
|
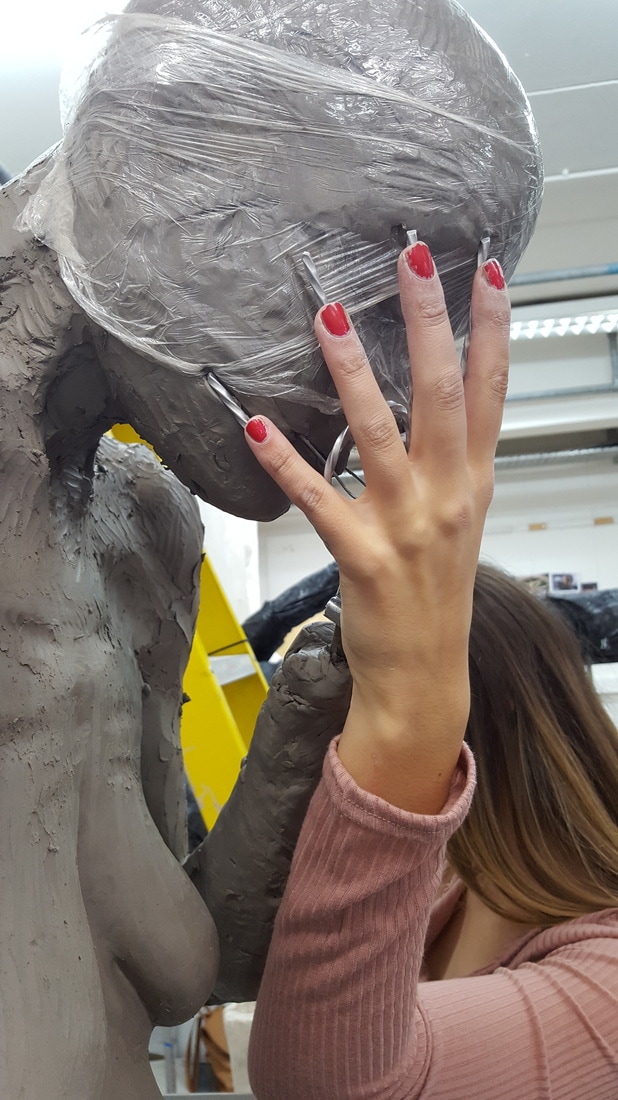
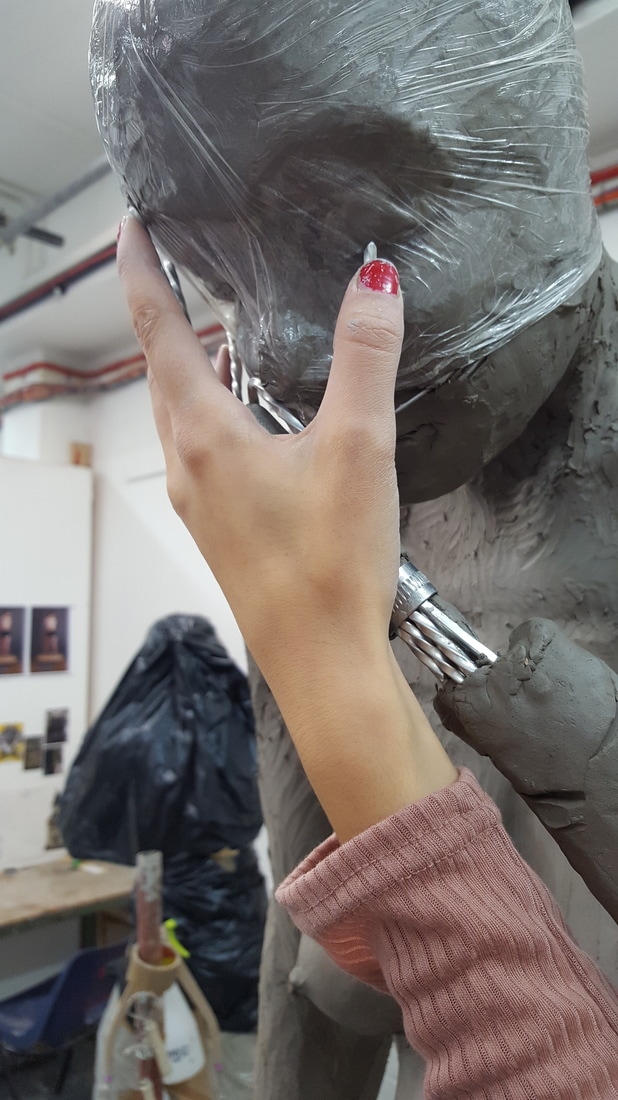
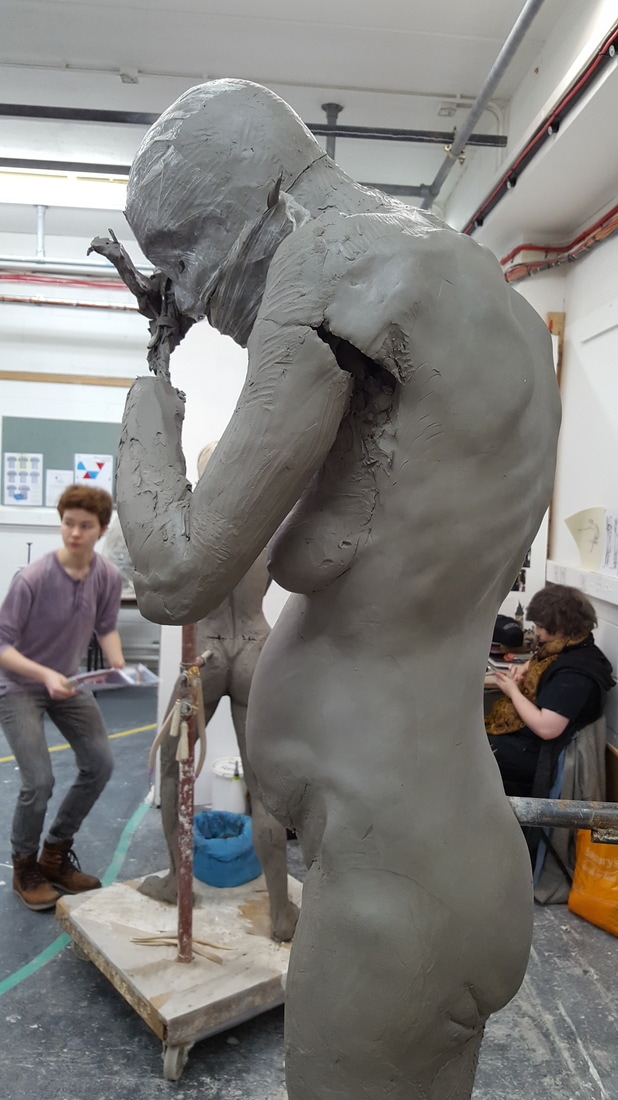
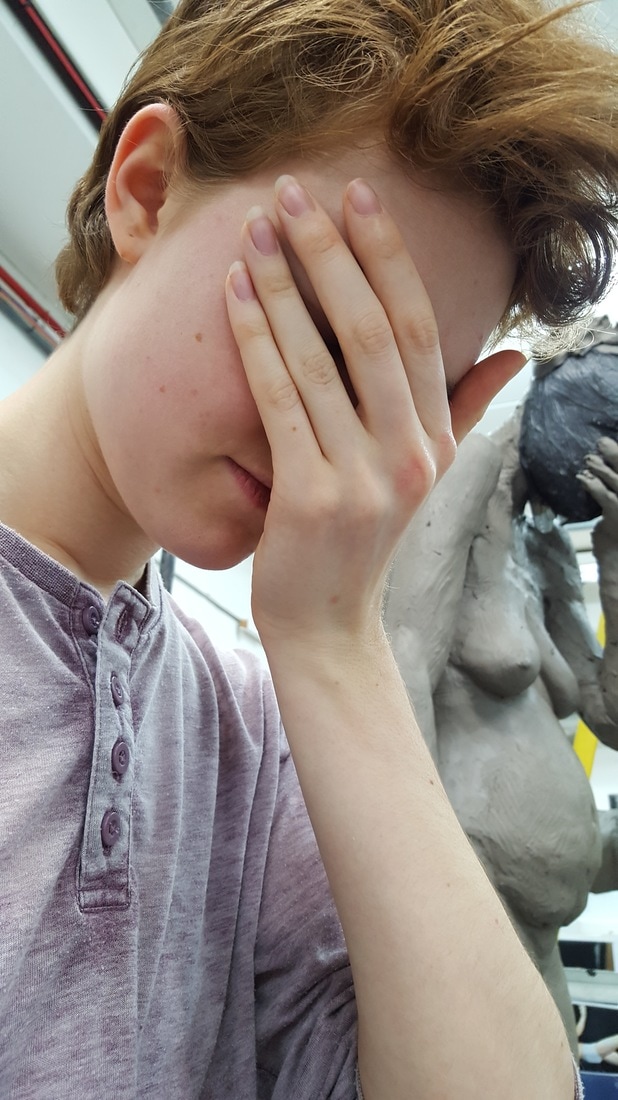
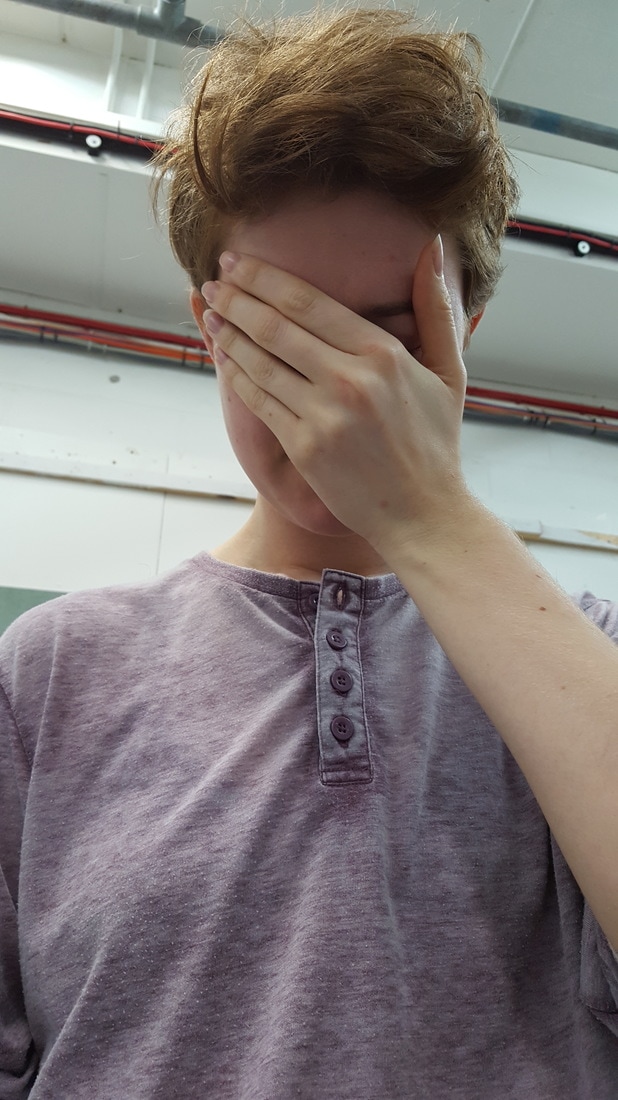
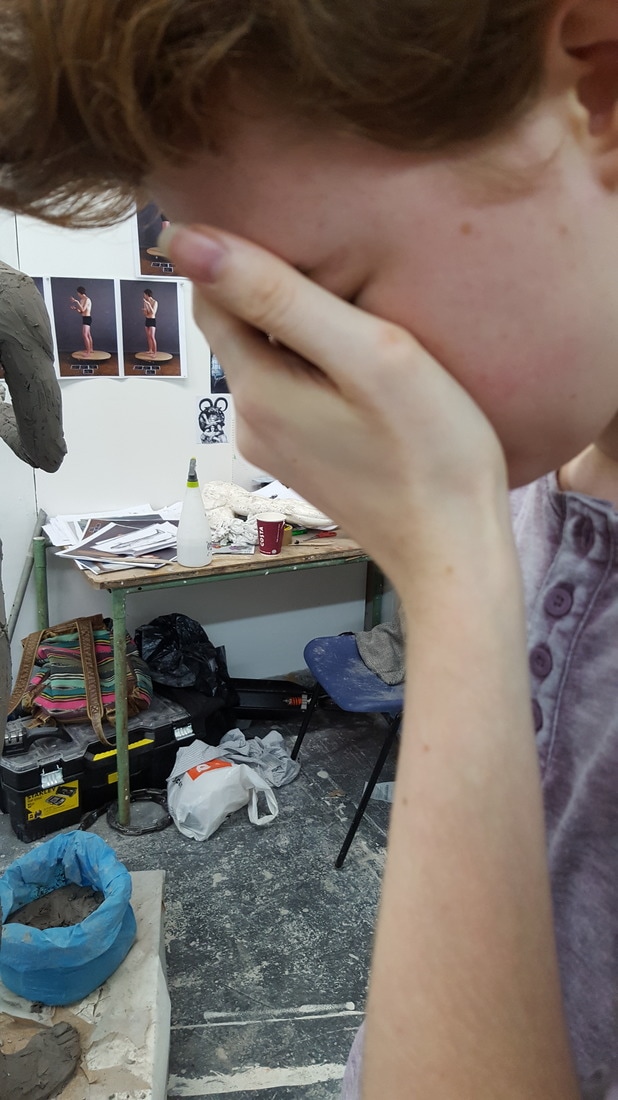
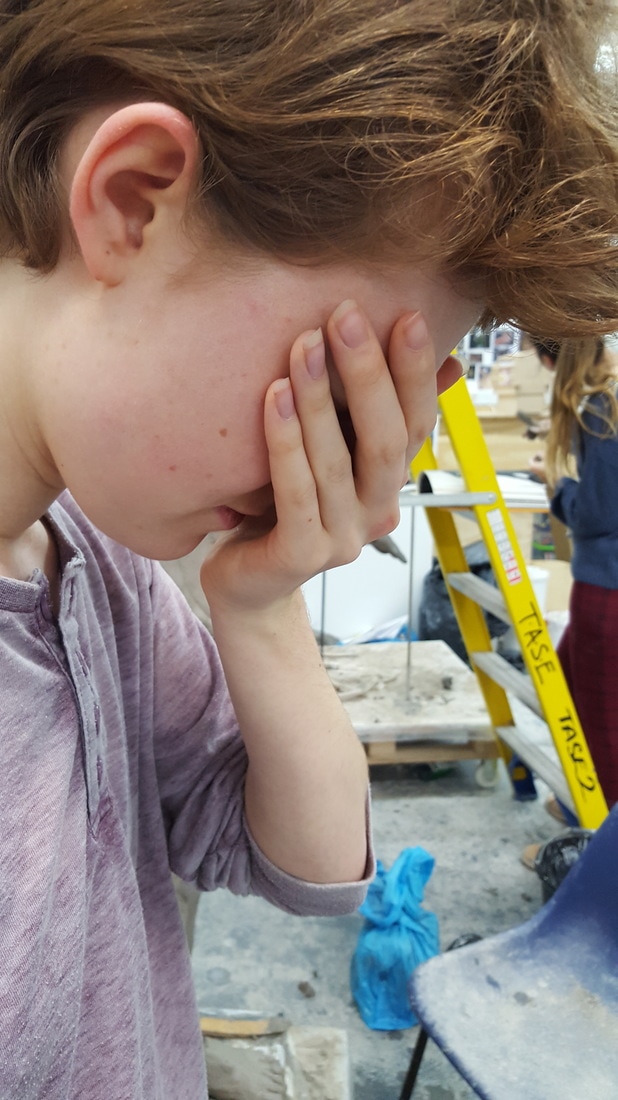
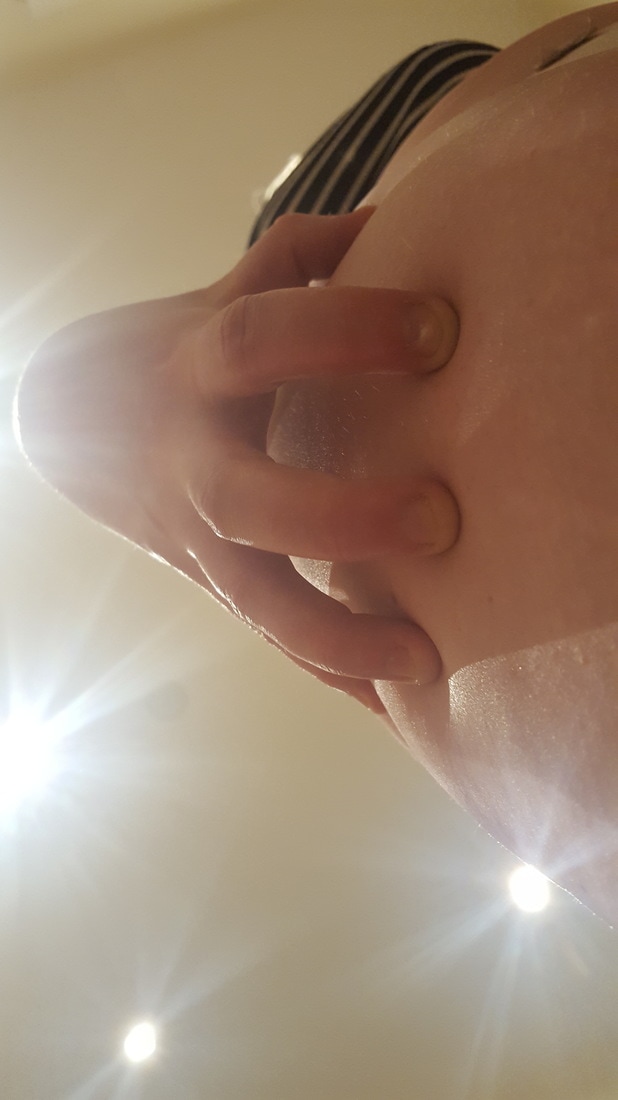
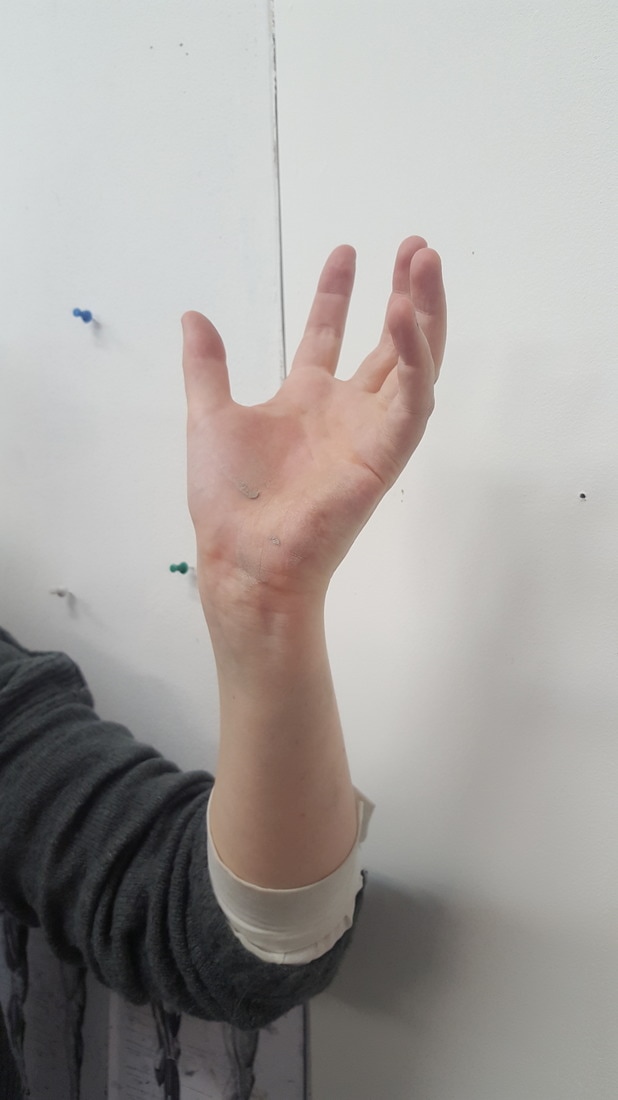
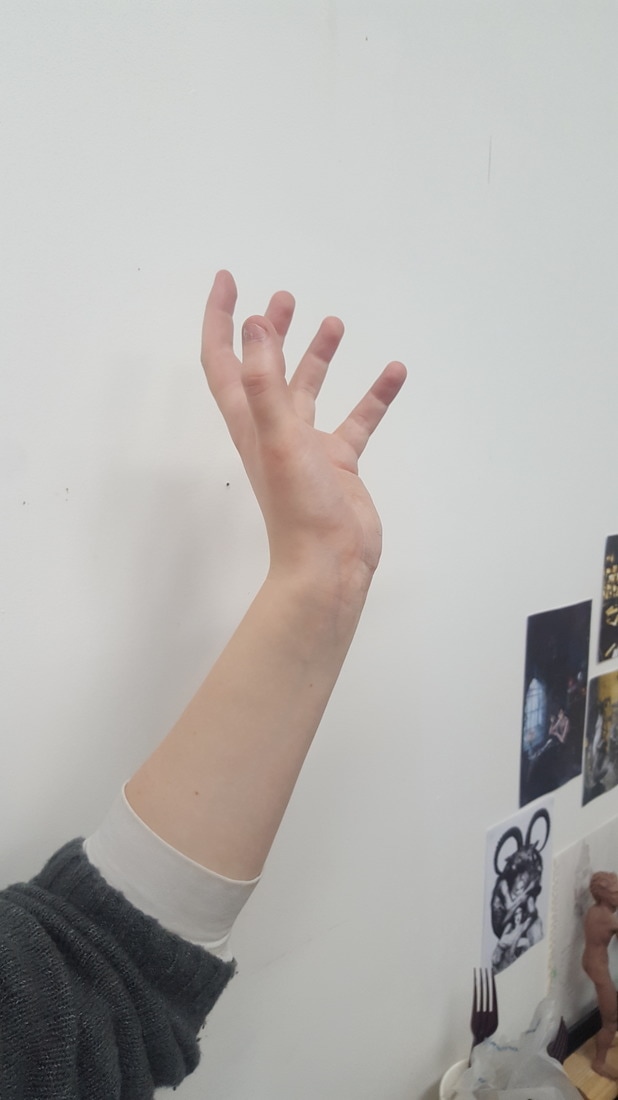
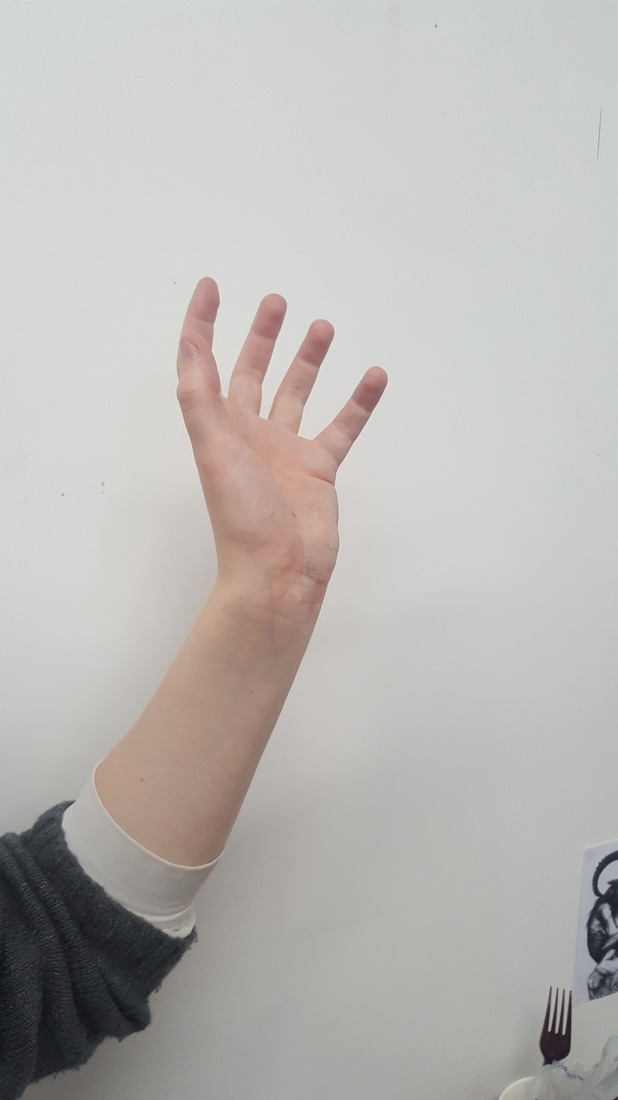
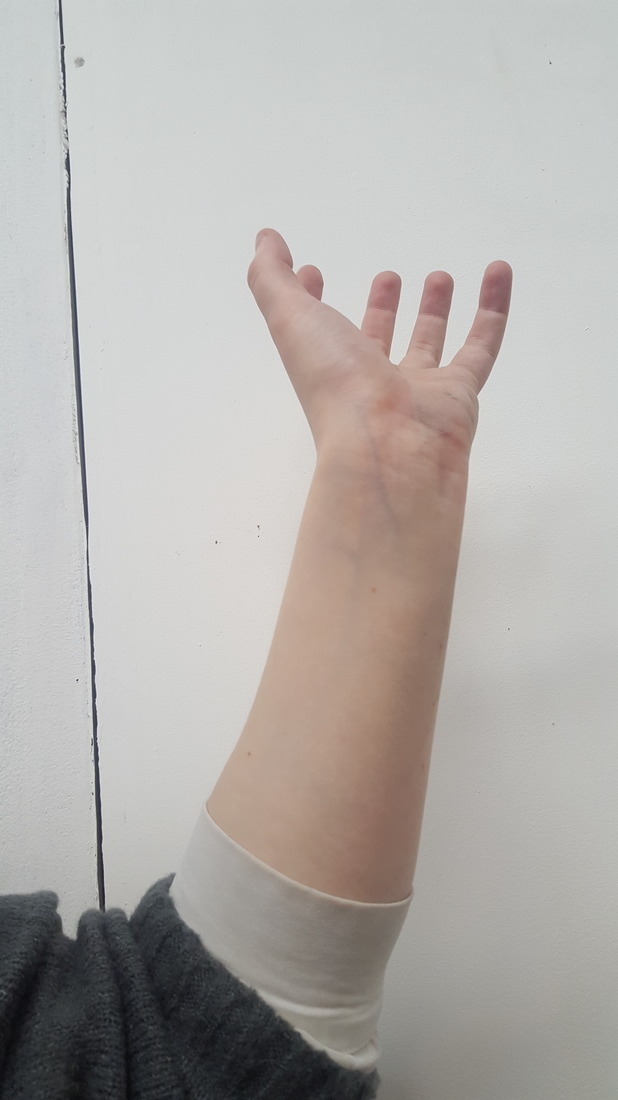
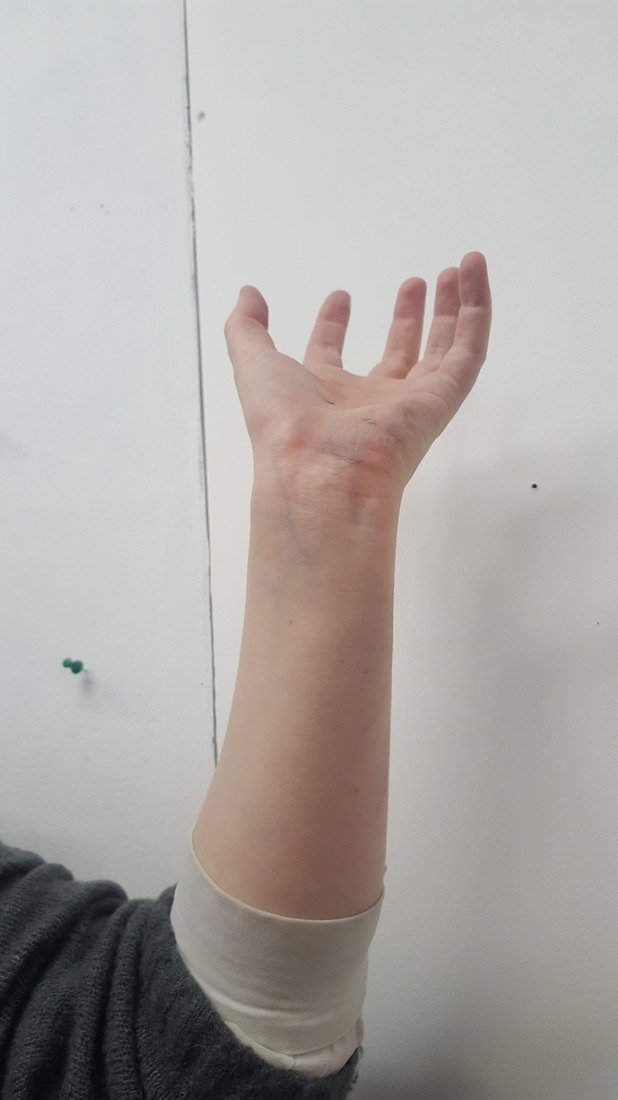
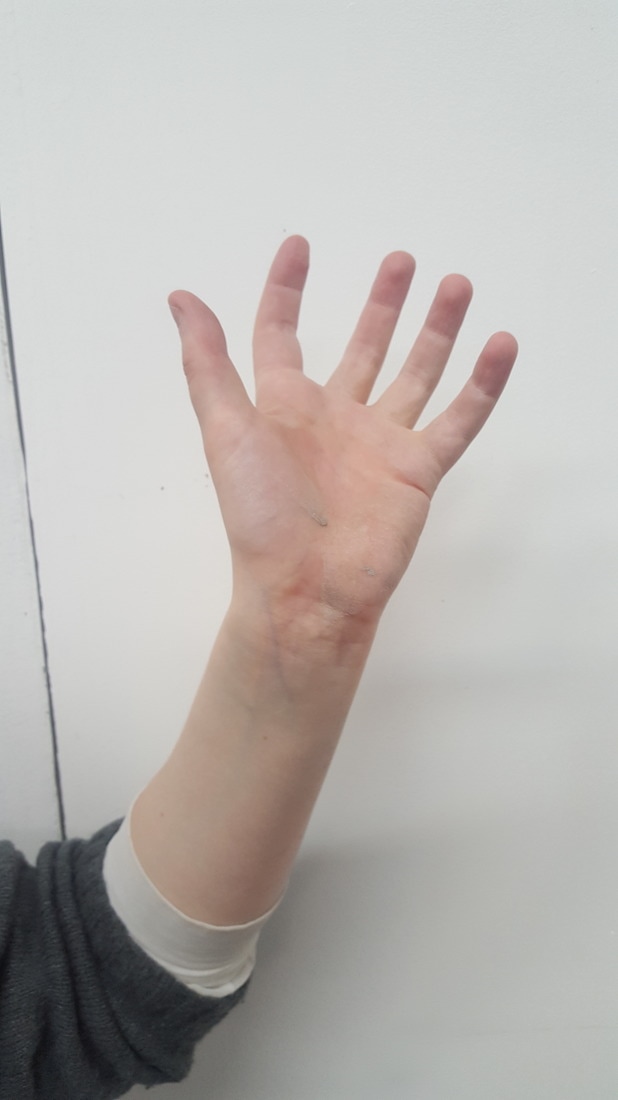
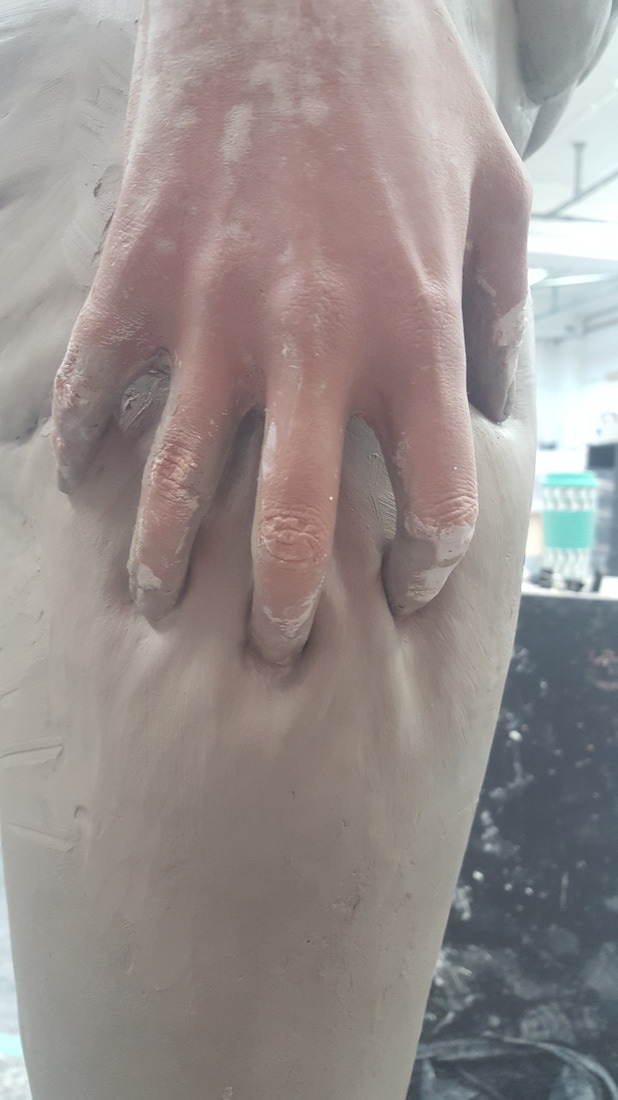
As I had decided to cast the hands from a real person rather than sculpt them, I decided that I needed to know exactly how the left hand (covering the face) would be positioned. Which is why I took several photos of my hand in the desired position from all angles. I could then use these and show them to my model to make sure that she had her hand in the right position. I used a fellow students hands.
|
|
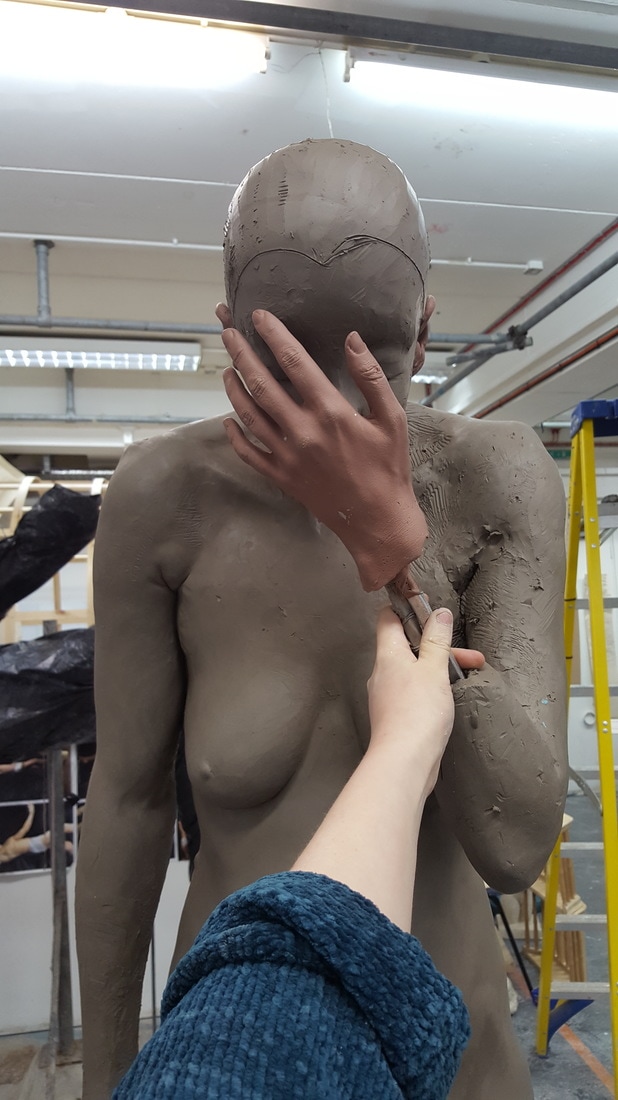
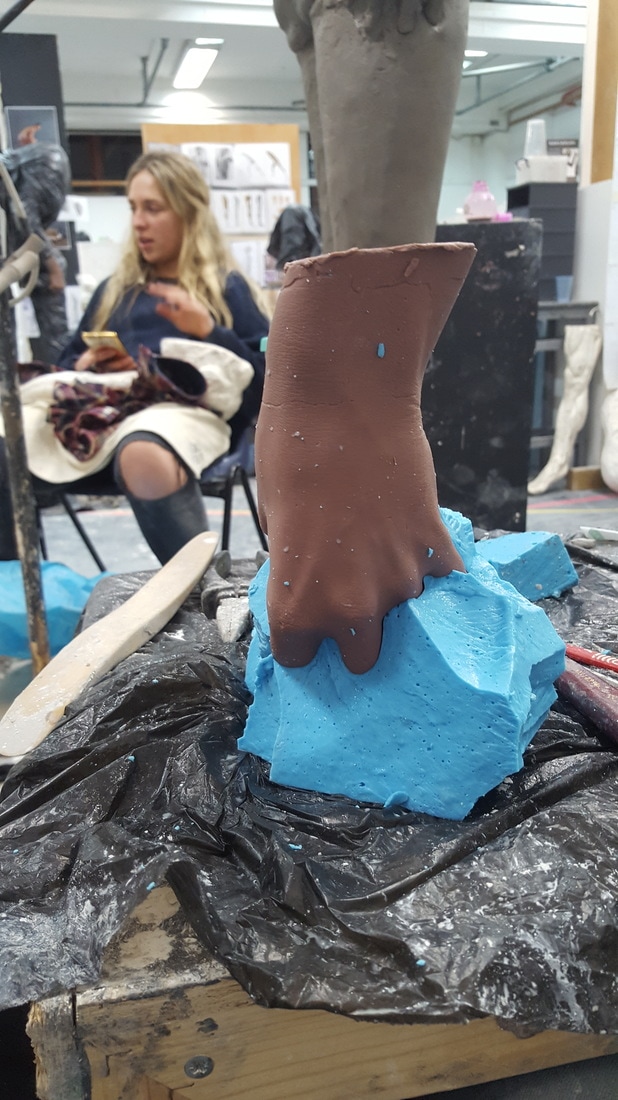
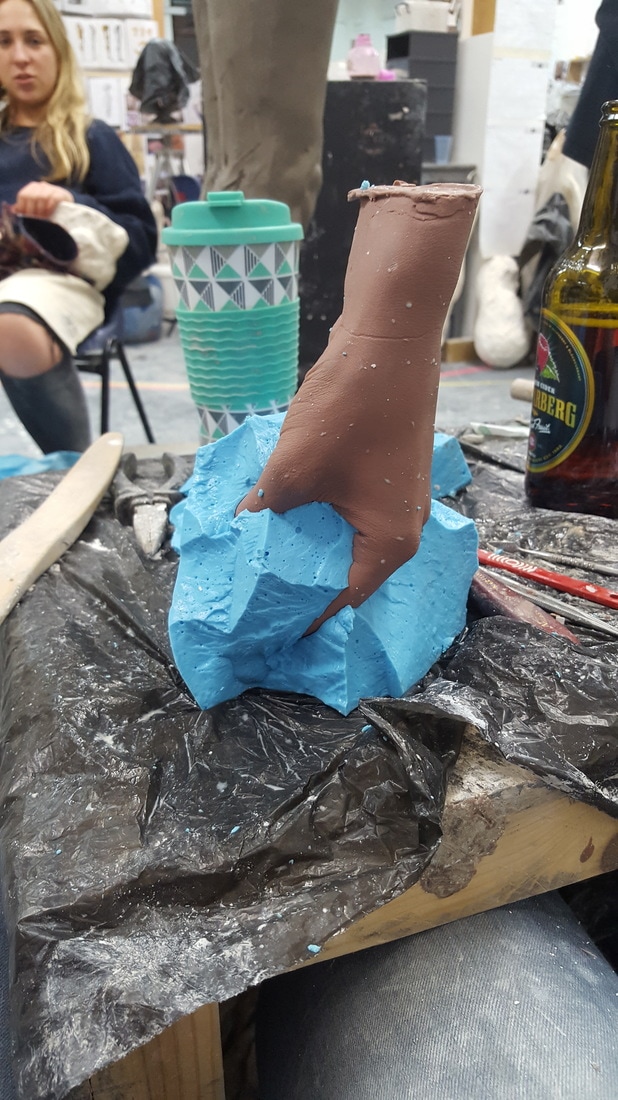
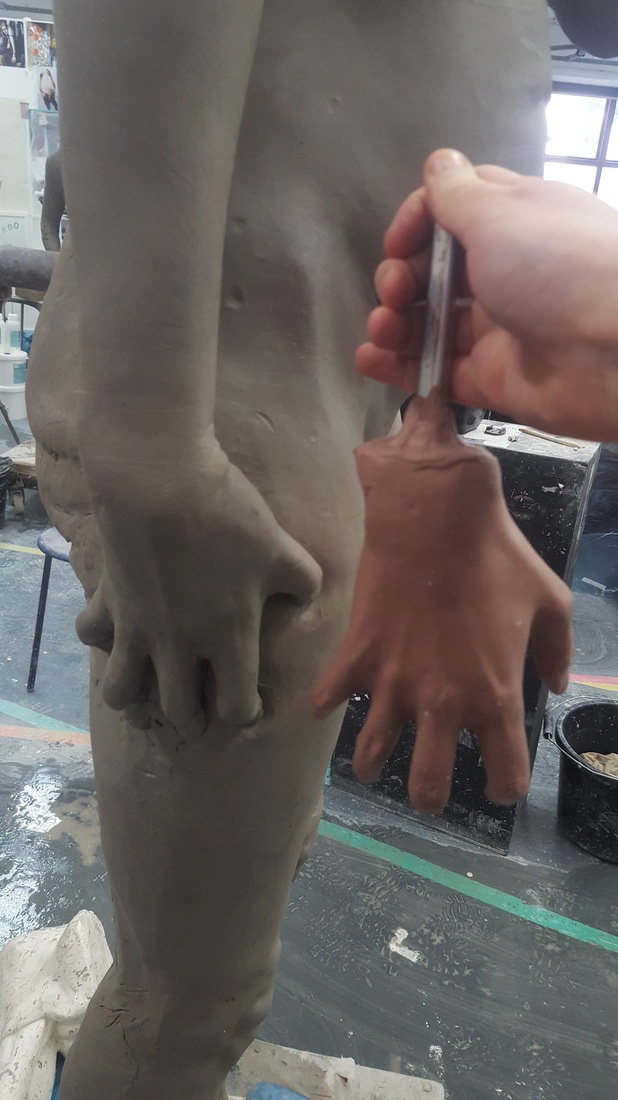
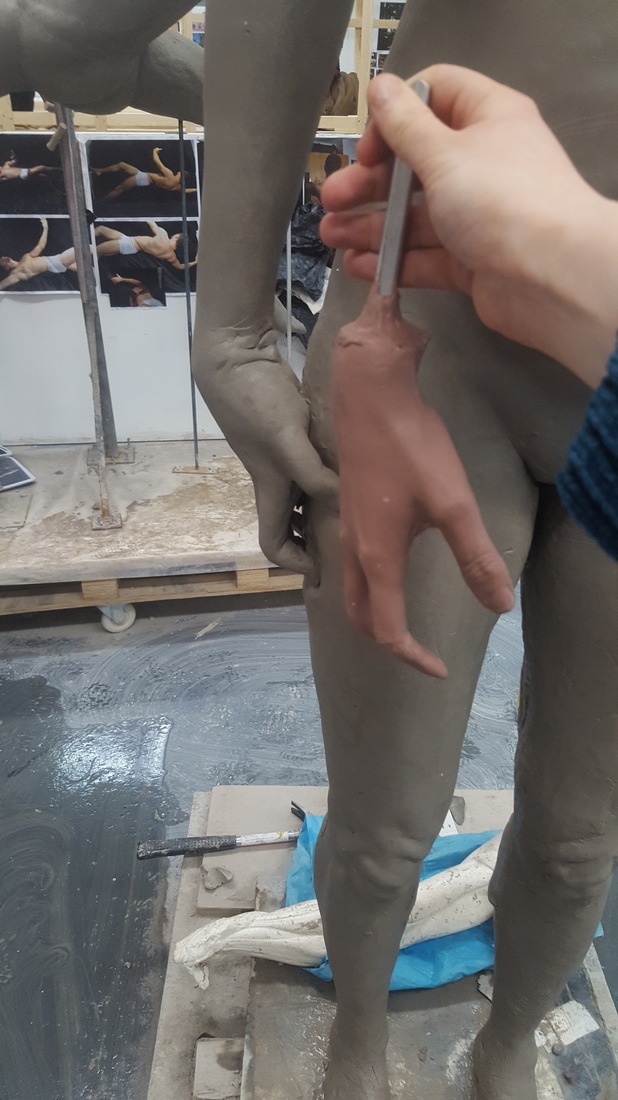

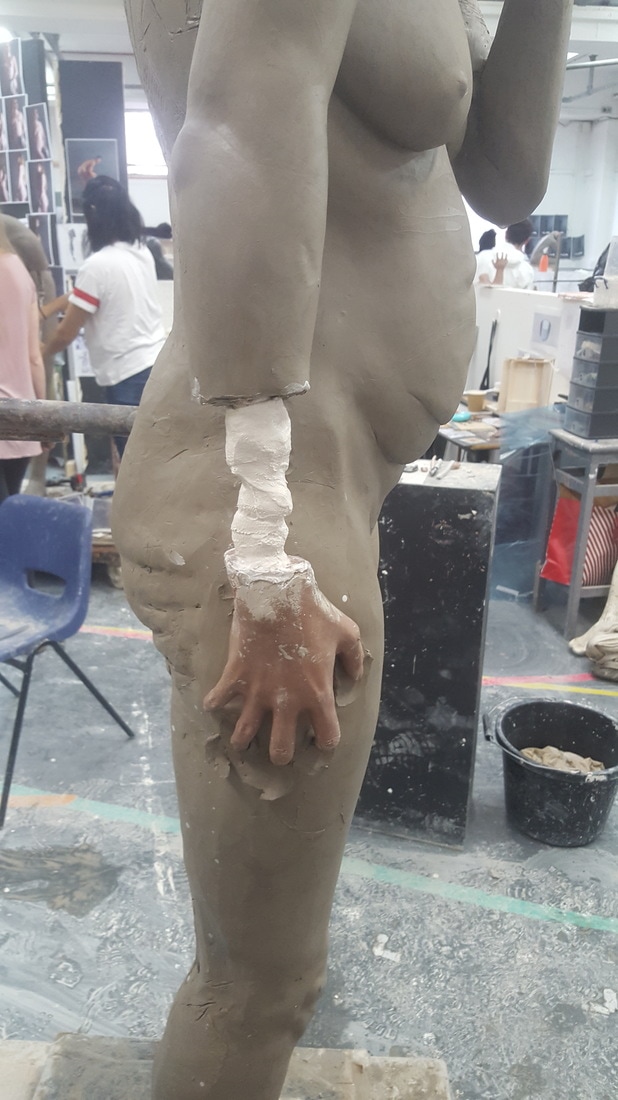
Casting the hands was pretty straight forward. I used an alginate solution to mould the hand, using my fellow student Fran as a model. once the mould was done and she had removed her hand from the alginate, I proceeded to melt monster clay in the microwave until it became a runny consistency. This was then poured into the mould and left to set. Once it had firmed up around the edges of the mould but the centre was still liquid, I placed a bit of aluminium into the hand so that I could later attach it to the sculpts armature. Once the hand had cooled down completely I removed the alginate, and positioned the hand next to the sculpt where I wanted it. I then attached the hand using jubilee clips and plaster bandage for strength, and simply added the clay up to the hand and blended the seam. I repeated this exactly for the left hand.
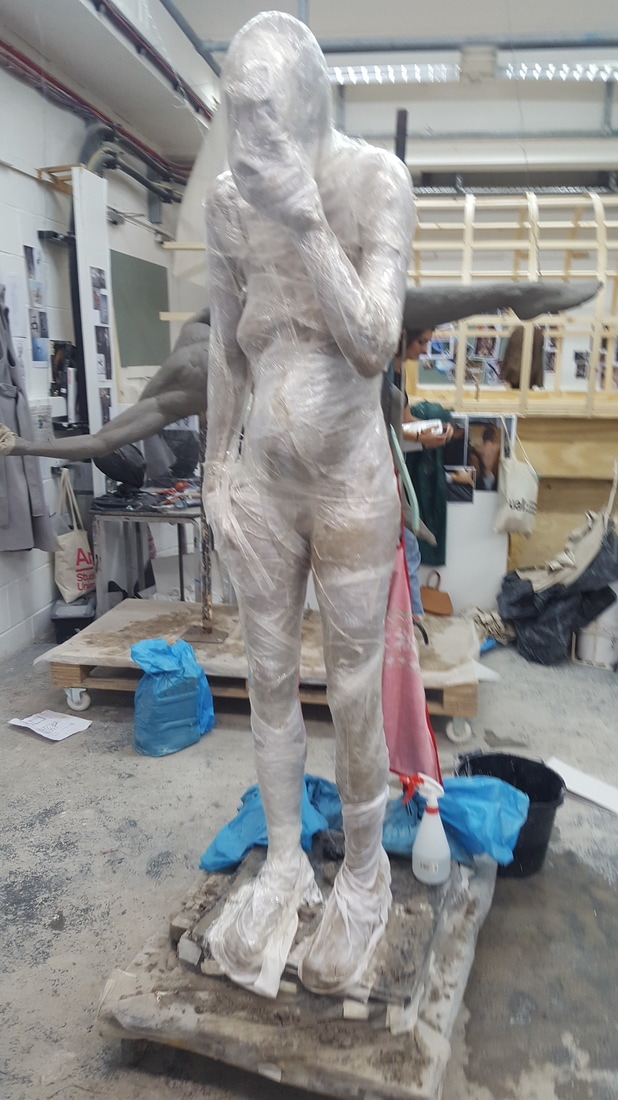
Once I had smoothed the clay surface and added texture, I was happy with my creation and was now ready to mould the sculpture.
