|
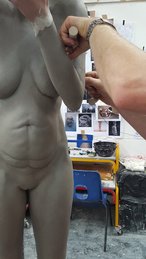
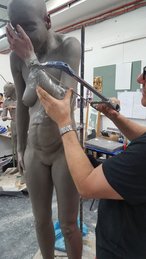
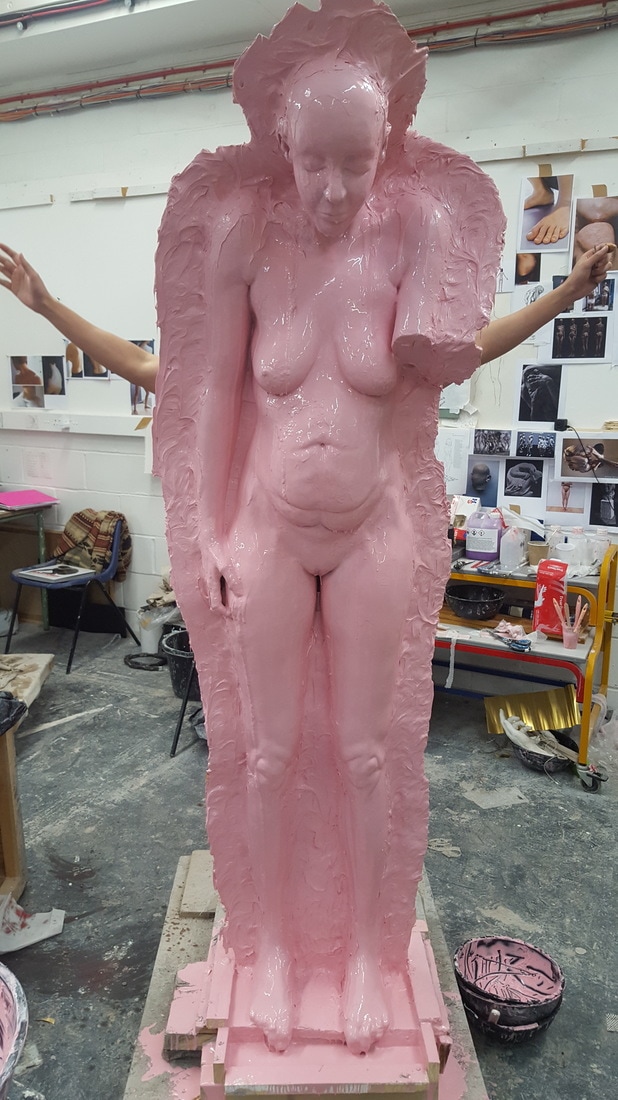
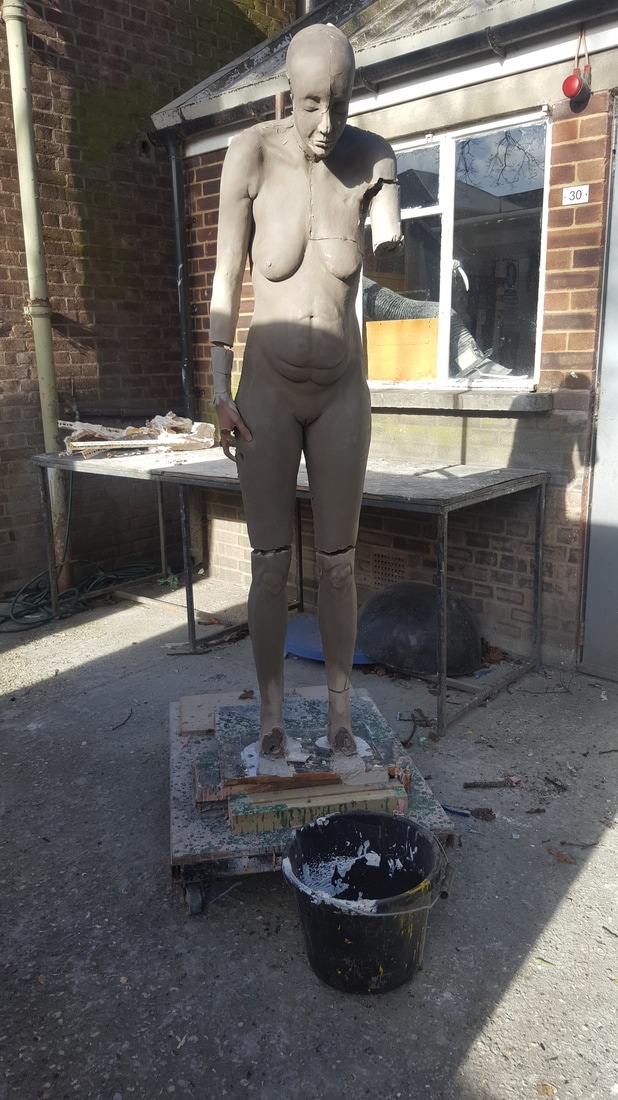
To begin moulding the figure I had to first cut off the left arm. This was because I couldn't mould the figure with the arm attached. The reason I couldn't mould the figure in its current state, was because I decided to make a silicone mould and it was impossible because of the undercuts to mould the figure with the arm attached. We cut the arm off by using a wire to cut the clay cleanly and then used a hacksaw to cut thought the aluminium wire. We marked the arm with two marks so that the arm can be attached correctly when they are eventually cast.
|
|
|
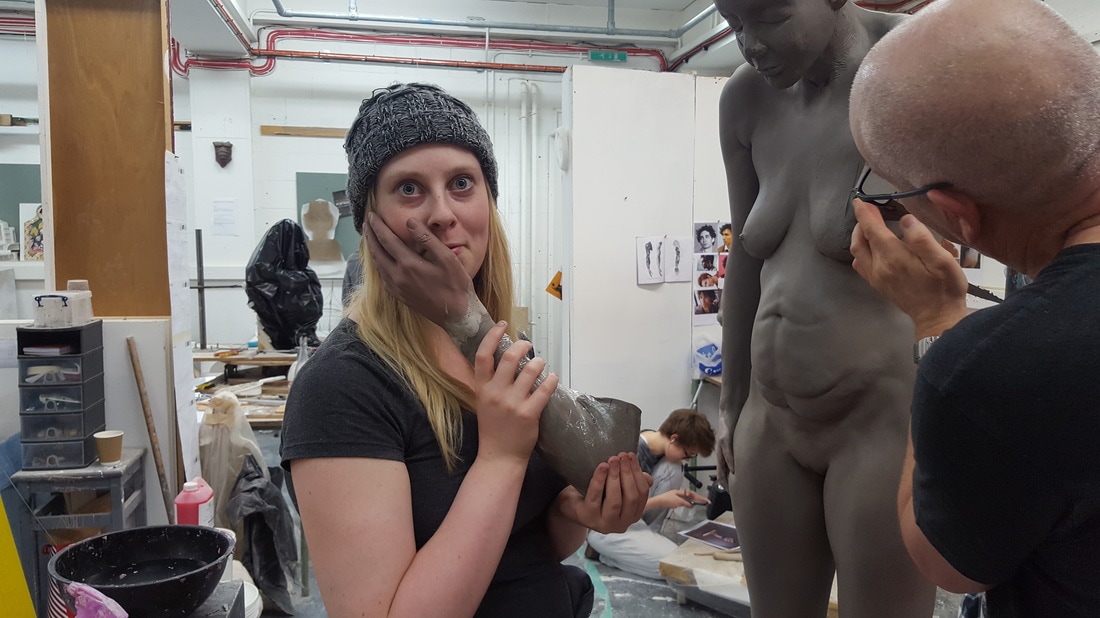

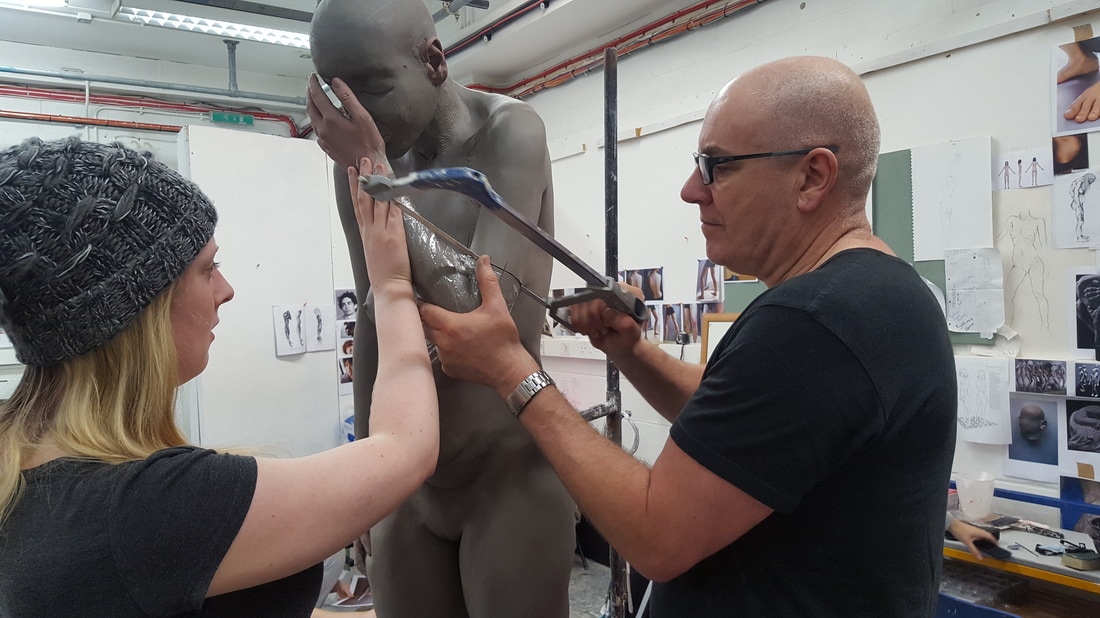
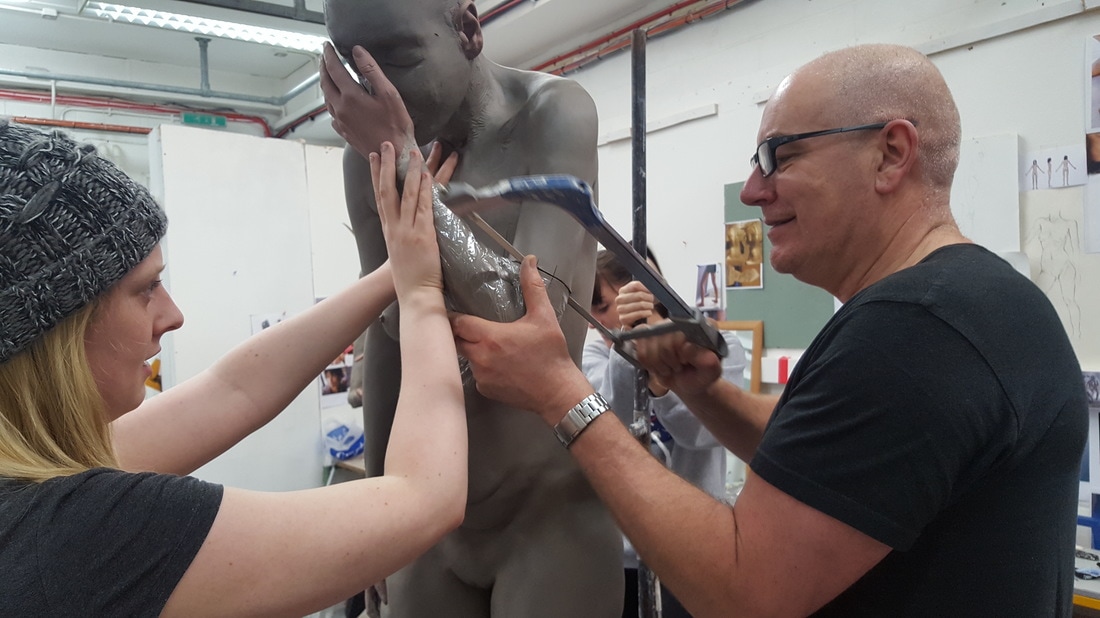
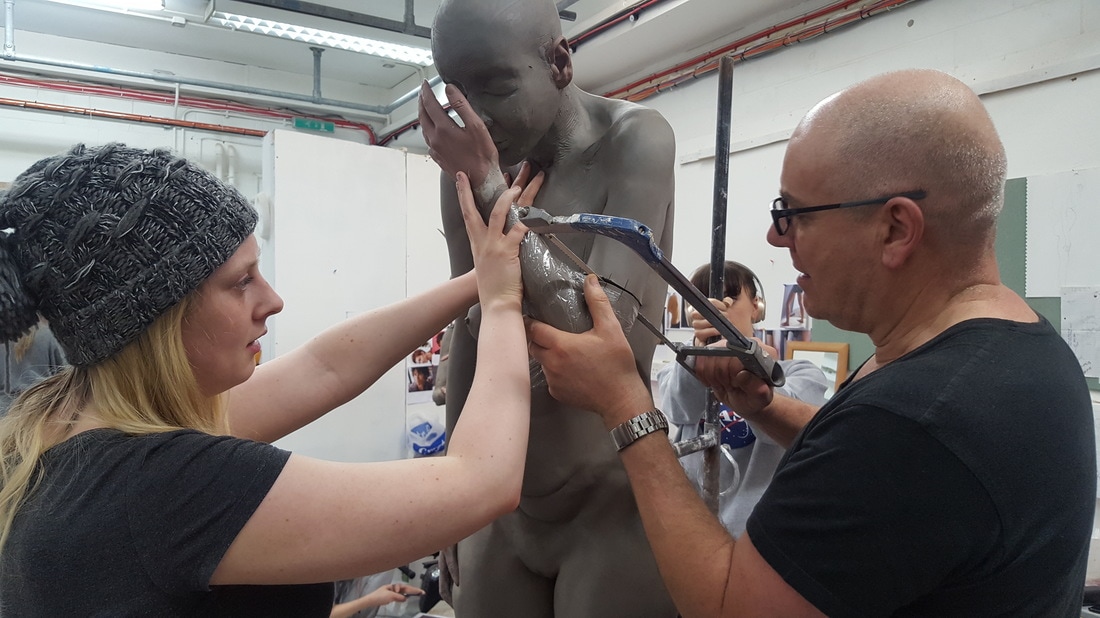
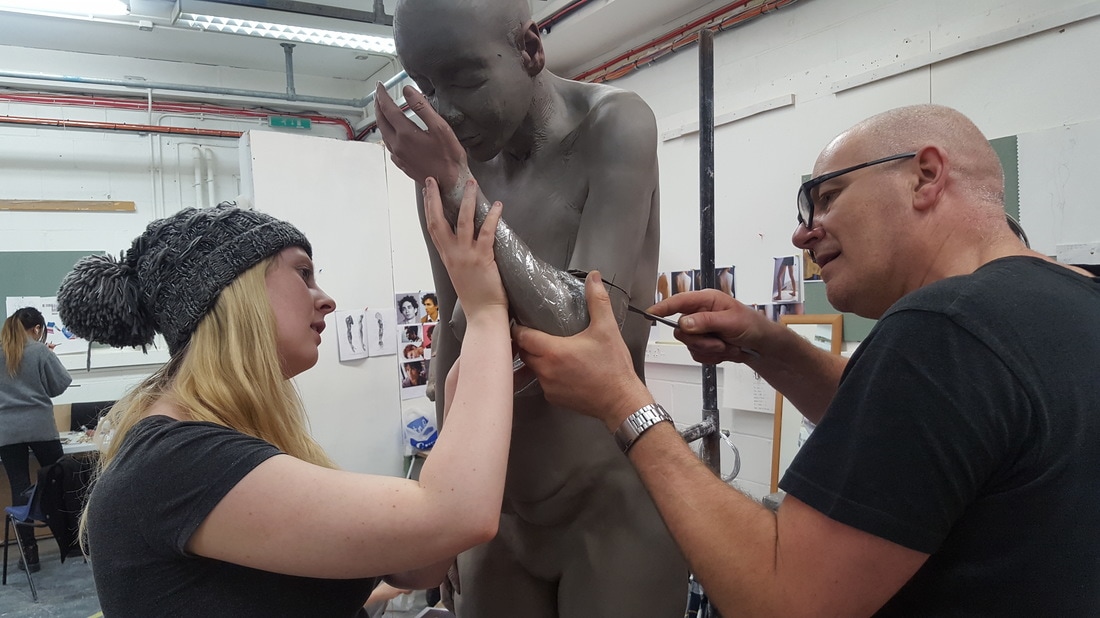
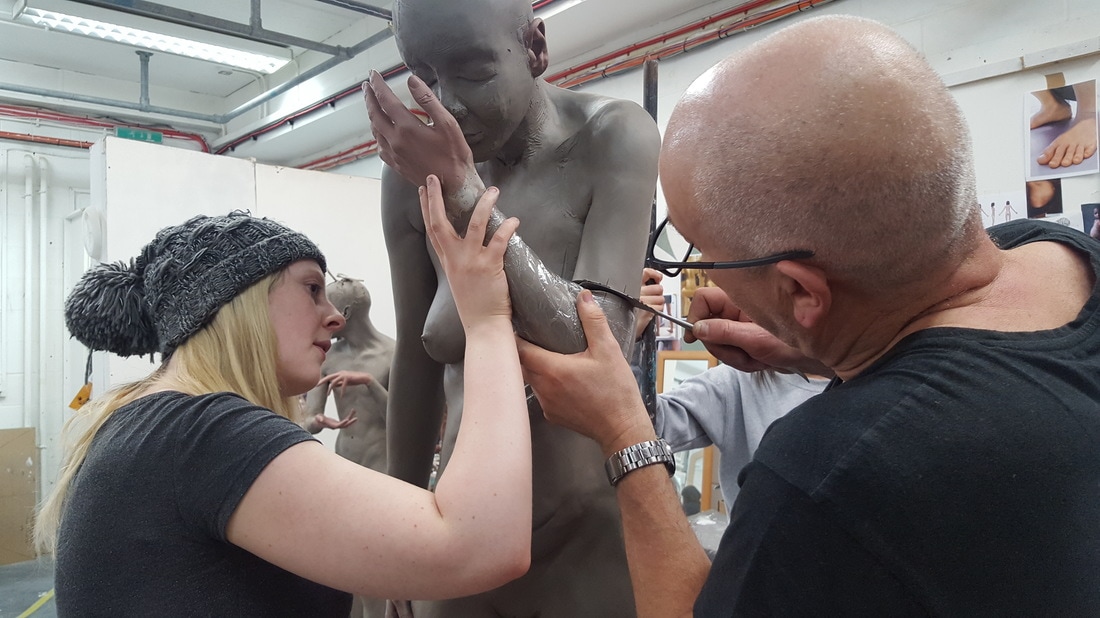
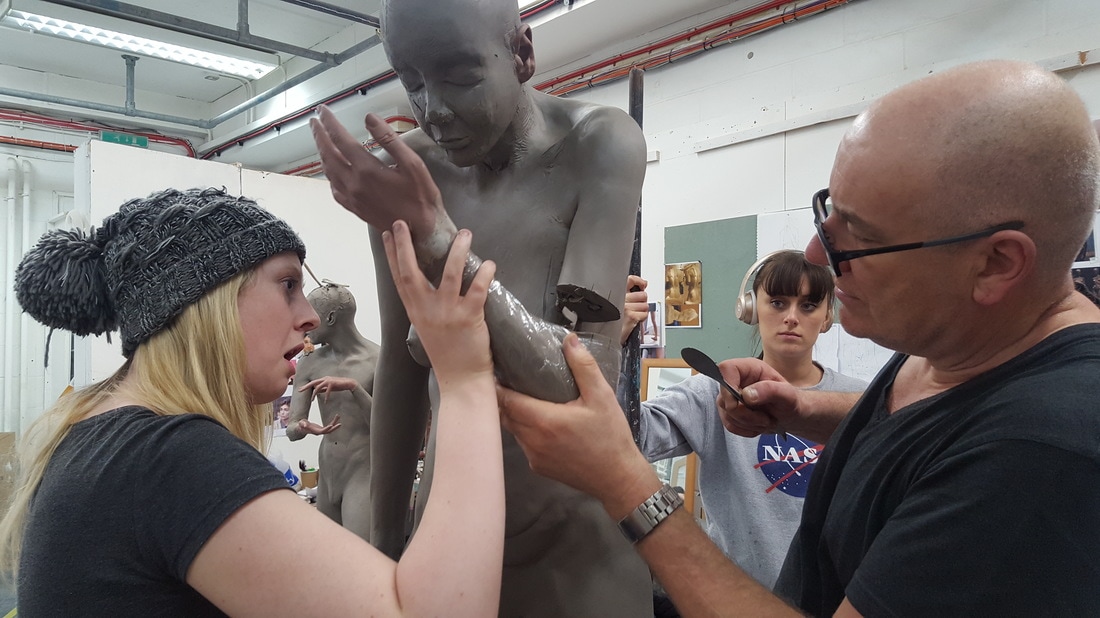
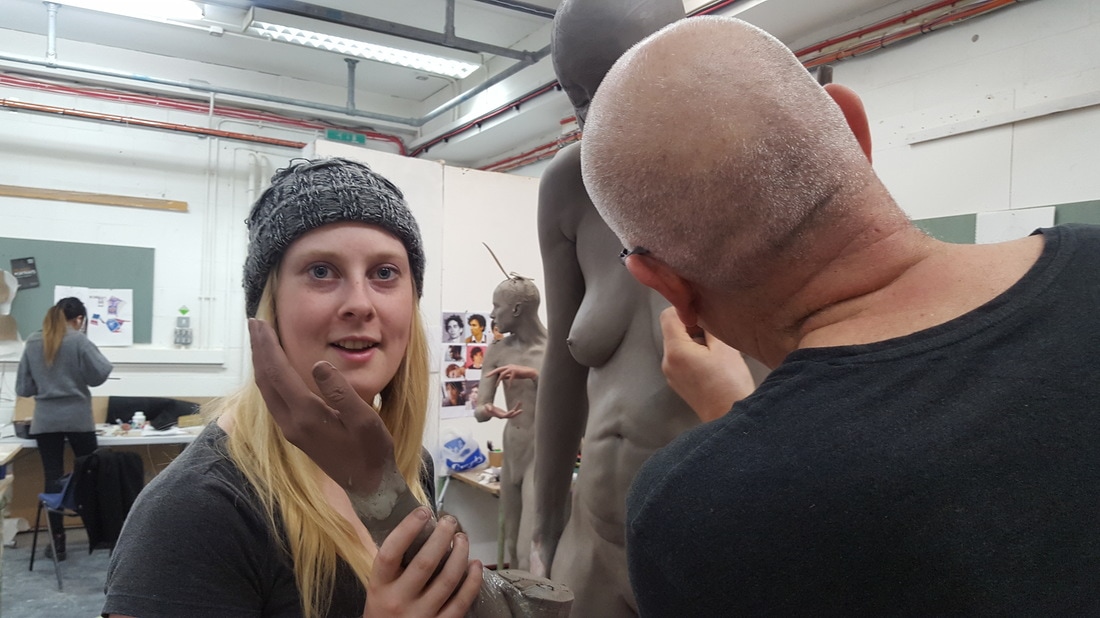
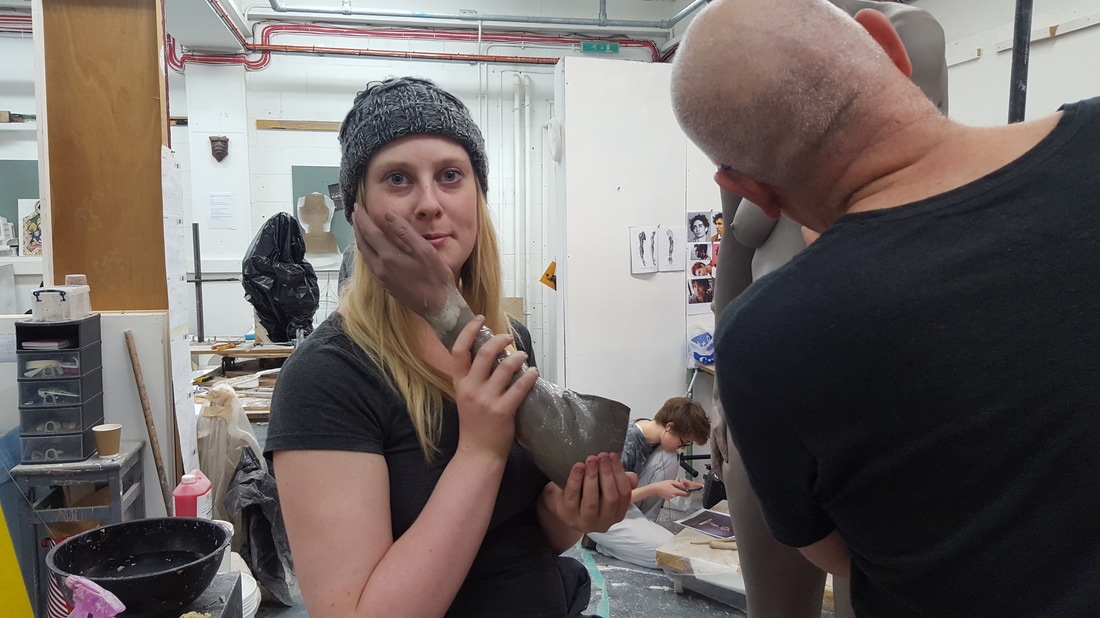
I was worried about taking the arm off, more because I was worried about distorting the shape of the arm.
|
|
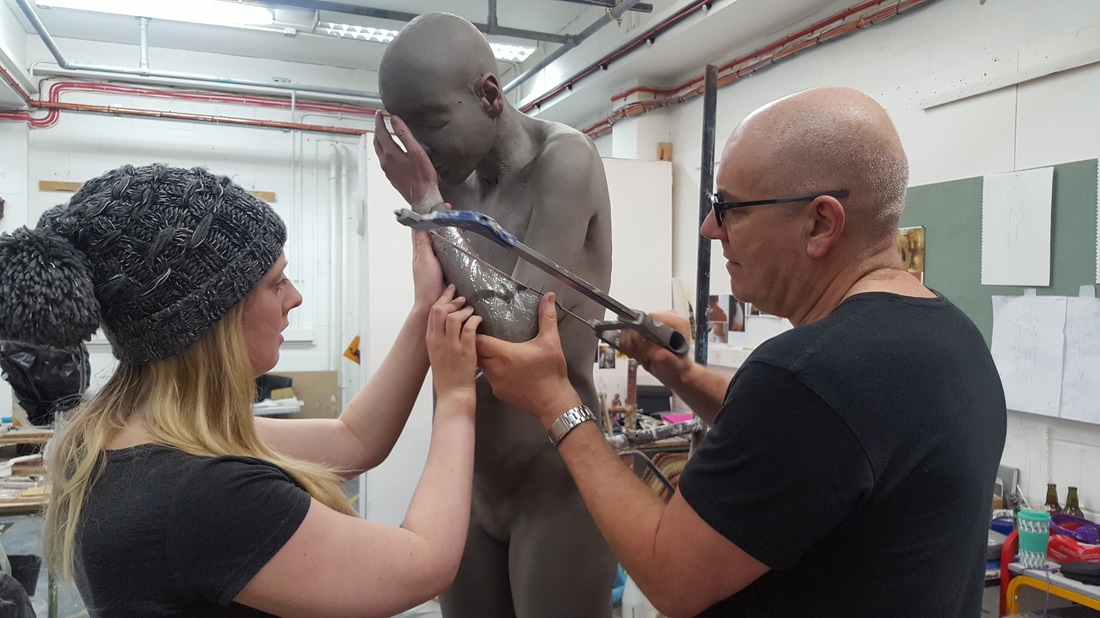
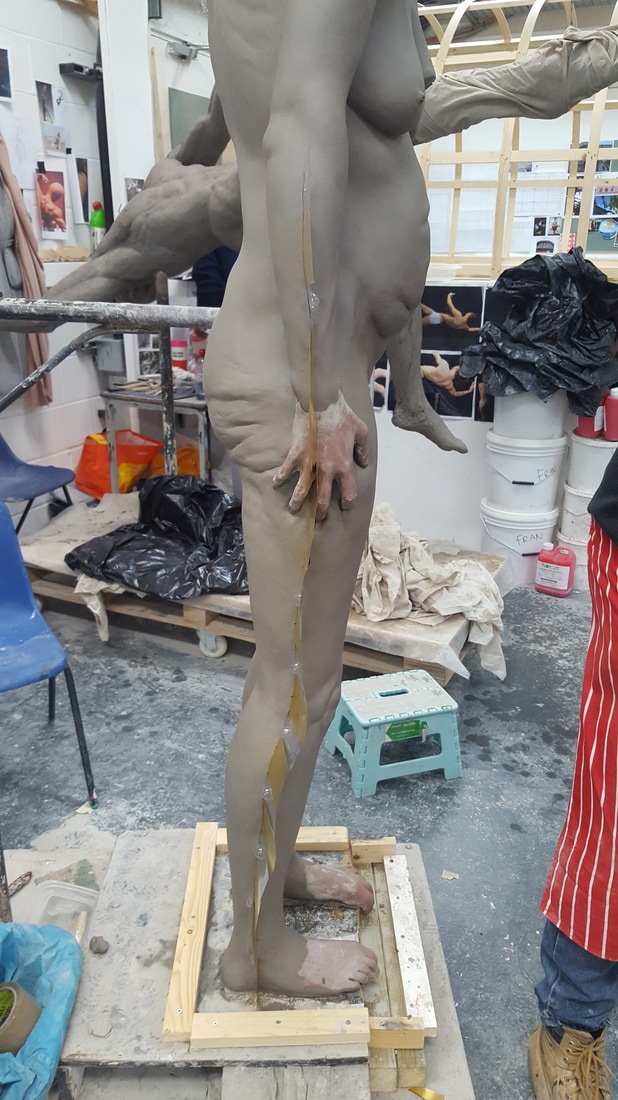
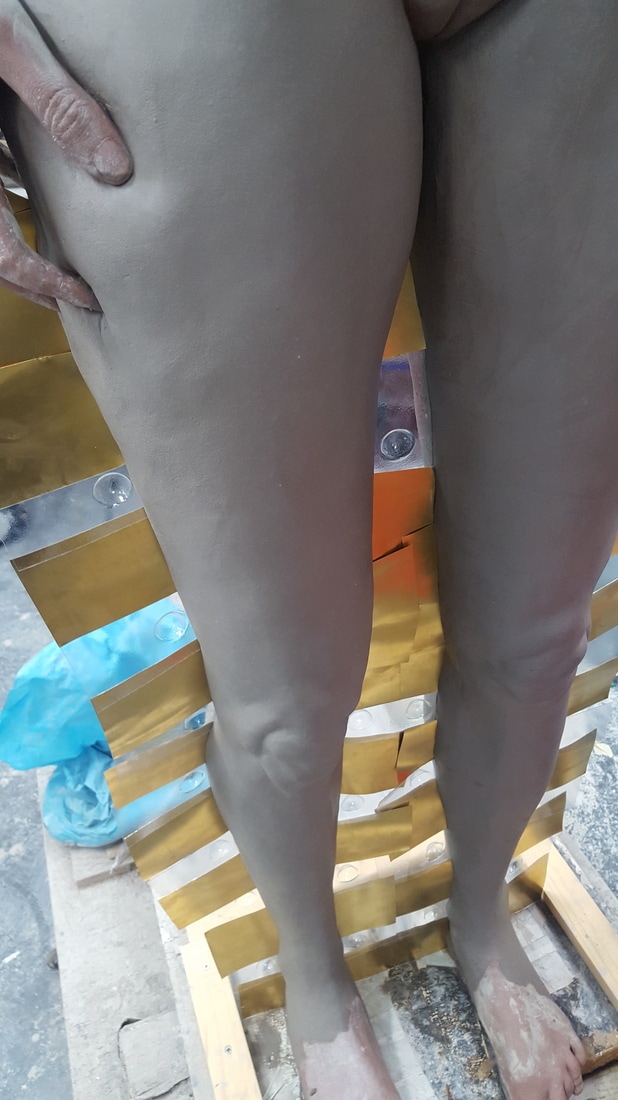
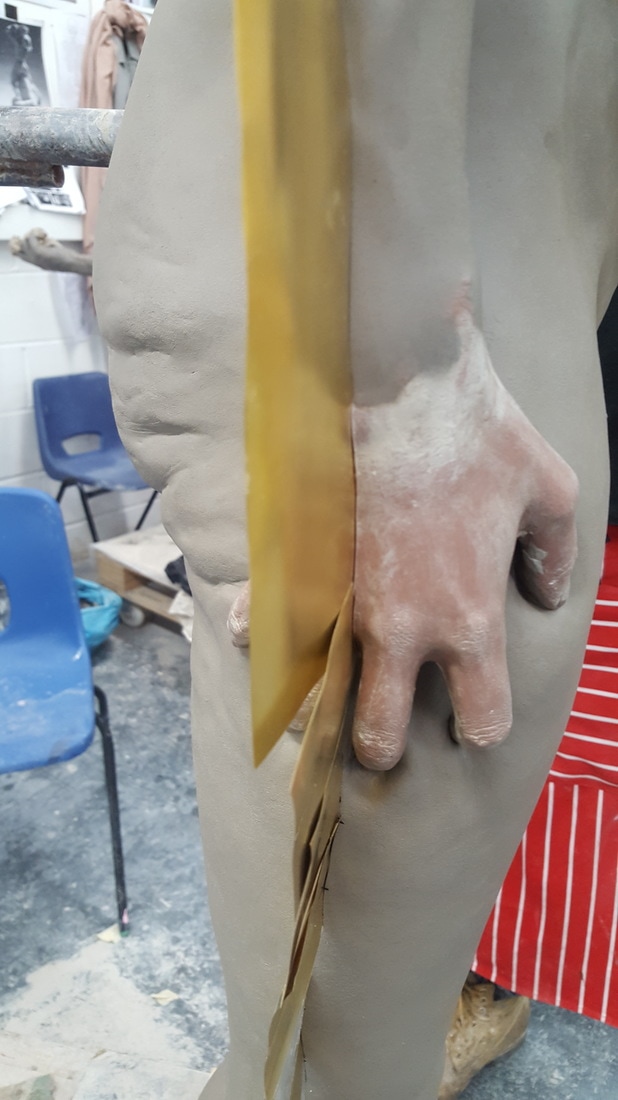
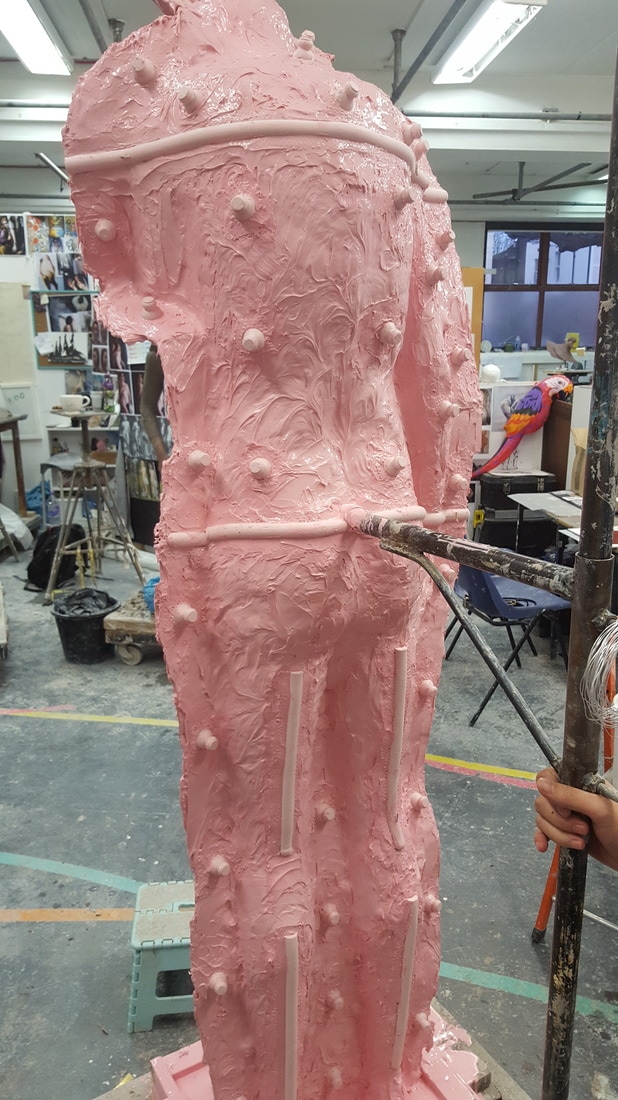
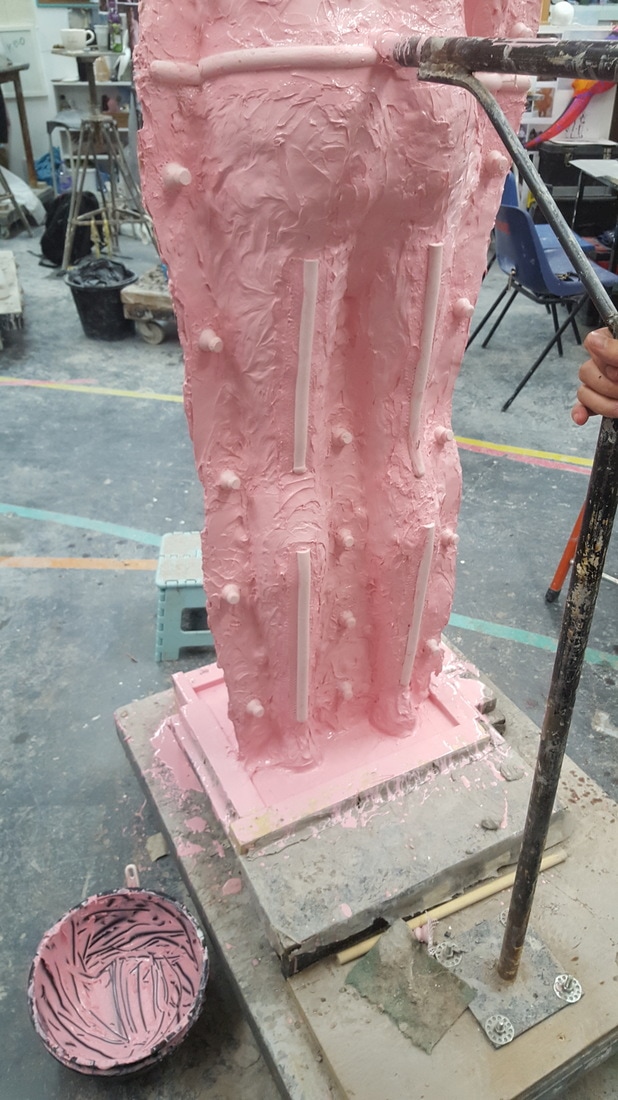
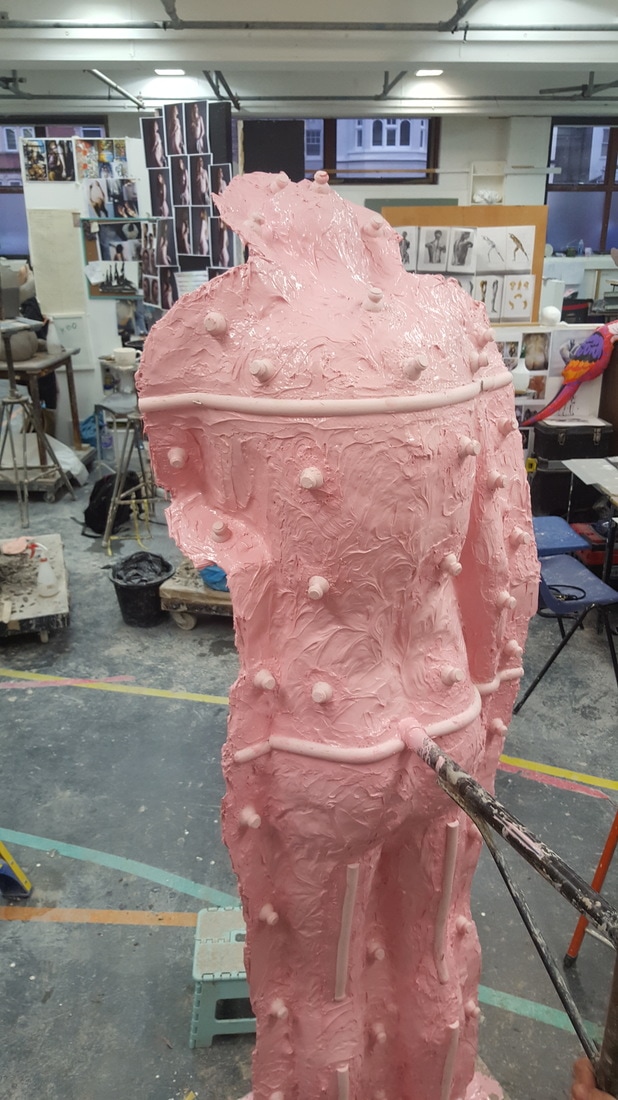
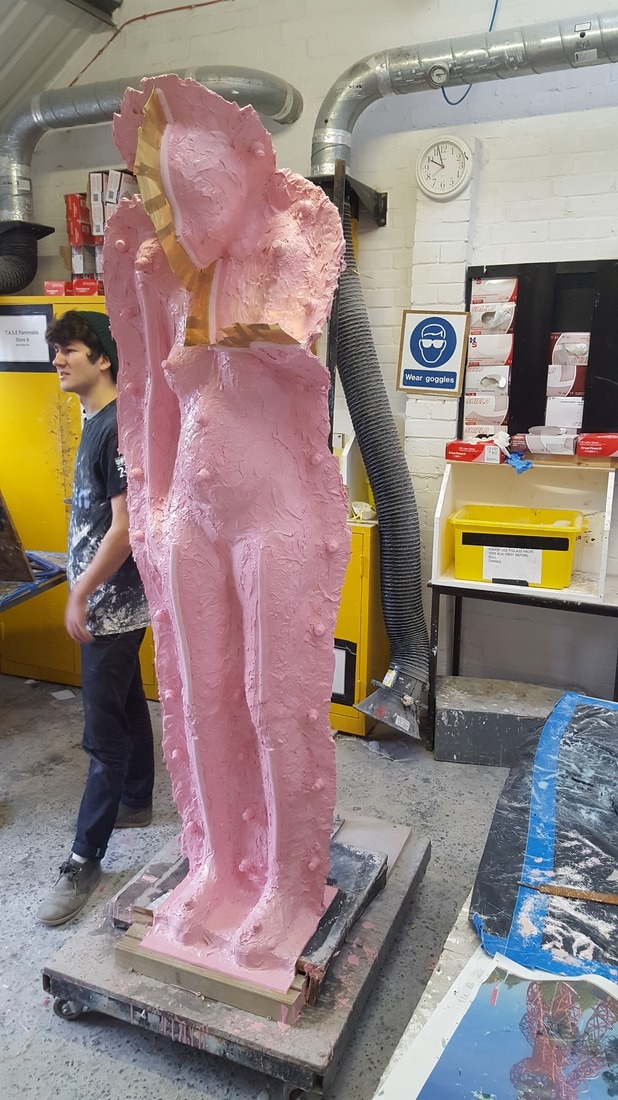
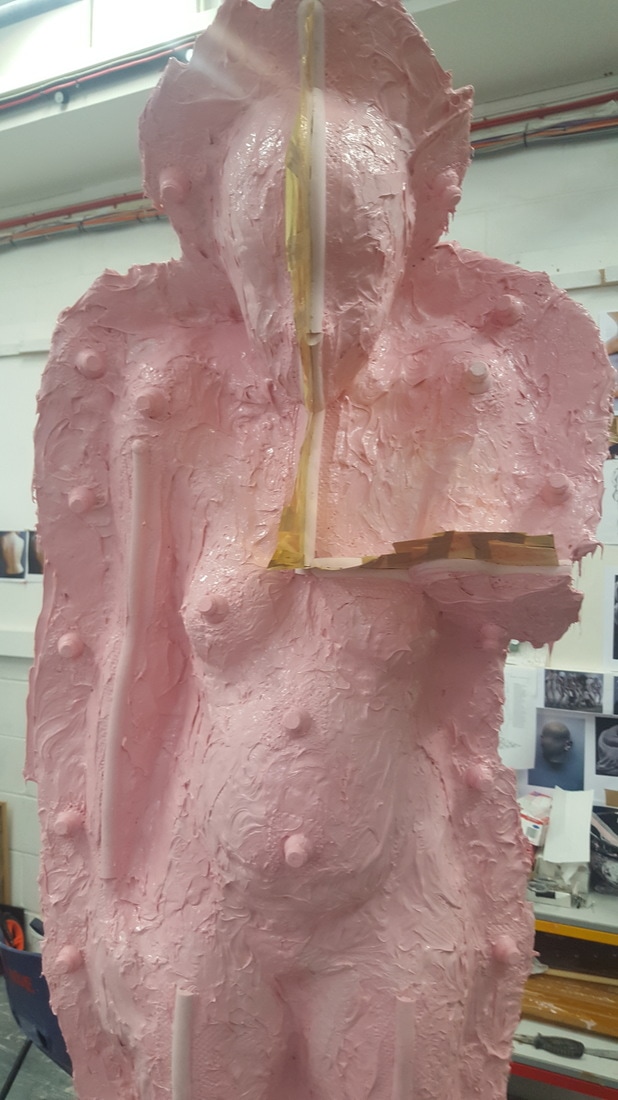
The next stage of the process is to divide the sculpt so that I can create two halves of the mould. This is important again exactly like the left arm, so that I can avoid undercuts. The sculpt needed to be split into two separate halves. This was created by using shim, a thin metal sheet that can be cut down and stuck directly into the clay. The tidier the shim is inserted the better the seams turn out in the final cast. Shim was inserted all around the sculpt, and by using key shim (plastic shaped to have divests in) could then be used to key in the silicone mould to locate itself to return to its original shape.
|
|
|
|
|
The shim was an integral part of how the final mould would turn out. By being accurate with the shim and how it was positioned would have effected how well the final cast would look. It was important to be accurate with he shim, such as when adding it to the middle of the legs and in-between the arm and the body. The shim also went though the monster clay hand intentionally to create the least mount of seam.
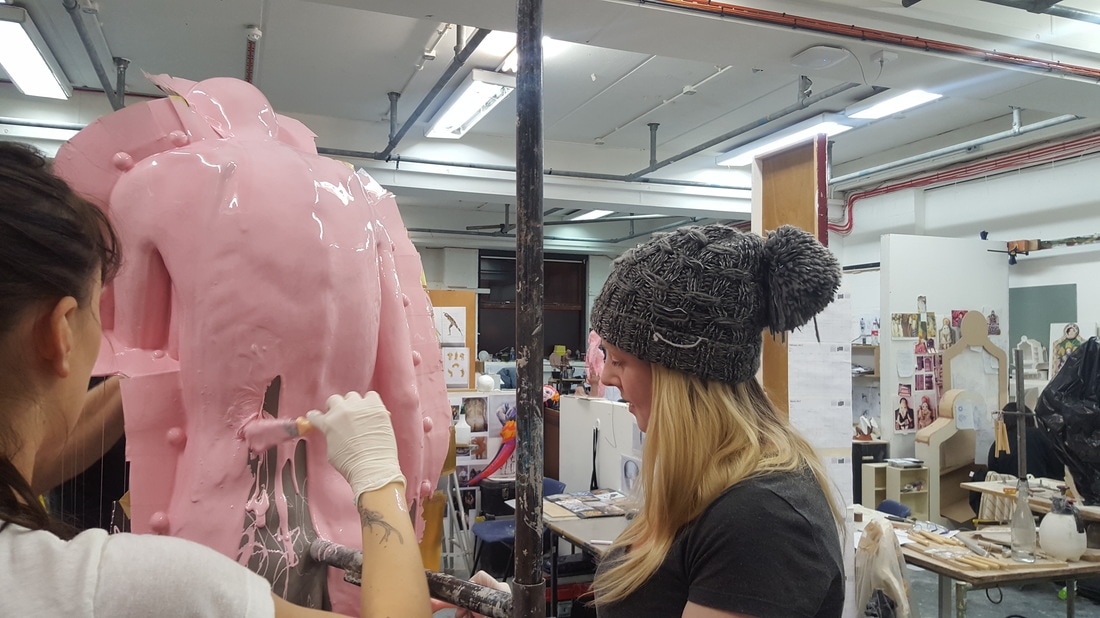
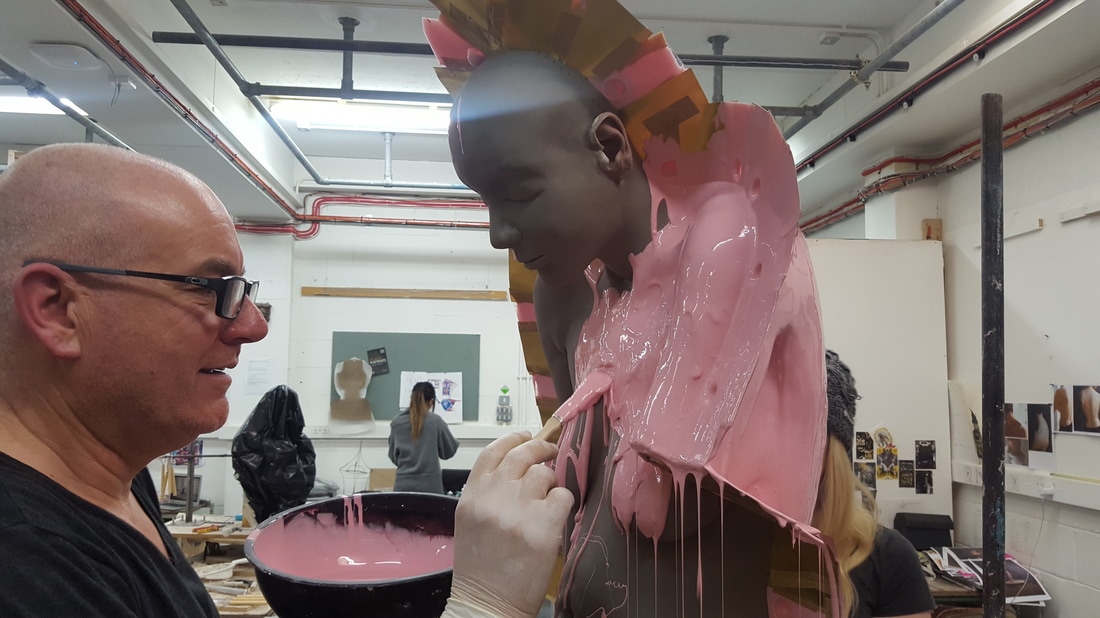
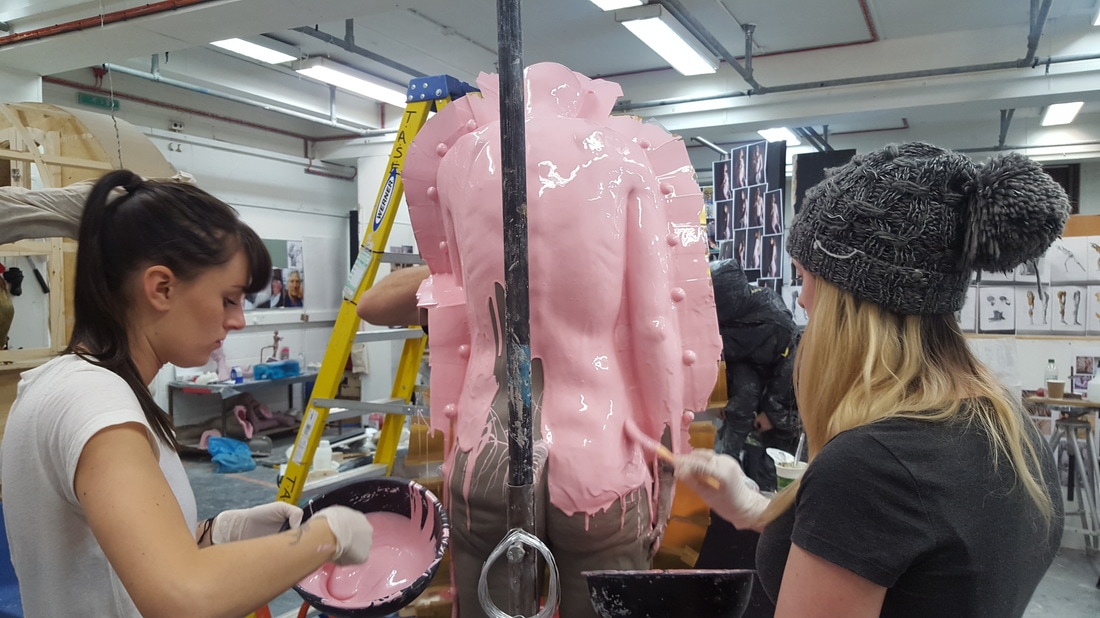
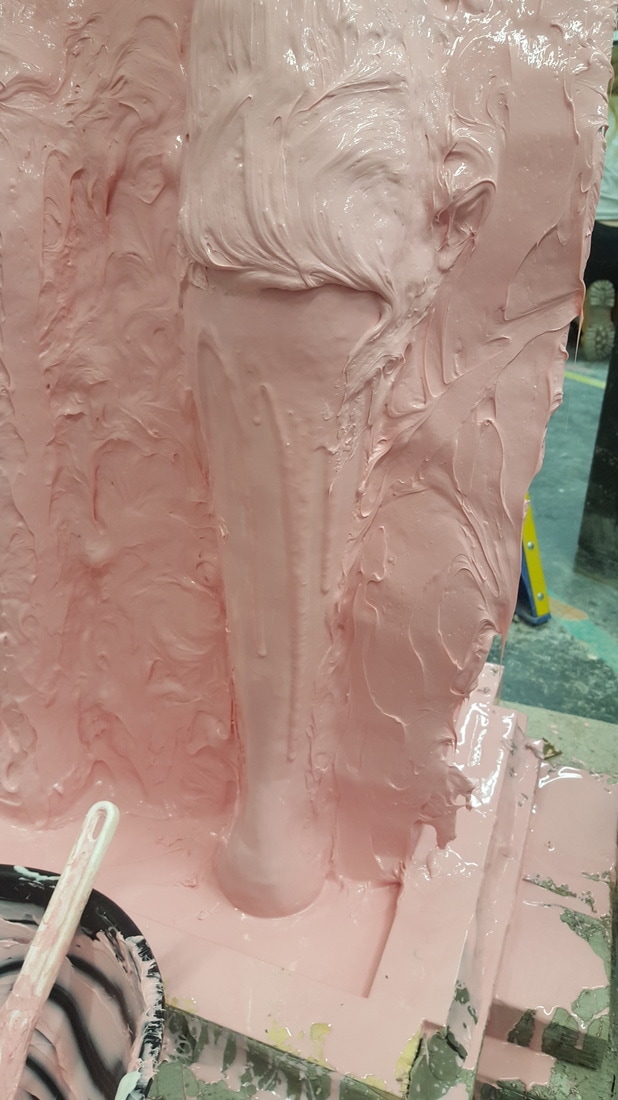
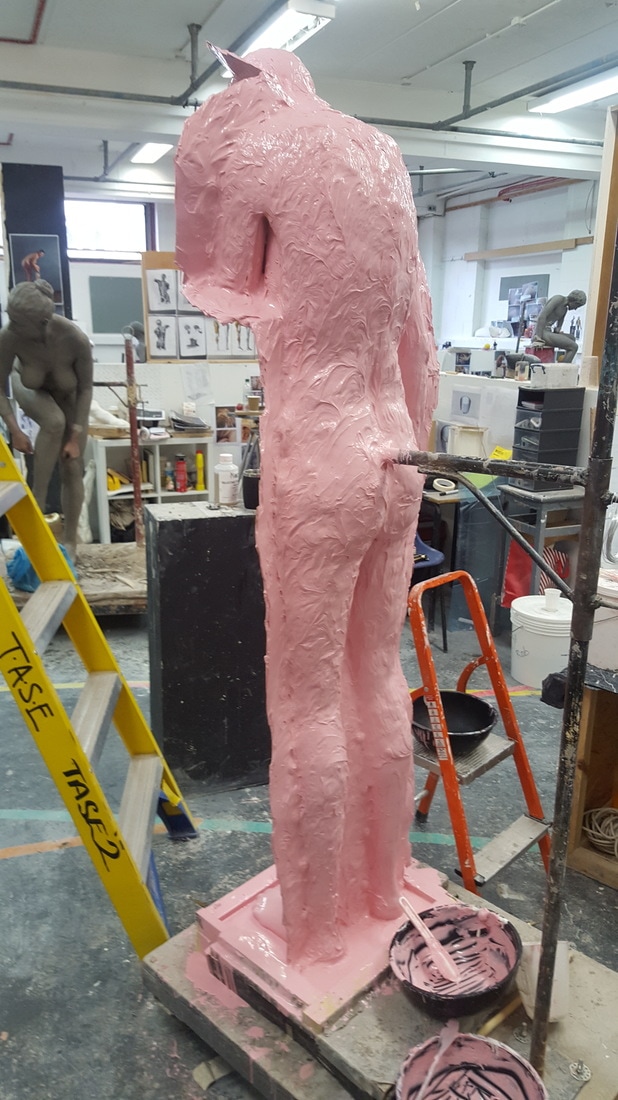
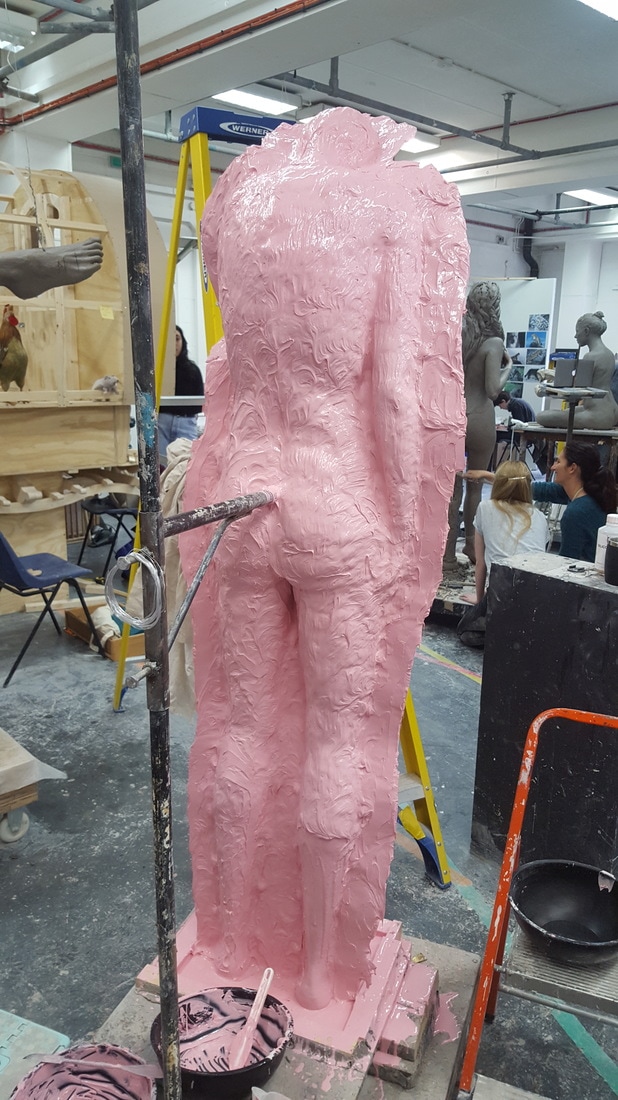
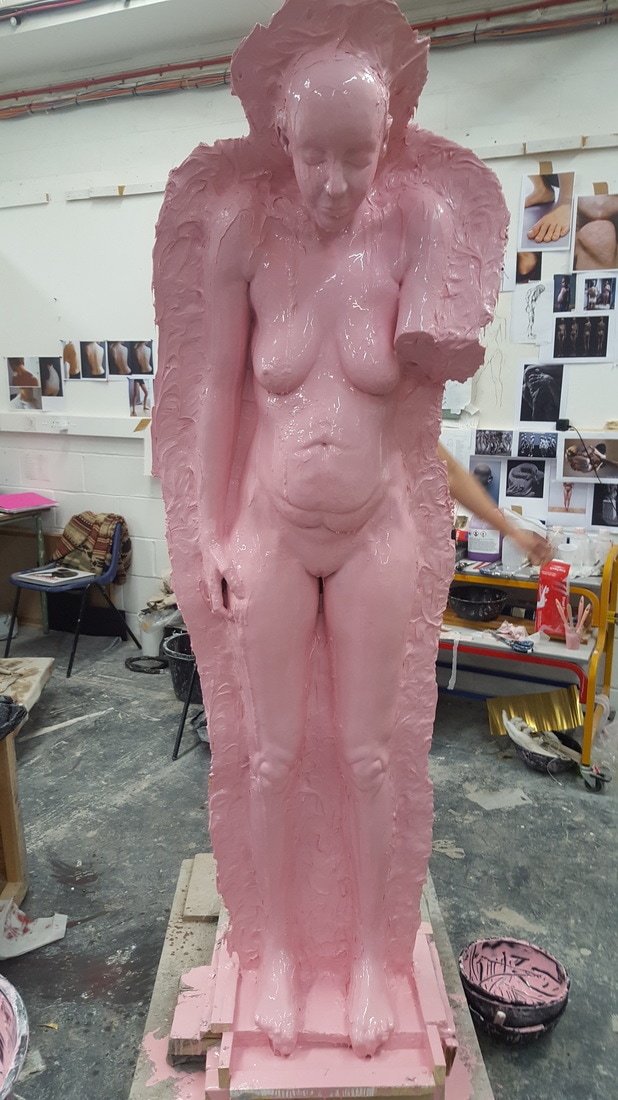
once the shim was applied, it was then time to add the silicone first layer. The silicone I added was 3481 base rubber .The first layer of silicone was thin so that it retained the high detail that I managed to get in the clay sculpt. This layer was added to all the sculpt, including up to the edges of the shim. For this process I managed to get the help of my fellow student Emily to assist me and my tutor in getting the silicone on the sculpt as fast as possible.
|
|
|
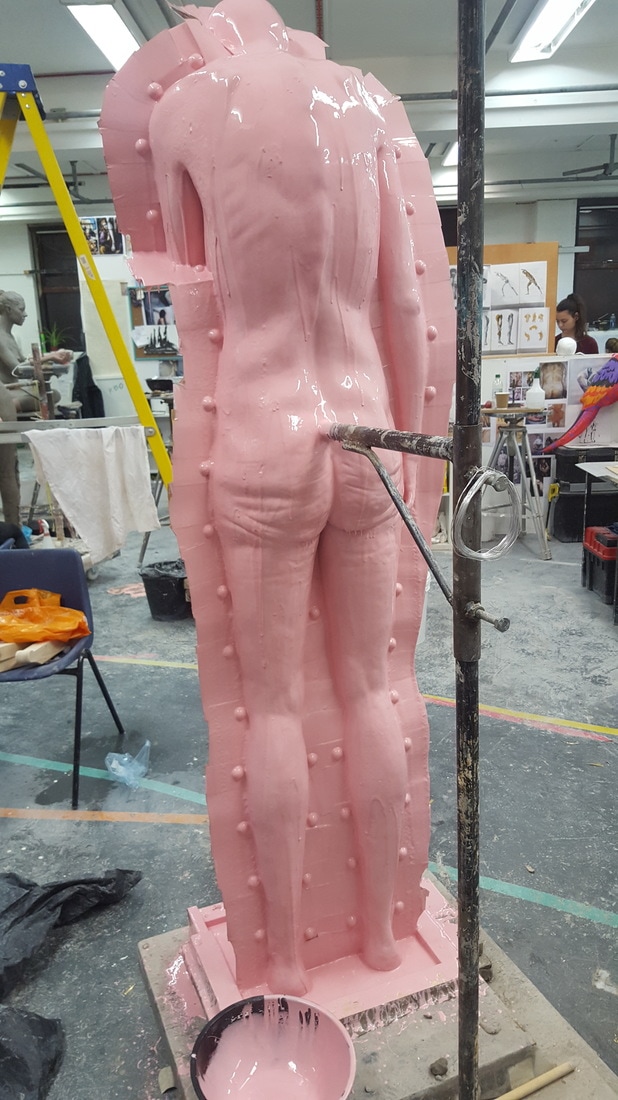
This is what the sculpt looked like once the whole piece was covered in the first thin layer of silicone. Once this was done I could then go on to add the thixo layer.
|
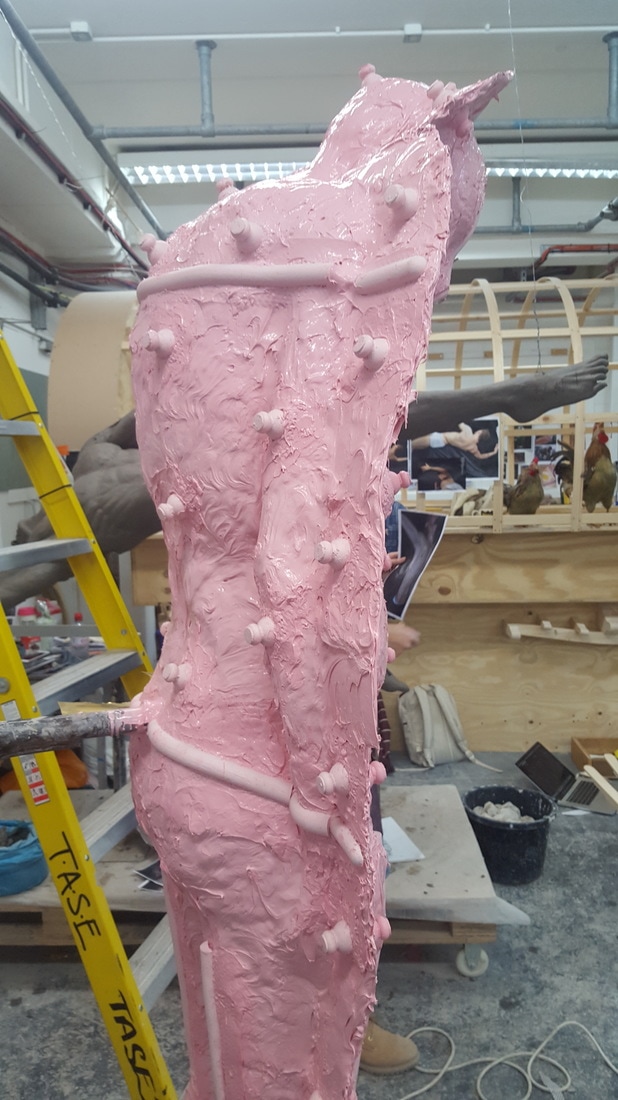
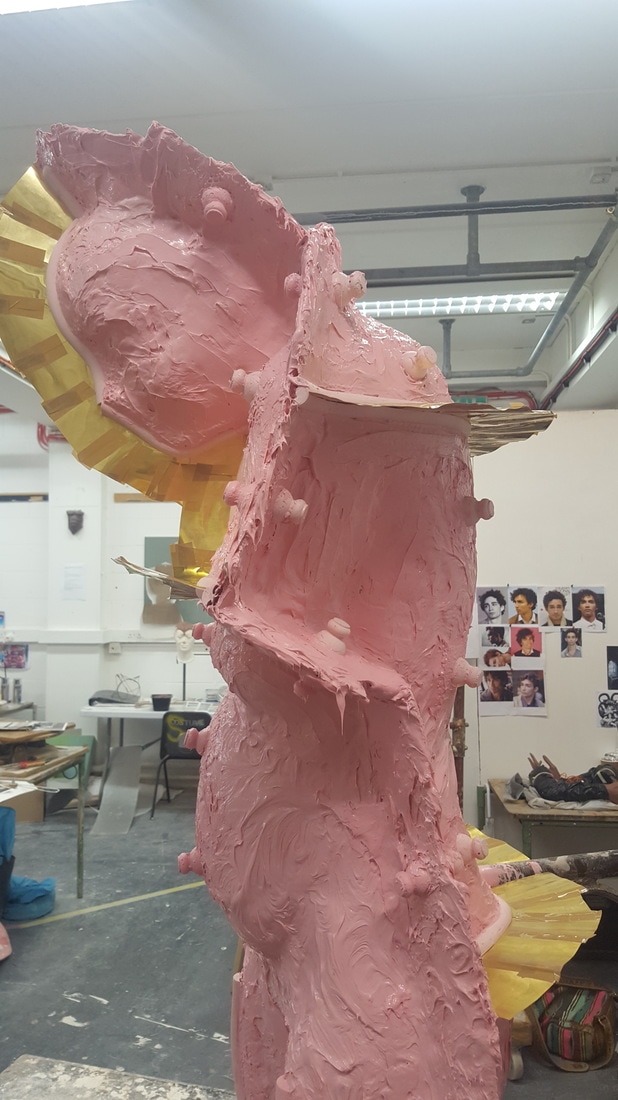
The 'Thixo' layer was simply the same process as the first layer, except having Thixative added to the mixture and this in turn made the mix thicker and added thikness to the silicone mould to make it more ridged.
|
|
|
|
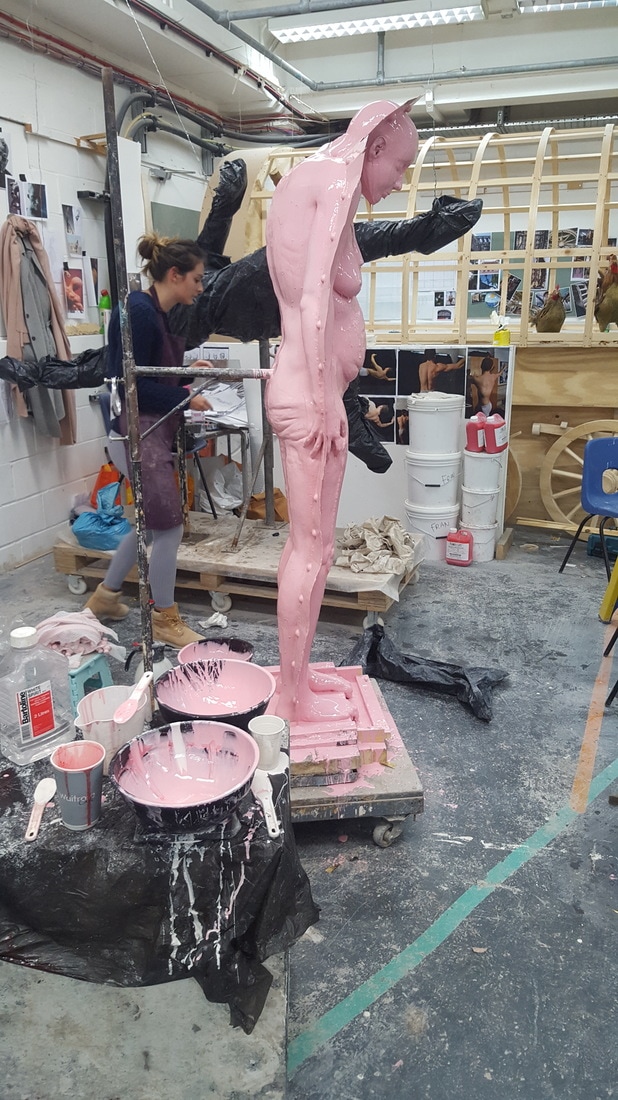
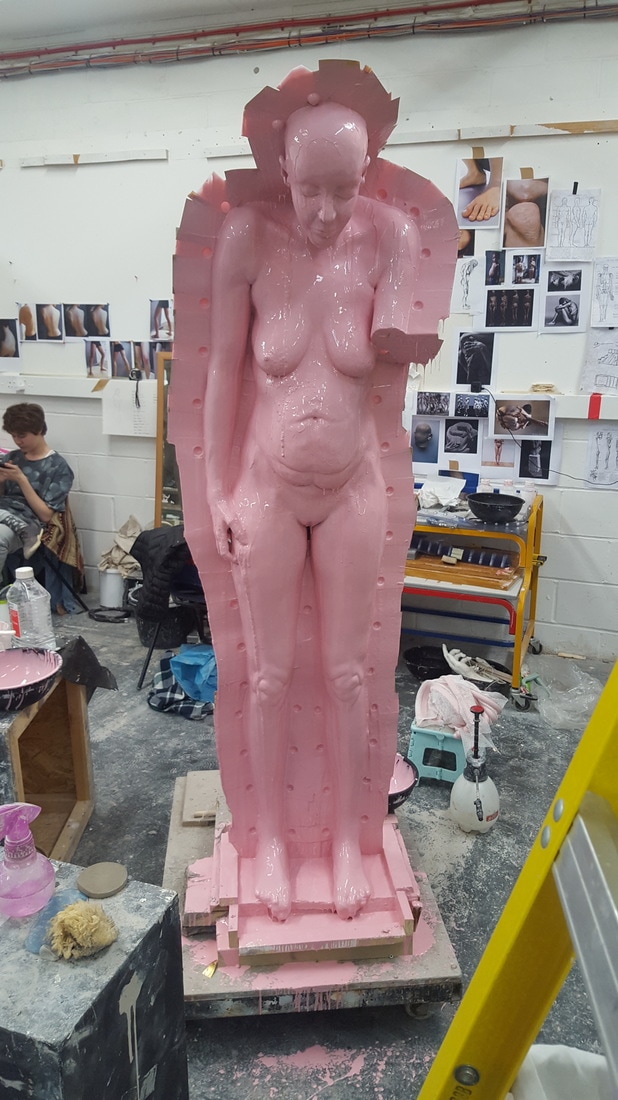
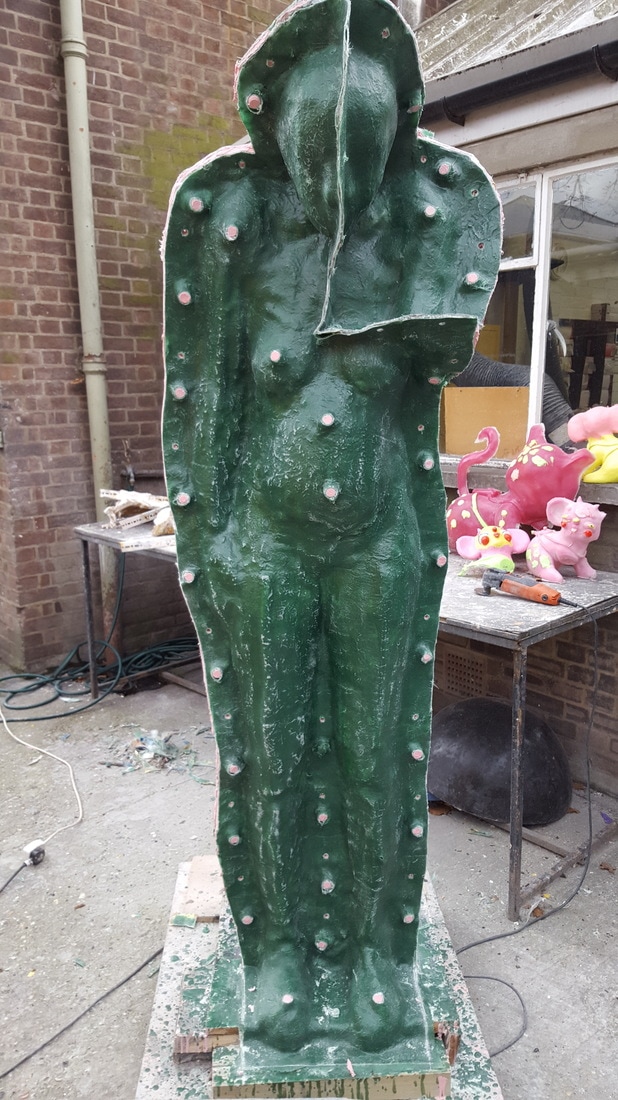
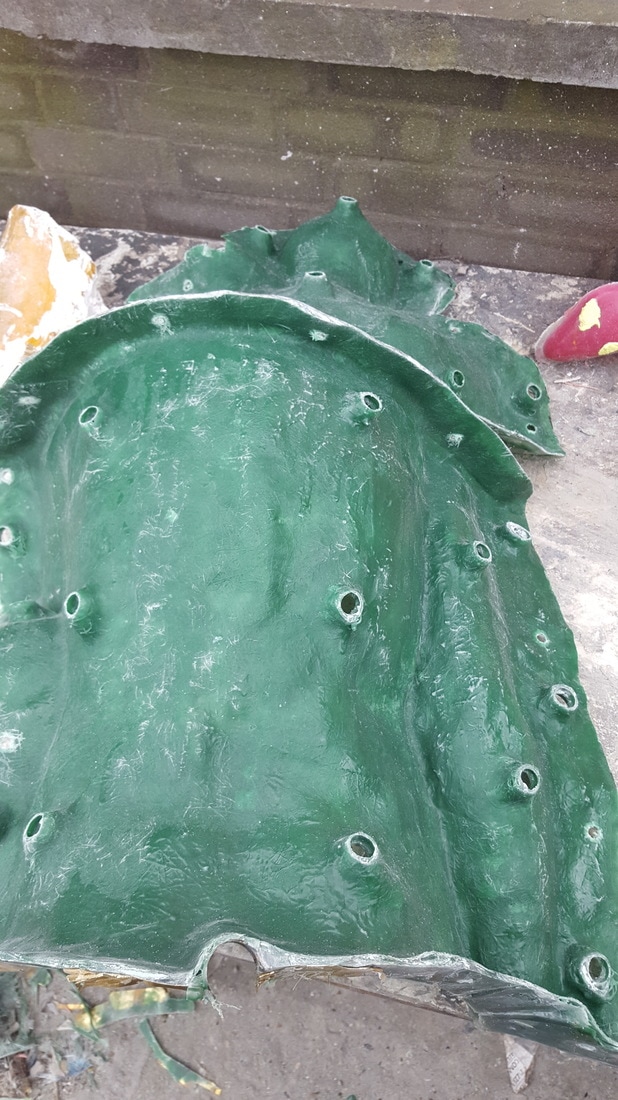
Once the thixo layer was applied to the back, I then began attaching keys. These knobbly additions are simply to help the mould fit back together again. they are made from the same silicone as the mould using templates. The thin linear keys are used later to divide the mould into different parts so that the mould can be split and taken apart easily.
|
|
Once all the thixo layer of the silicone was complete, and the keys were added I could then begin to add the last shim to the mould. This shim was added to the thin tubes of keys so that the resin mould pieces could be separated making it easier for the mould to come apart. The shim was inserted by using a thin blade to cut through the key to the clay underneath and inserting the shim into the cut.
|
|
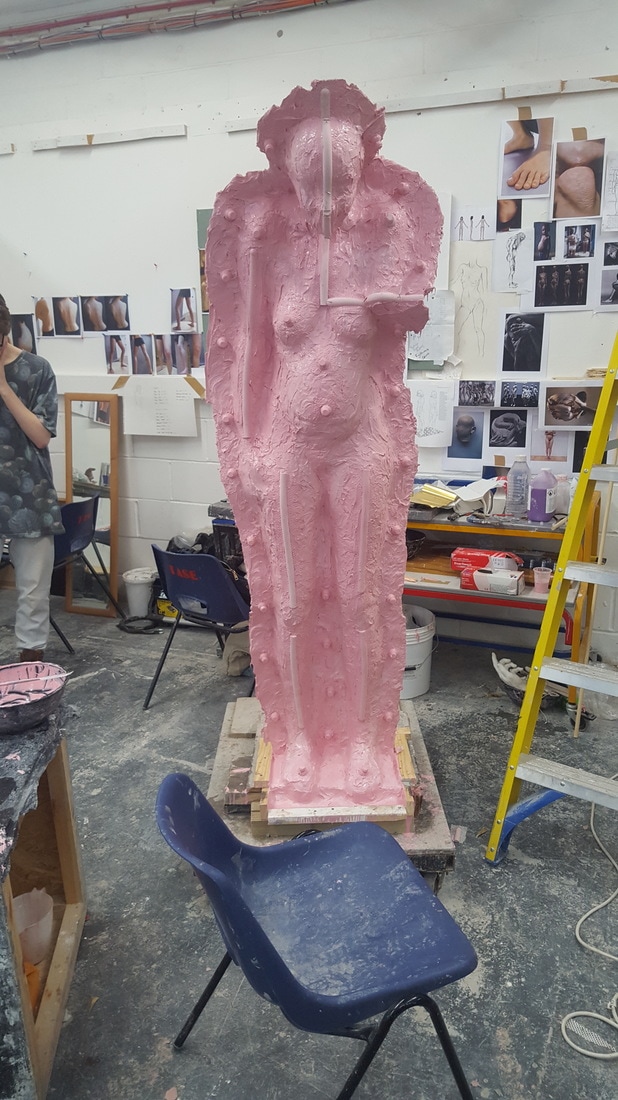

When the silicone mould was created, I could then begin to create the outer fiberglass hard shell that would protect the silicone mould and retain the original shape of the clay sculpt. To begin this process I first had to take the whole sculpture outside to the resin workshop. This is because the chemicals used in this process where so dangerous they couldn't be used in anywhere that wasn't ventilated properly. To begin the resin mould I had to first make a gel coat. This consisted of Resin (norsodyne laminating resin), catalyst and a thinkenning agent (in this case lime powder and jesmonite powder can be used). This was then applied directly to the surface of the silicone. This was used to adhere the fiberglass fibre to the sculpt. The fiberglass fibre acts as the strength in the resin.
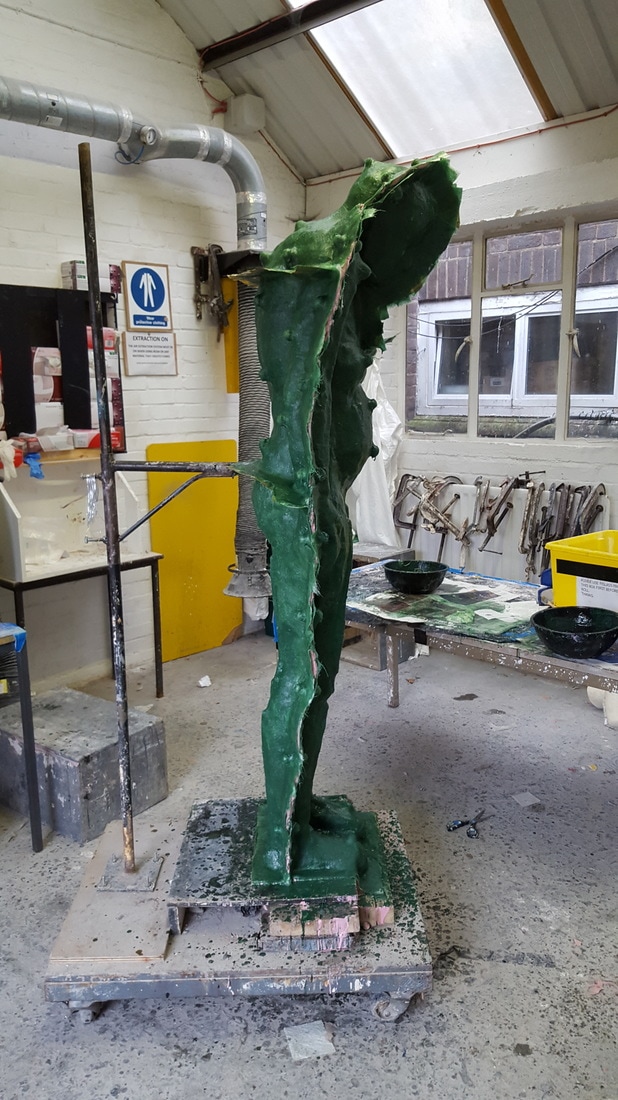
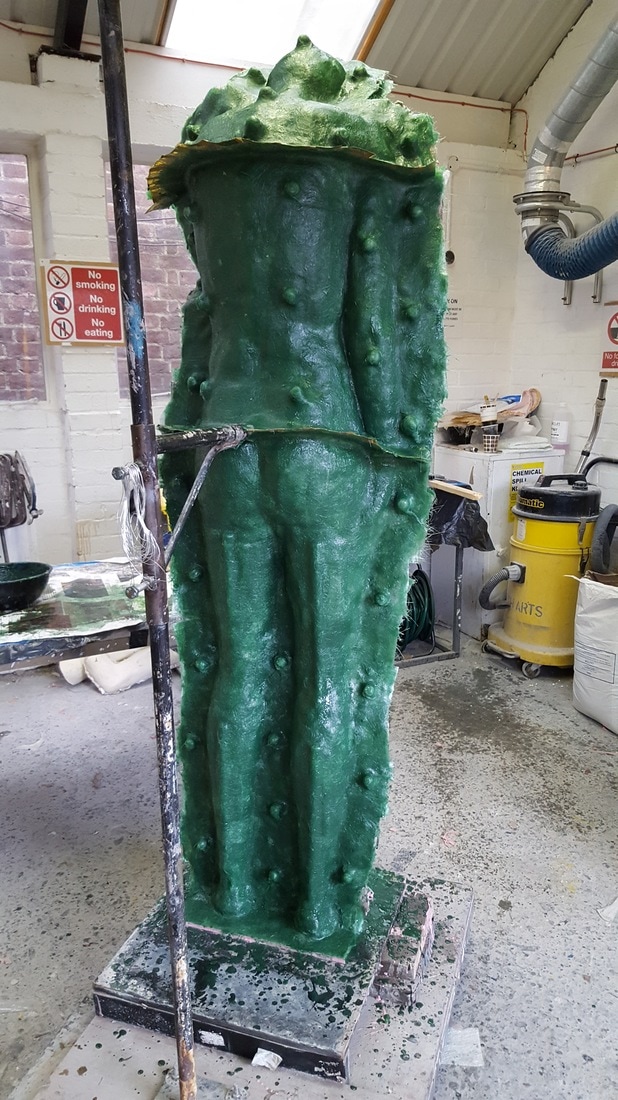
once the gel coat was done, I could then begin to adhere a layer of resin material to the cast. During this stage I could decide what colour I wanted to make the mould. I decided upon a dark evergreen green. The pigment of colour was added to the resin in a bowl along with the catalyst. this was then painted onto resin mat that was stippled into place using a paintbrush. in total we used two layers of resin to create a thick enough layer to hold itself together.
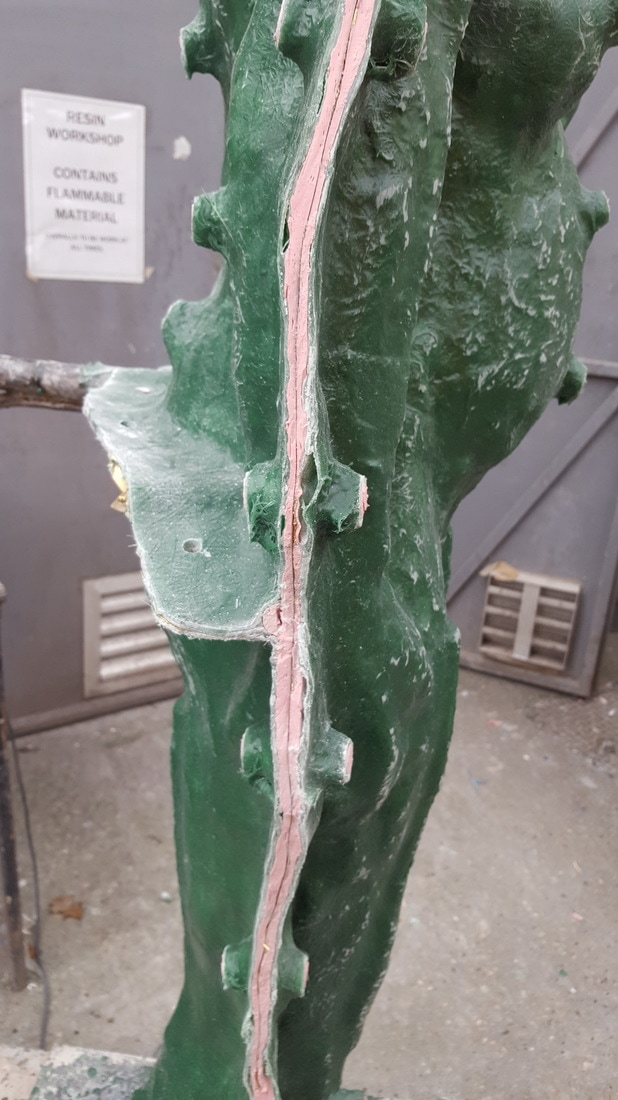

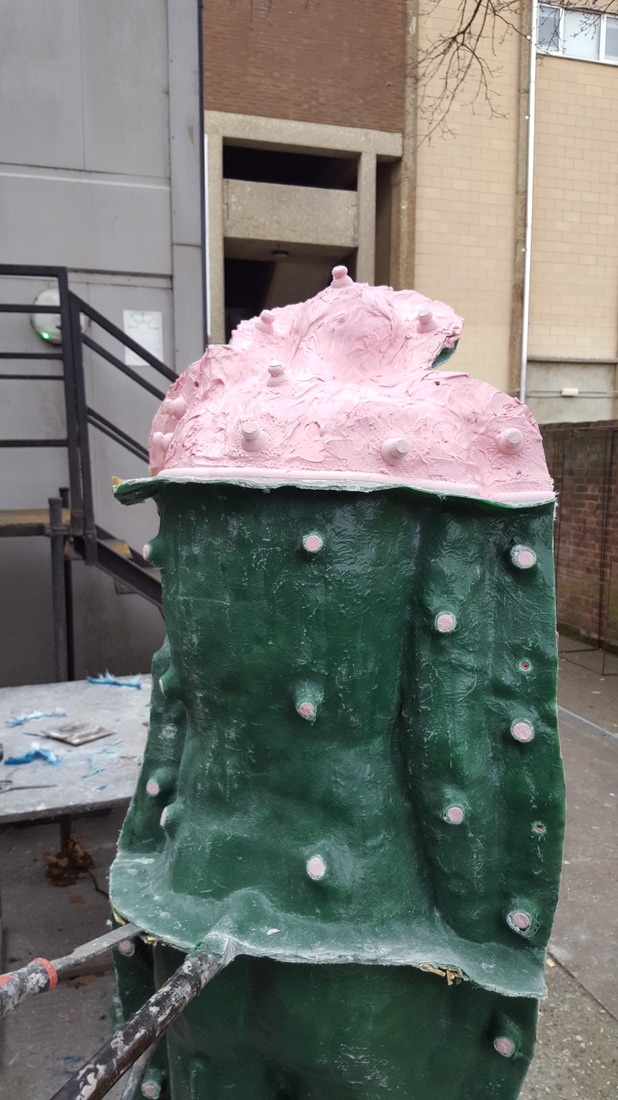
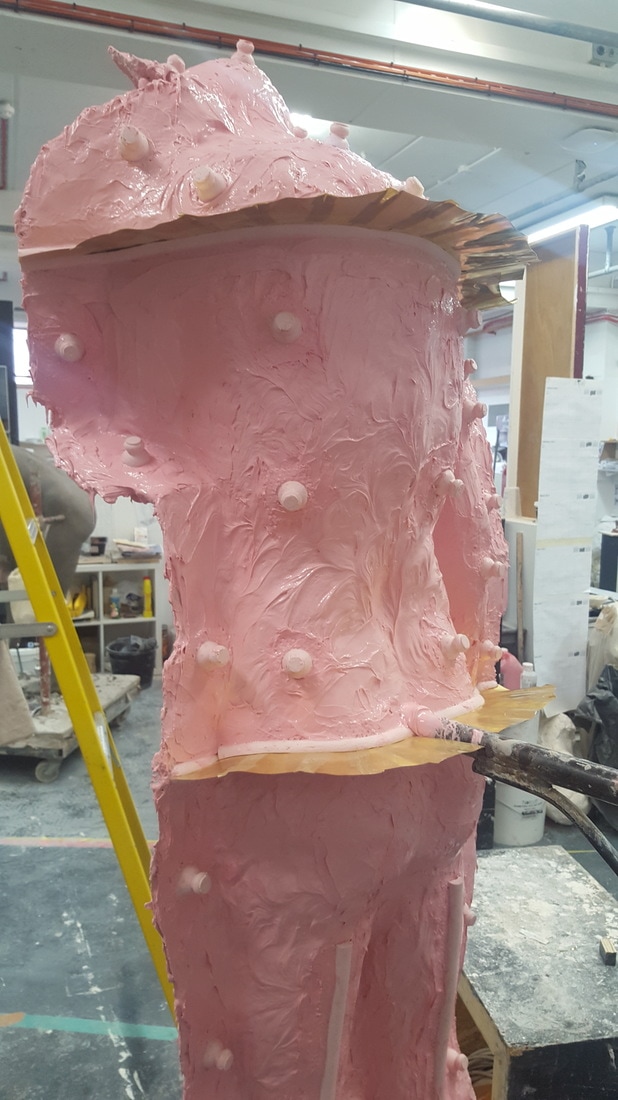
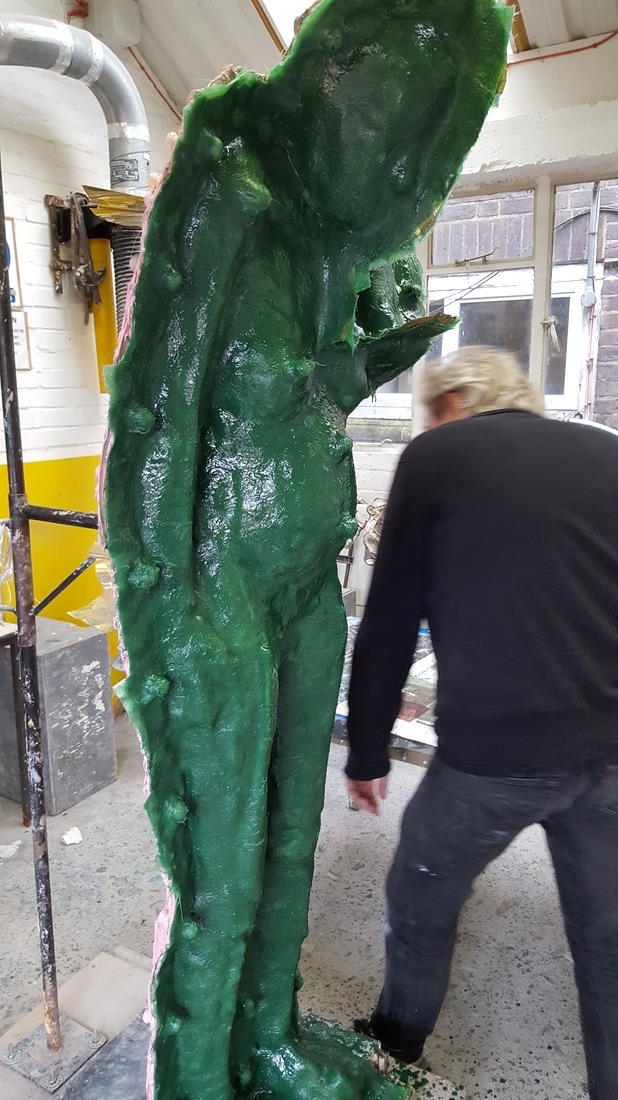
When the resin jacket was fully set, I could then begin to tidy up the seams using a multi tool. I also at this point cut off the tops of the silicone keys so that when the silicone is removed it can be keyed back into place. once the seams were tidied up I could then pull the resin jacket apart.
|
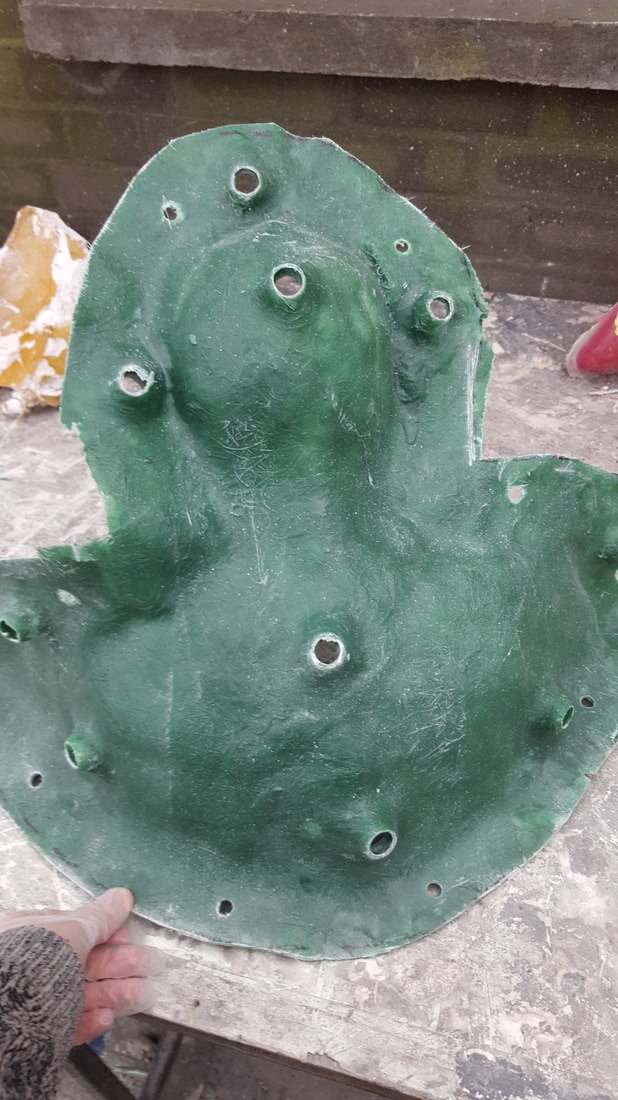
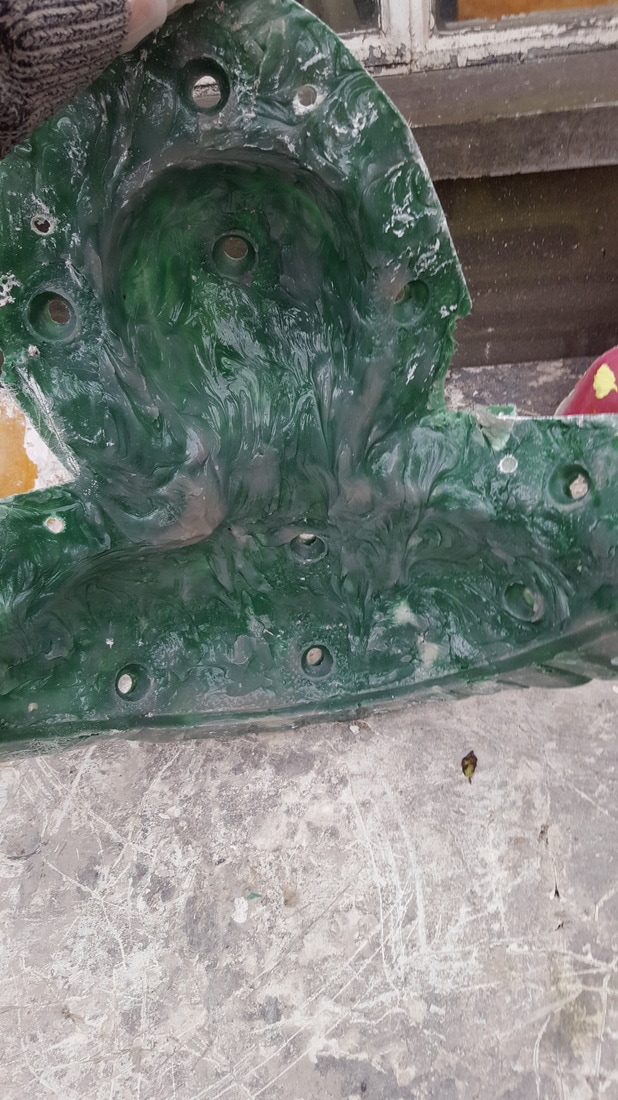
When the resin jacket was removed exposing the silicone layer underneath, I could then remove the shim and cut the mould into its separate sections using a scalpel across the strip of silicone cutting through to the clay.
|
|
|
The silicone was returned to its resin case to stabilise it and to make sure it didn't warp the mould. I then proceeded to clean the mould of residue clay and the clay sculpture was then destroyed. The mould is now ready to cast from.
|
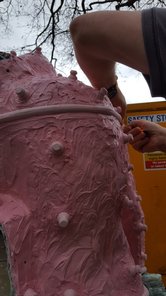
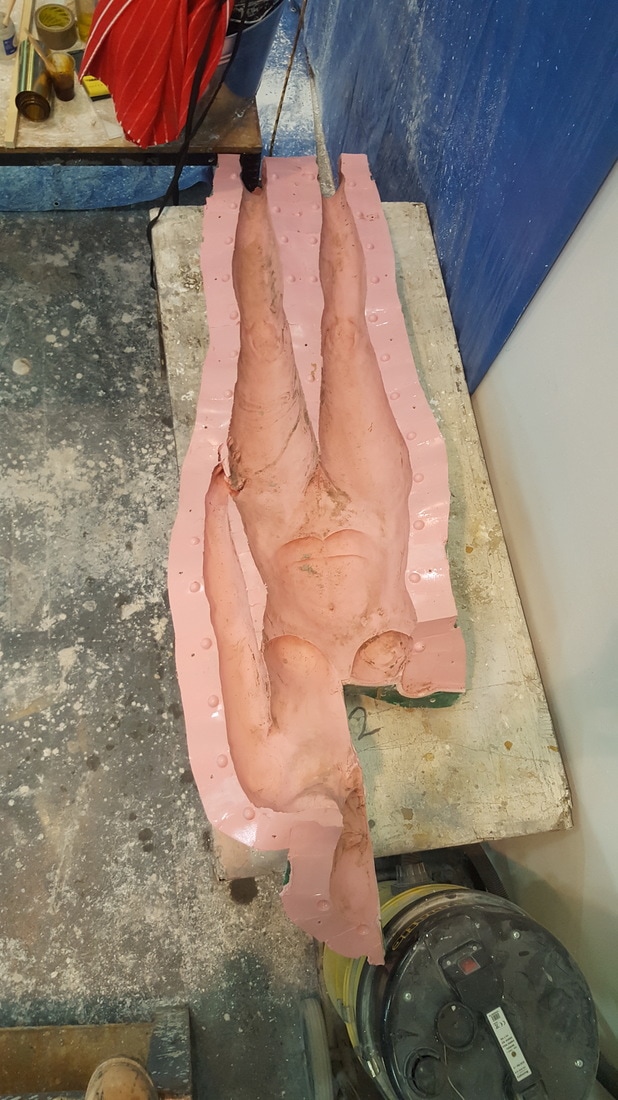
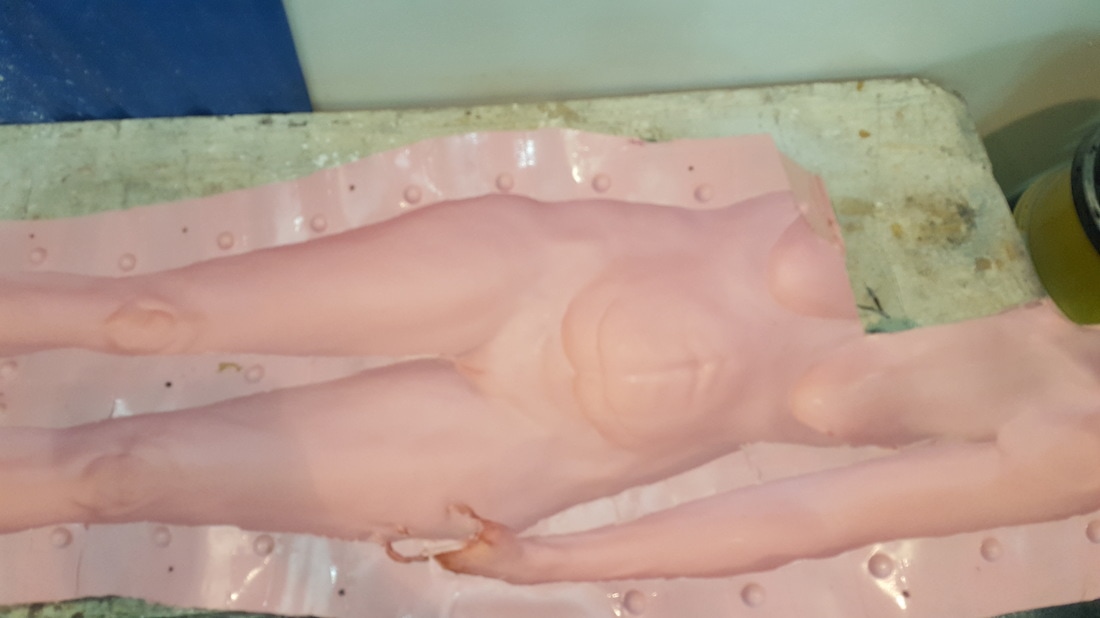
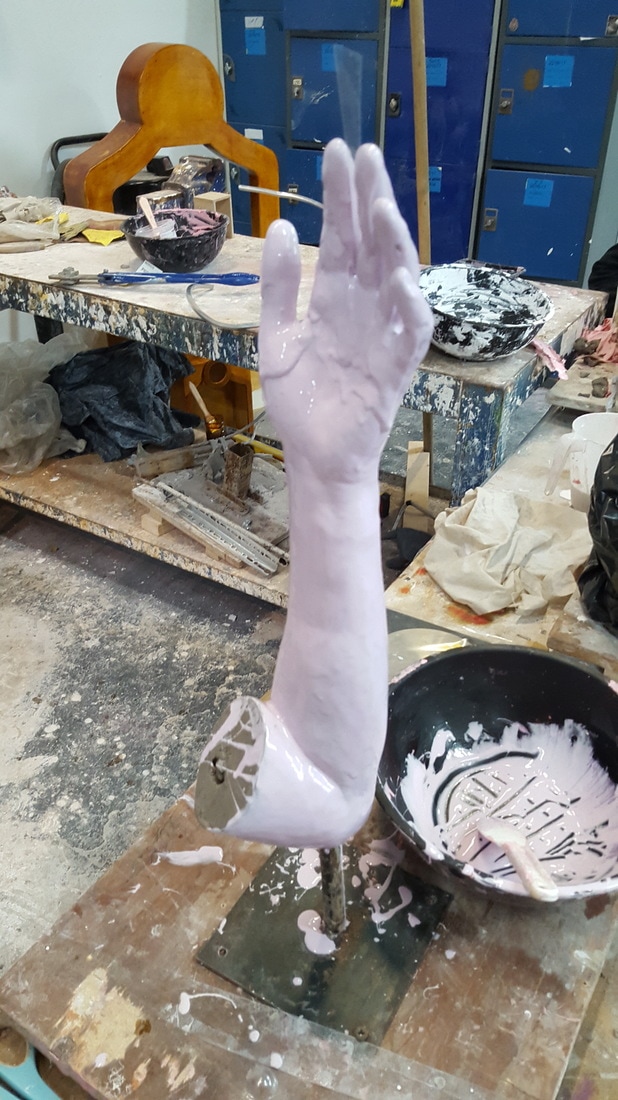
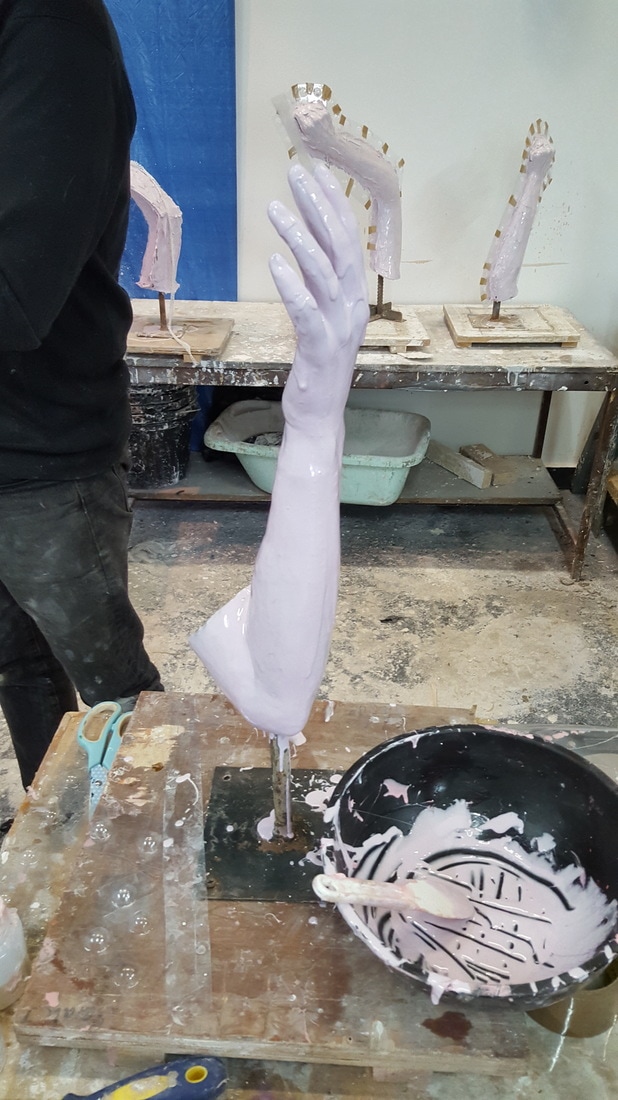
In addition to the main body, the arm that I removed earlier in the process needed to be cast. I did this by first securing it to a metal rod attached to a board so that the arm could be stood upright. The arm was then covered in a layer of silicone, (the colour being more purple because I added a faster setting catalyst to the mix). Shim was added to the sides of the arms, and a second layer of thixo was added.
|
|
|

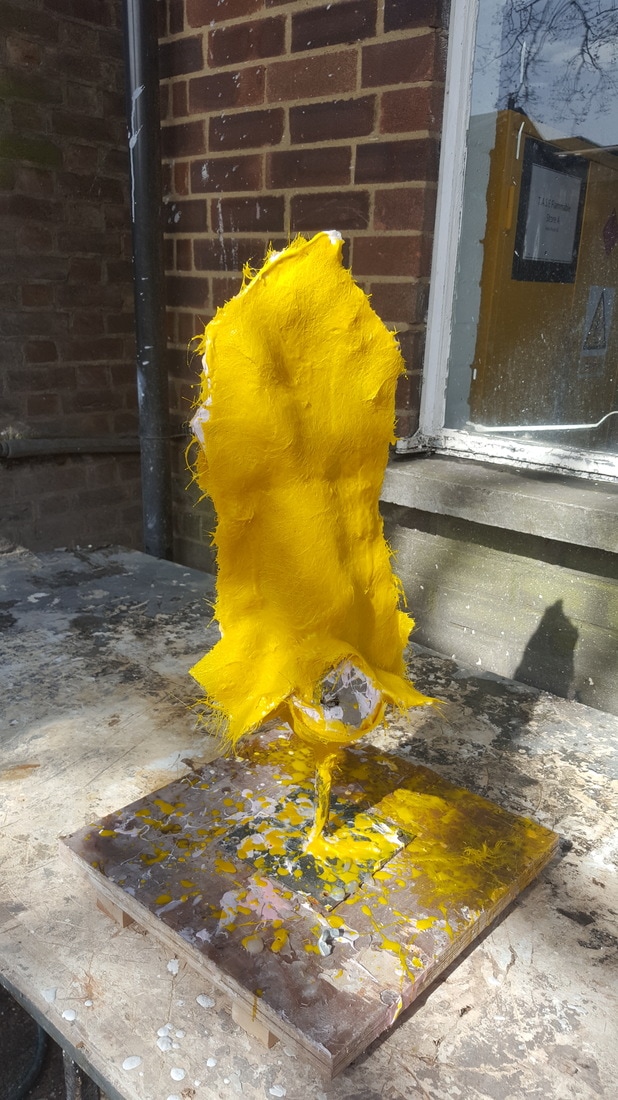
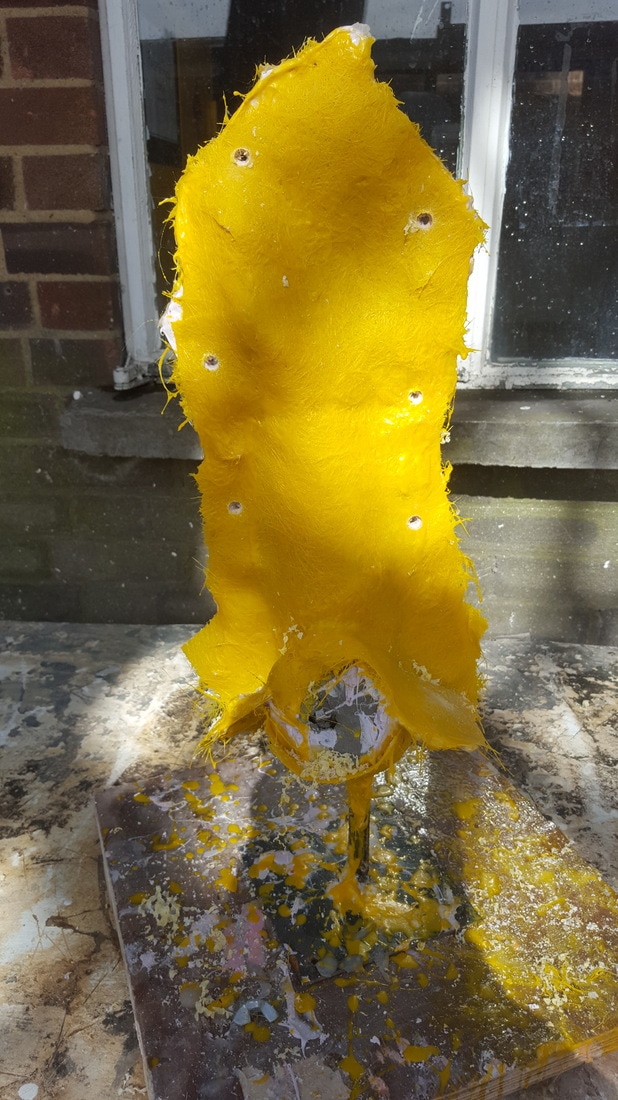
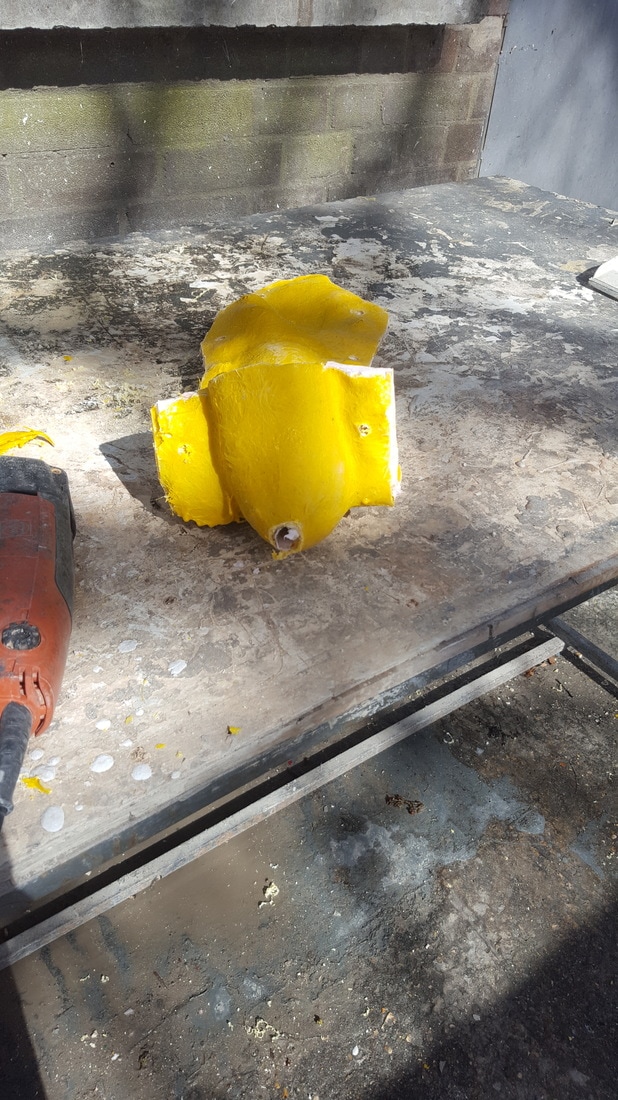
The arm was then given a resin case exactly in the same process as when the body was moulded. this time I coloured it a vibrant yellow. once the resin had set, I removed the spike and drilled the holes for the bolts to go through and removed the clay from inside it. The arm was then destroyed and the mould was cleaned and prepped for casting.
